Friday, April 10, 2009

It turned out just fine!

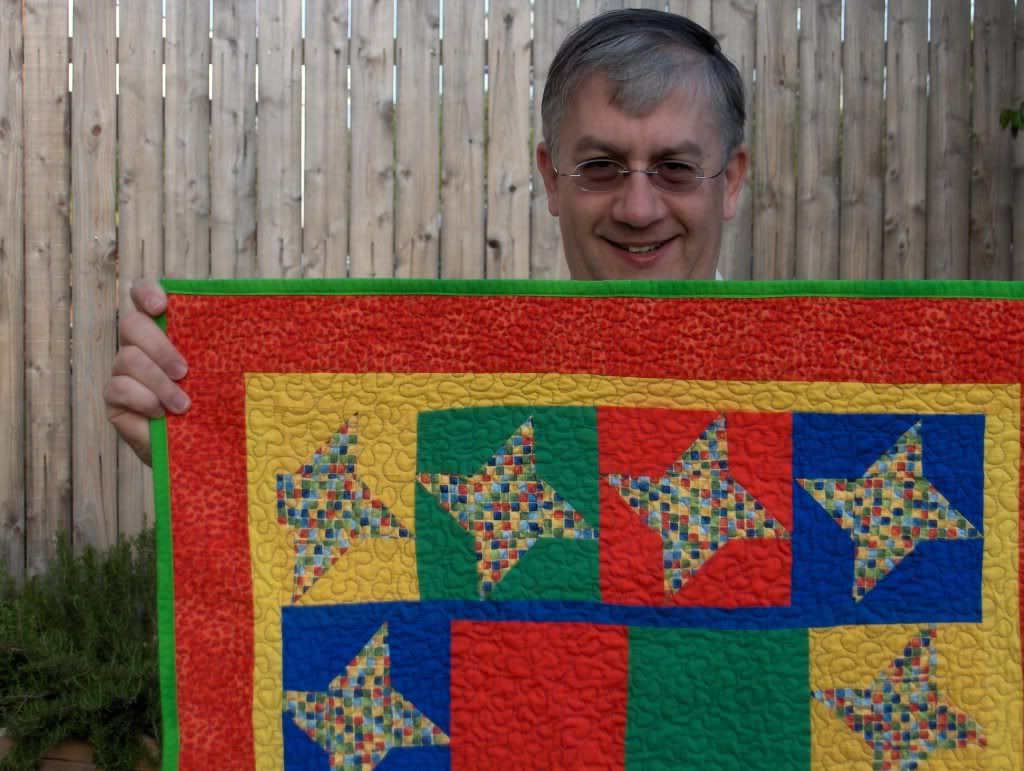
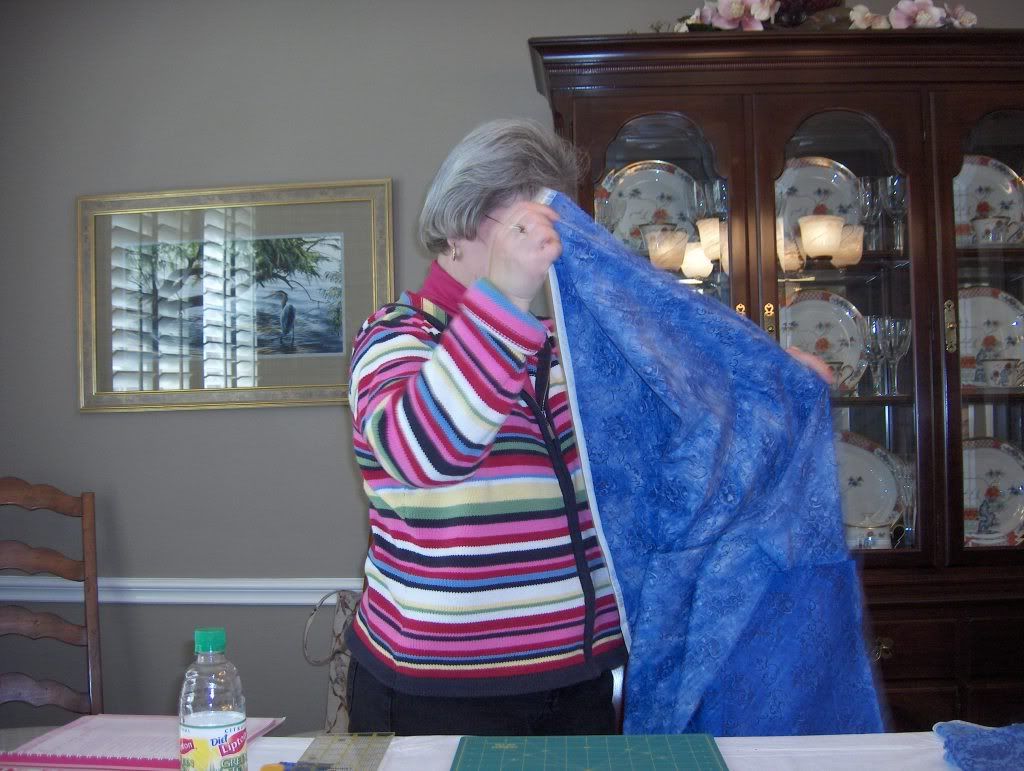
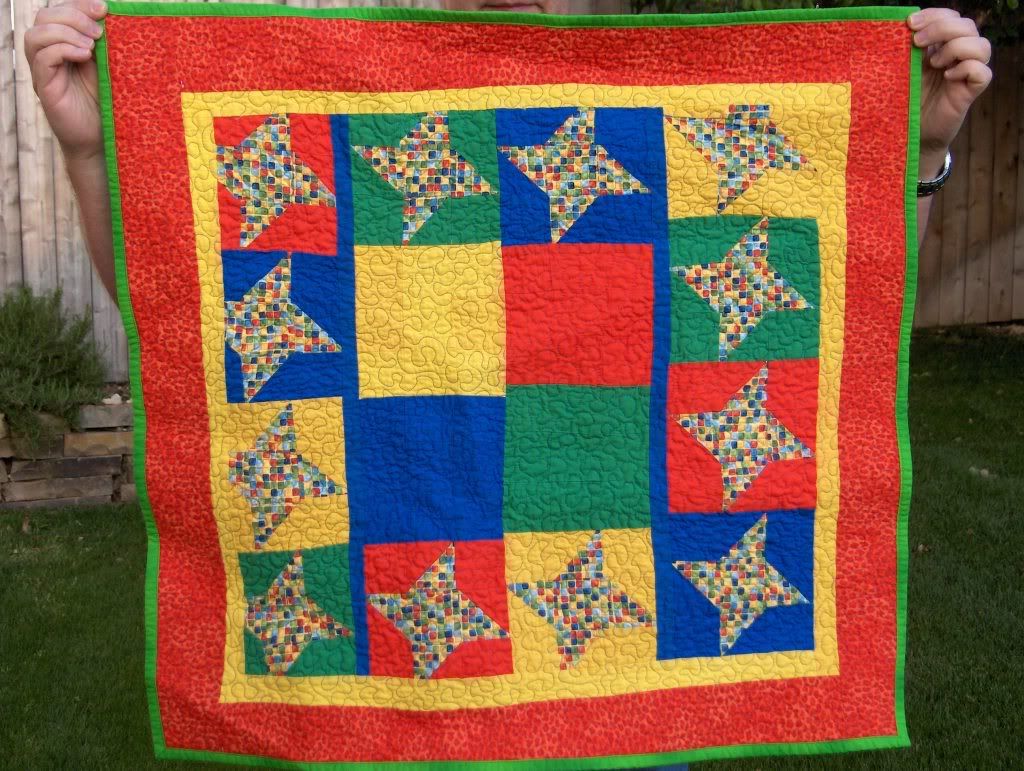
We had our monthly Blanketeers meeting today and Rachel and Sheila were very surprised at how well Mary's quilt turned out. Everyone was very complimentary. It was too bad Mary couldn't be there, but I still have the quilt, so hopefully she'll get to see it before it goes to the USO. It got very wrinkled in the dryer, but it actually lies very flat now. It could probably stand to be ironed a bit.

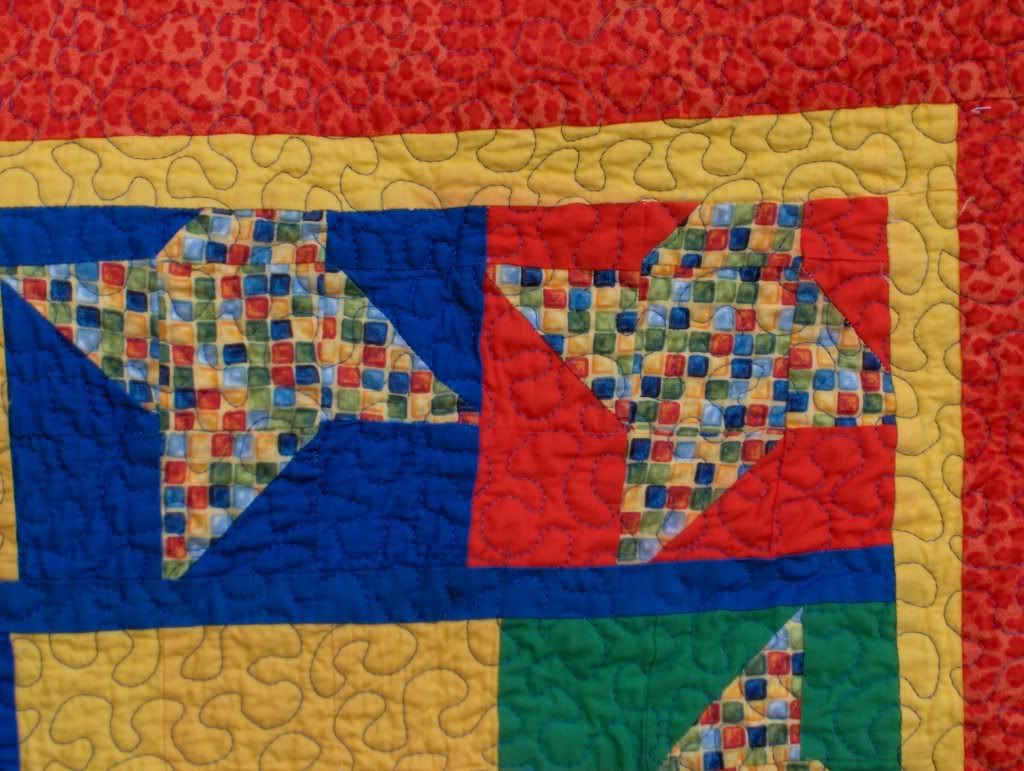
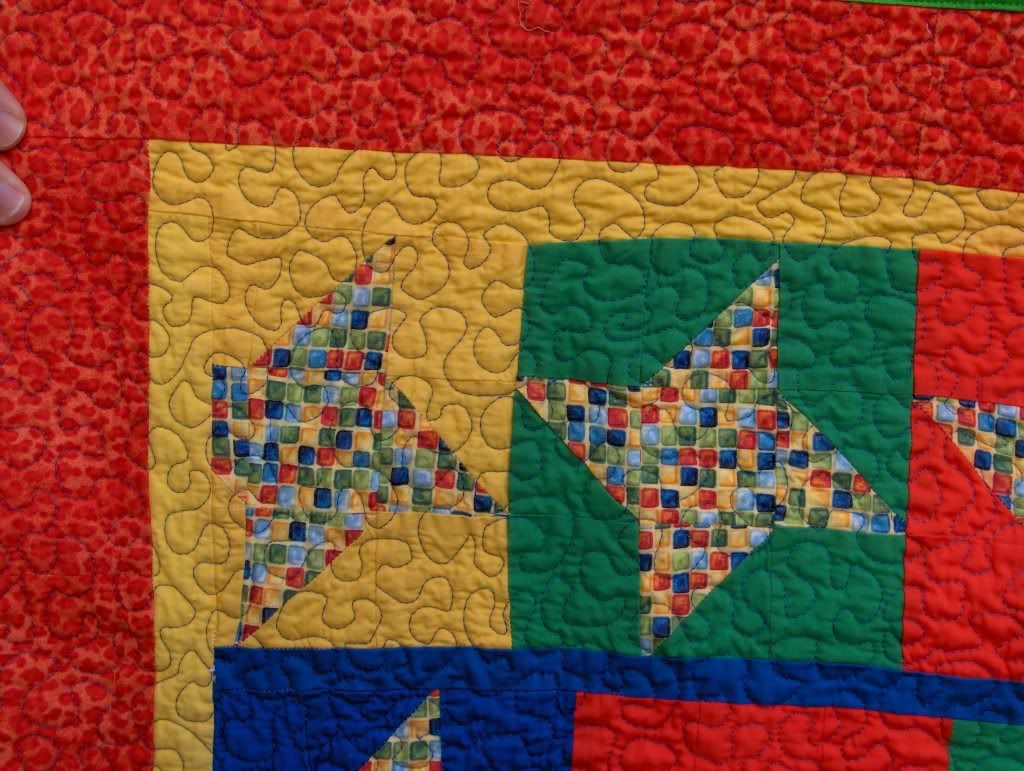
Stippling quilts this size is just pure fun! They scoot around on the sewing table without any effort. I used blue thread on the top and green thread to match the back and binding in the bobbin. The blue thread really pops against the orange border.

I usually manage to do my worst stippling where it shows up the best like on the yellow here, but I got pretty lucky with this one.


I just love these colors. It's all the colors in the smallest box of Crayola crayons. And, as I pointed out to my DH (and number one quilt holder), when you cut that much off of a star, people will think for sure that you meant for it to be that way! 8-)

The moral of this story is that any quilt top can be saved as long as the fabric isn't damaged and you don't worry too much about the original design. I think some little kid is going to love this sweet little blankie to death!

Wednesday, April 8, 2009

More White Fabric!

It was amazing. We ran out of the beautiful white fabric for the Quilt of Valor and we needed some more and what do you know? The first fabric I saw as I walked into the Berry Patch was the white fabric. Yes! What a relief. I was afraid we would have to find another selection for a scrapier look, but we lucked out this time. I was able to buy another yard, which is at least twice what we actually need to complete the quilt.


Of course, I haven't actually *worked* on the Quilt of Valor this week. lol Instead I've spent the week trying to turn a sad little quilt top into a plucky little quilt survivor. I'm happy to say that I believe the patient will live. In fact, while it will never win any construction awards, I think it's going to turn out quite cute. This is a very washed-out picture; it's much more vibrant than this. I got it all stippled in blue thread. Tomorrow I'm going to bind it, not sure what color yet, then I'll take a picture of it outside on Friday morning. Look how flat it is! That was a *major* accomplishment. lol

Tuesday, April 7, 2009

Quilting Bee

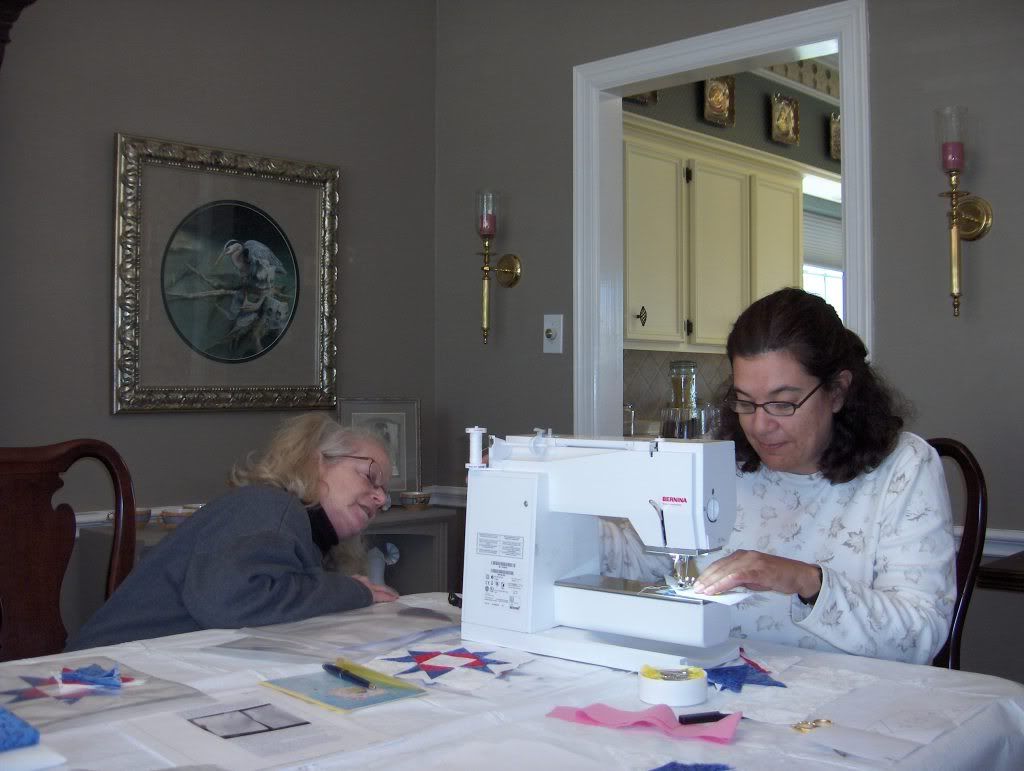
We had another fun, productive quilting bee at my house on Sunday. Here is Rachel at the sewing machine, patiently learning how to paper piece with Mary looking on. (See if you can spy the yummy chocolate cake on the kitchen counter just begging to be eaten.) By the end of the bee, Rachel had completed the paper piecing part of her first star, now she just has to trim it and sew the parts together.


Sheila, spent almost the entire bee cutting up fabric for the remaining star kits, 6 large and 25 small. She's an expert cutter. I'm so grateful that I didn't have to do this part. I had all the kit bags made up and she cut and stuffed and cut until they were done. Thank you, Sheila! Unfortunately we ran out of the white fabric with 6 kits to go. I'm going to go back to the Berry Patch at lunch today to see if I can get some more. If not, we'll just have two whites in the quilt, instead of just one.

I should have taken more pictures, because this one certainly doesn't do Sheila justice at all, but we got busy with other things and the camera just sat there for the rest of the bee. I really need to improve if we're going to be making a QOV journal to go with this quilt!

About half way through the bee we heard a little knock on the back door. Virginia came! We were so pleased to see her. Exactly 2 weeks ago today she had a QUADRUPLE bypass. I still can't believe she's getting out and around so well already; it's absolutely amazing! I have been SO worried about her. The surgery came out of the blue. Horrible angina pain (but no heart attack, thank God) in the hospital for a few days, then surgery. What a blessing to have her safely out the other side of THAT! She called last Thursday saying that she wanted to come to the bee. I told her not to wear herself out, and to come in her jammies if she wanted, so she did. She stayed for a piece of cake and a nice chat. We got to see her scars, which were something to see, but I know she would have KILLED me if I had taken any pictures. She can't drive for another month (airbags are very bad for healing chests) so her husband, Jim, sat in the car for a half hour, eating cake (we delivered) and listening to the NASCAR races on the radio while she visited with us. What a great guy!

Friday, April 3, 2009

Three more International Siggies

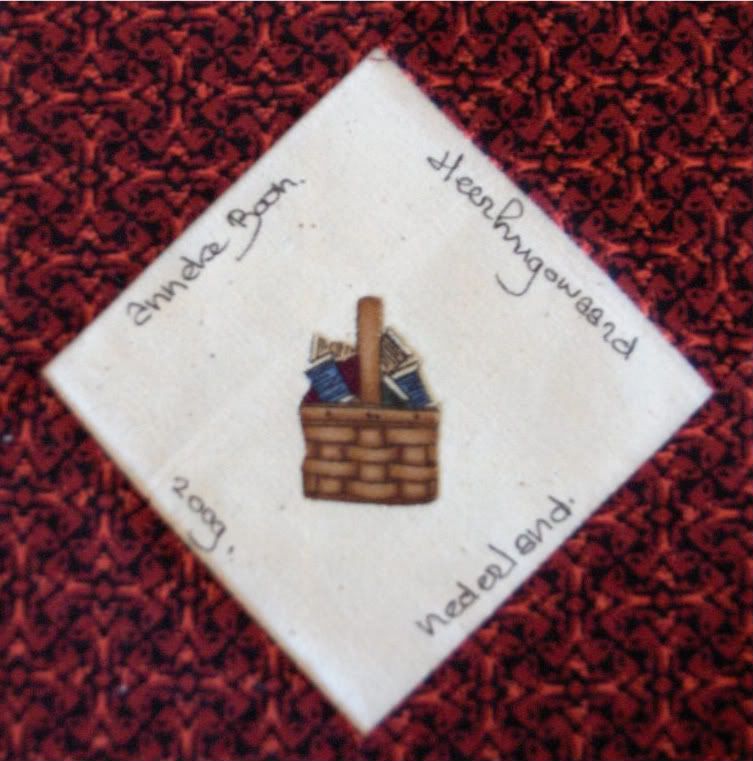
Another banner week for siggies! Anneke Boon sent me this lovely sewing basket from the Netherlands. It's an iron-on cut-out, I think, perhaps she bought fabric with this motif? It's very much like the anonymous rooster in the post. (I still haven't heard back from her; I'm not sure what to do about an unsigned siggy. Should I just sign it myself?) Anneke lives in Heerhugowaard, which is about 20 miles north of Amsterdam, in the middle of the peninsula that sticks straight out into the sea. In scanning the google satellite photos of the area, it looks like Anneke lives about 6 inches above sea level, very close to the reclaimed lands.


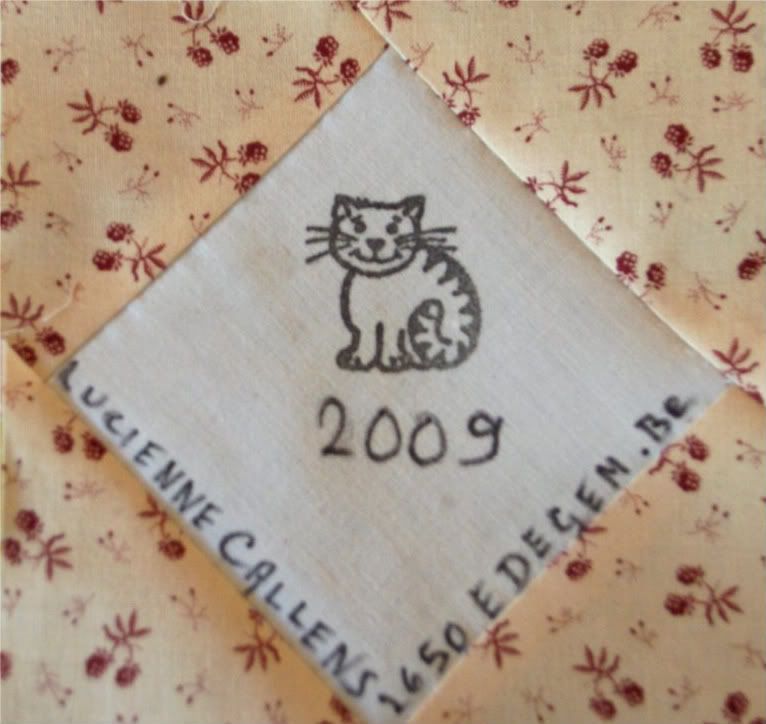
Lucien Callens sent me this pretty kitty from Edegem, Belgium. Edegem looks to be practically a suburb of Antwerp on way to Brussels, which is about 20+ miles away to the south.


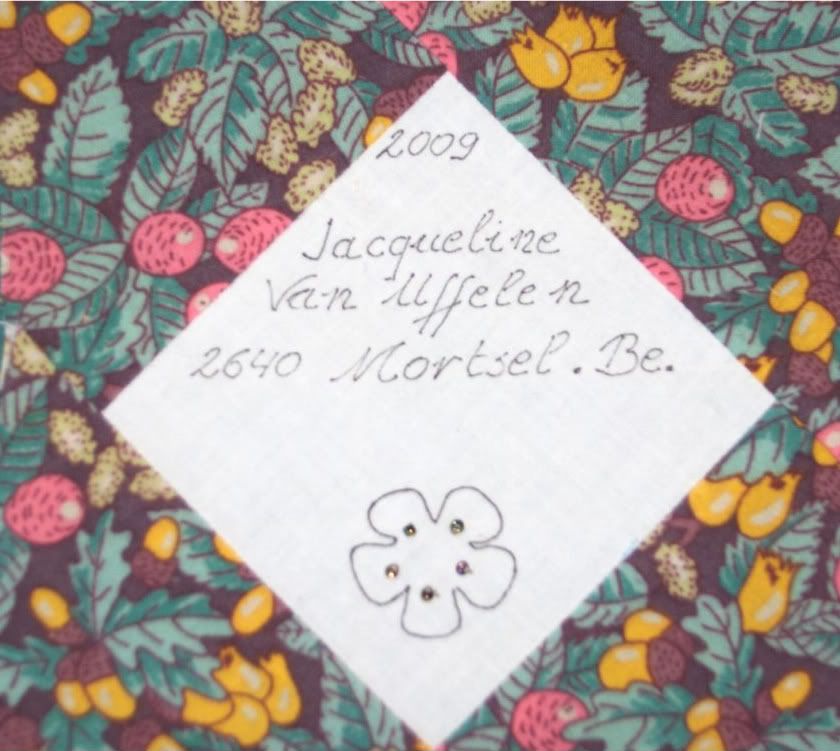
Jacqueline Van Ufflelen, also from Belgium, sent me this delicate beaded flower. I love her fabric choice; it's very dramatic! Jacqueline is on the list, but I hadn't sent a siggy to her yet. This siggy came bundled with Lucienne's, so I have to hurry and send one back to her. At least I have a few made up. I just googled Jacqueline. She and Lucienne live only a mile apart. I wonder how long they have been friends. How nice to have a hobby in common!


Thursday, March 26, 2009

Lots of International Siggies

It's been a banner week; I received 5 international siggies already!

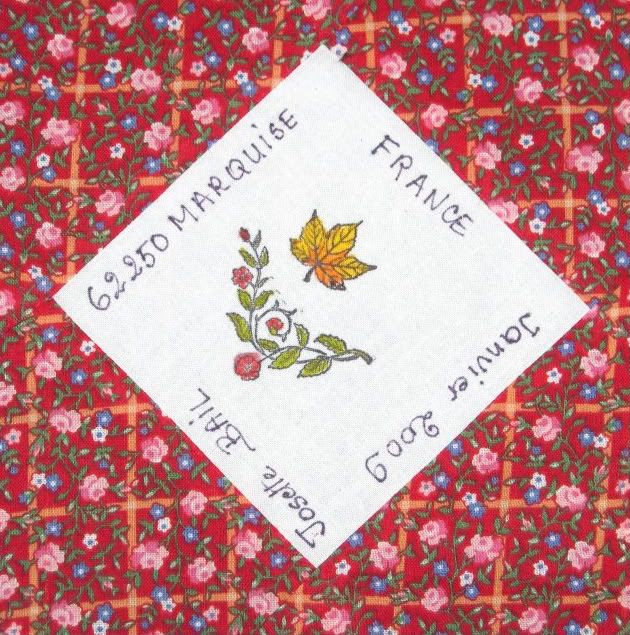
This very french looking siggy is from Josette Bail in Marquise, France. I just love it! Josette's writing is gorgeous and the stampings appear to be hand-colored in at least four different colors. Exquisite! Josette told me in her letter that she lives near the "tunnel sous la Manche to go in England". It took me a moment to realize she was referring to the "Chunnel", a word which has probably been banned by the French word police - lol. I've read that all signage in France must conform to standard French, no french version of "Krispy Kreme" or "Qwik Wash" for them.

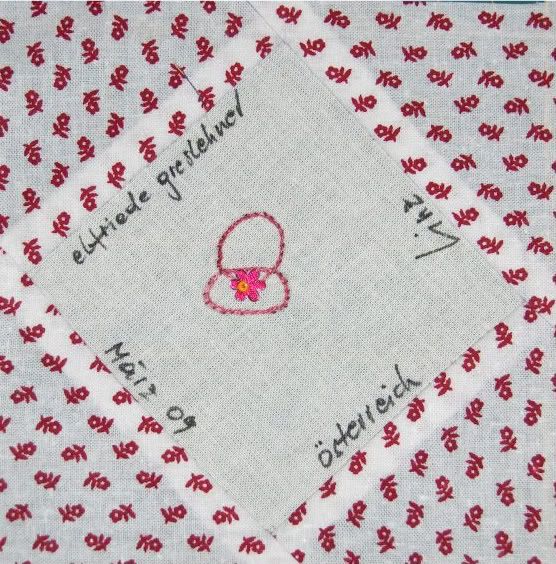
Here is a lovely siggy with a darling little embroidered purse on it from Elfriede Greslehner in Linz, Austria. I love the little flower with the yellow bead; it's so delicate. I wonder if Elfriede collects purses? Her letter had the prettiest over-sized stamp on it celebrating Pez candies. Can anyone tell me if that stamp is one of a series? I wish US stamps celebrated candy! lol


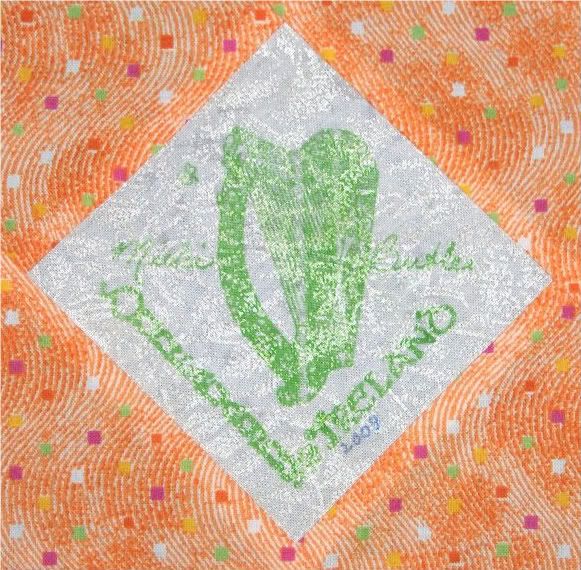
Here is Micki Butler's Irish harp siggy from Ireland. I've gotten to know Micki because she's been following my blog since she got my email a few weeks ago. She used to live in Texas but has since married an Irishman and moved to Dunfanaghy in County Donegal, Ireland. I love her siggy, which is a very unusual one. I had never seen one made like this before. Did you use a personalized iron-on transfer, Micki or is this a stamp? It's rather shiny, and this picture does not do it justice. The orange fabric is very pretty too; it actually DOES have the little waves in it, (those are usually scanner artifacts - lol). And I'll have to check, but I don't think I have another orange siggy, and I love orange!

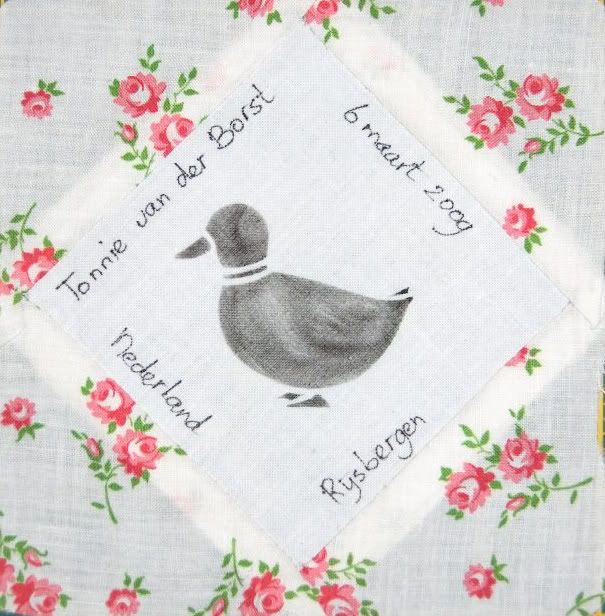
This lovely little duck siggy is from Tonnie van der Borst in Rijsbergen, Netherlands. I would love to know if the duck was stamped or stenciled onto the fabric. It looks like it was stenciled, and I have never seen that done before!

I'm pretty sure that Tonnie's letter is telling me that she is sorry she doesn't speak English, but the rest of it is in Dutch (I think) so I can't be sure. Maybe someone can translate for me?

Dear Susan, Thank you for the siggy. Sorry maar ik schnjf geen Engels Sinds 20 jaar patch en quilt ik, meestat met de hand Nomaf oht 03 ben ik berig met de siggy niil en heb er +- 250 ontvemgen. Nog veel plezier met verzameler. Gnochen Tonnie


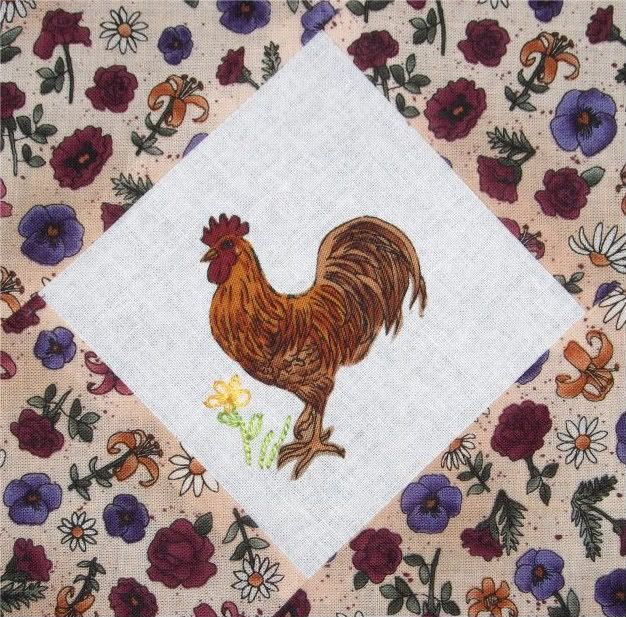
This very pretty rooster comes from Edda Bjork Hauksdottir in Iceland. It's lovely; the rooster looks to be very carefully cut from another fabric and ironed on. The embroidered flower is a very nice touch! The only unusual thing I see is that the siggy is completely anonymous. I don't know if Edda meant to leave it blank, or forgot to sign it (I've almost done that once or twice - caught myself stuffing an envelope with an unsigned siggy, oops!) I'm planning to ask her in an email soon, though if you would like to leave a comment for me, Edda, that would be wonderful! 8-)

Sunday, March 22, 2009

Internation Siggy Swap - Vera Hayes

This pretty siggy arrived in the mail yesterday from England. I really like the autumn fabric, though it is odd that it arrived on the spring equinox, six months from now would have been more appropriate. lol


My scanner isn't talking to my computer anymore, and this is the first time I have photographed a siggy instead of scanning it. I think I like the photo better than the scan; it's certainly easier to do.

Saturday, March 21, 2009

Ohio Star Paper Piecing Tutorial

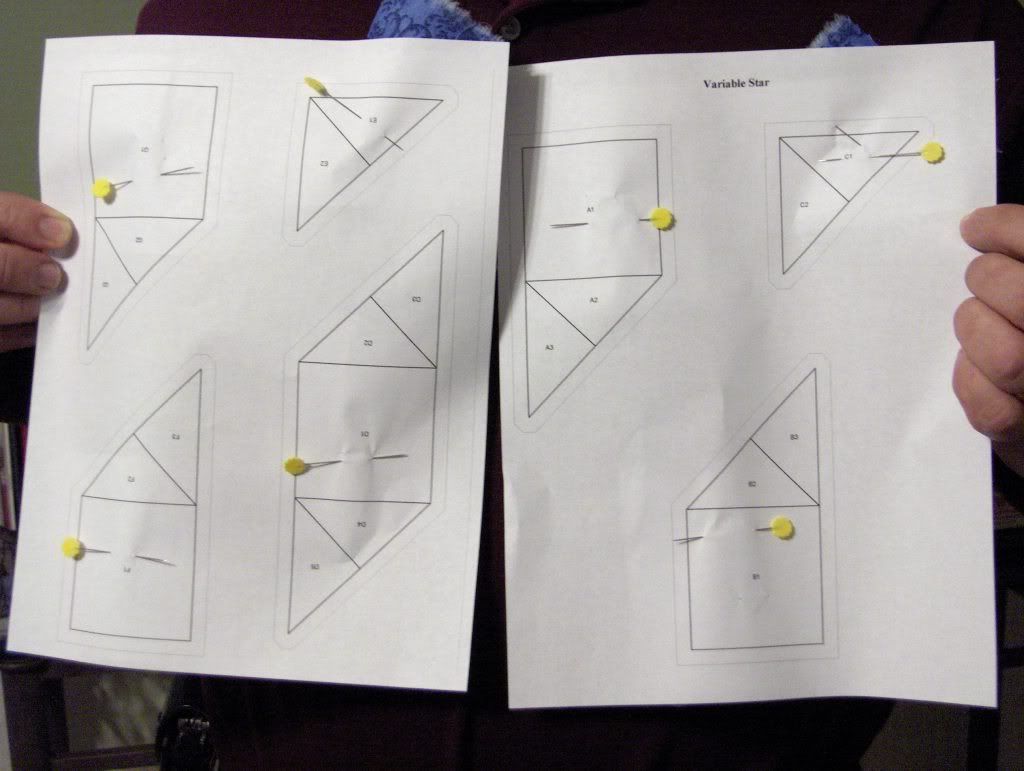
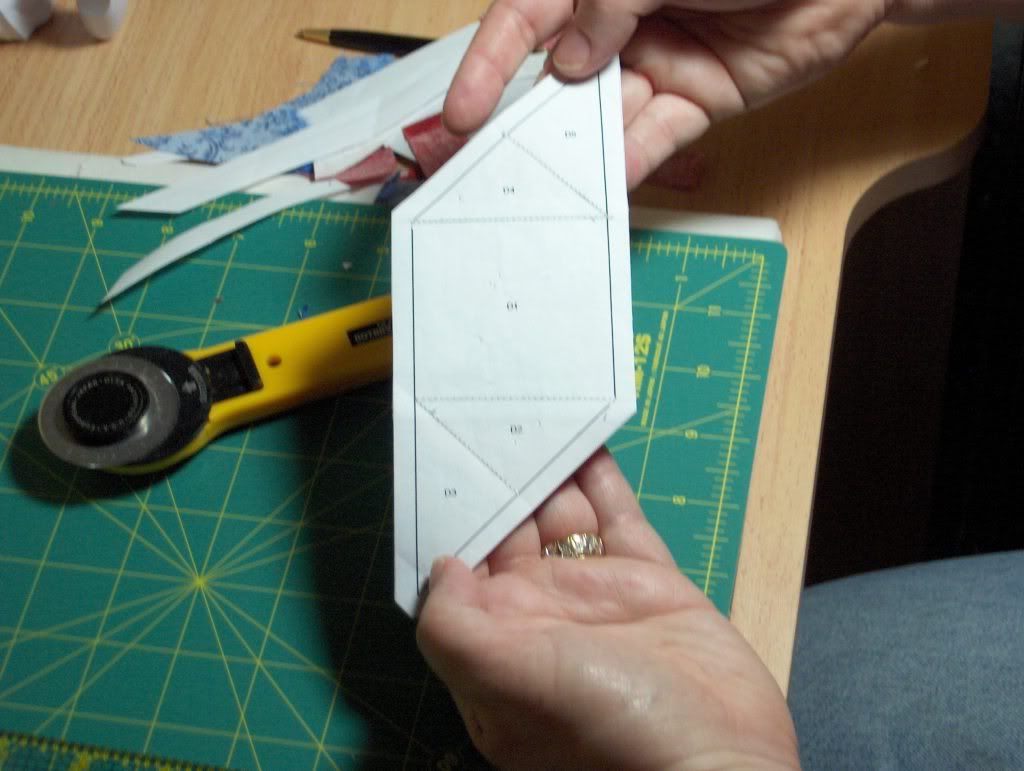
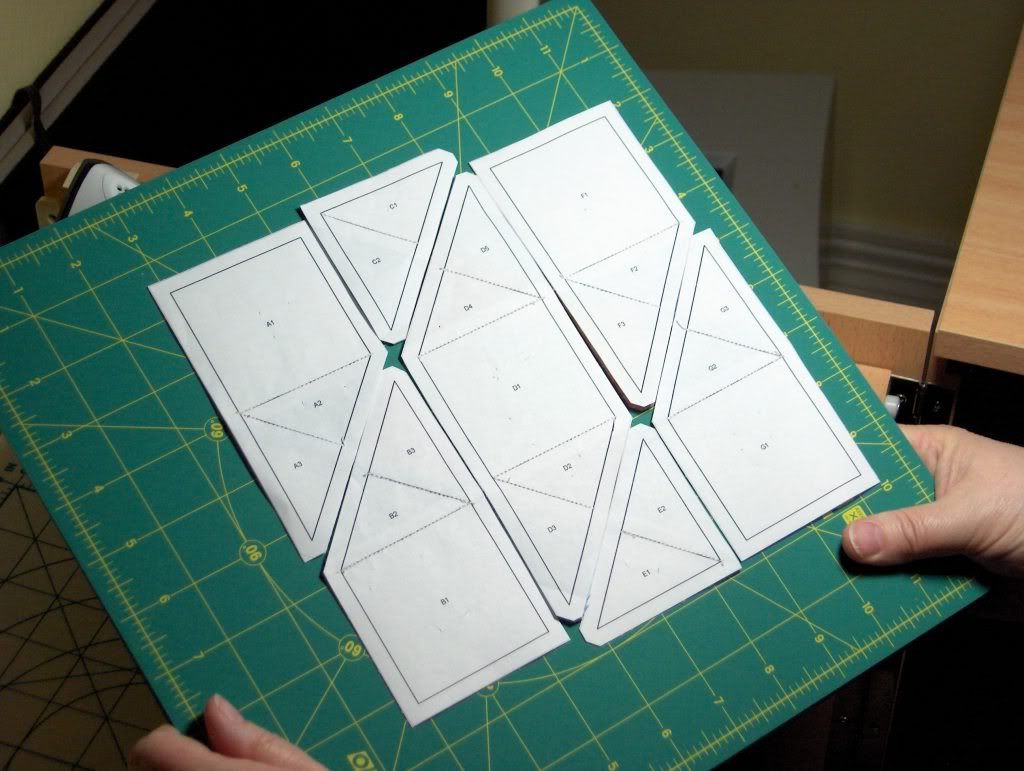
OK, first things first. In paper piecing there is a pattern drawn in ink on one side of the paper. All the sewing takes place on the pattern side of the paper and all the fabric is placed on the blank side of the paper. This is the pattern side, as you can see, the fabric is pinned to the other side of the paper... ALWAYS [Note: The pattern pieces are labeled in the order in which they are be sewn, that is, first sew A1 and A2 together, then add A3. It's much faster and easier to work all seven pattern sections at a single time, so that is what I have done.]

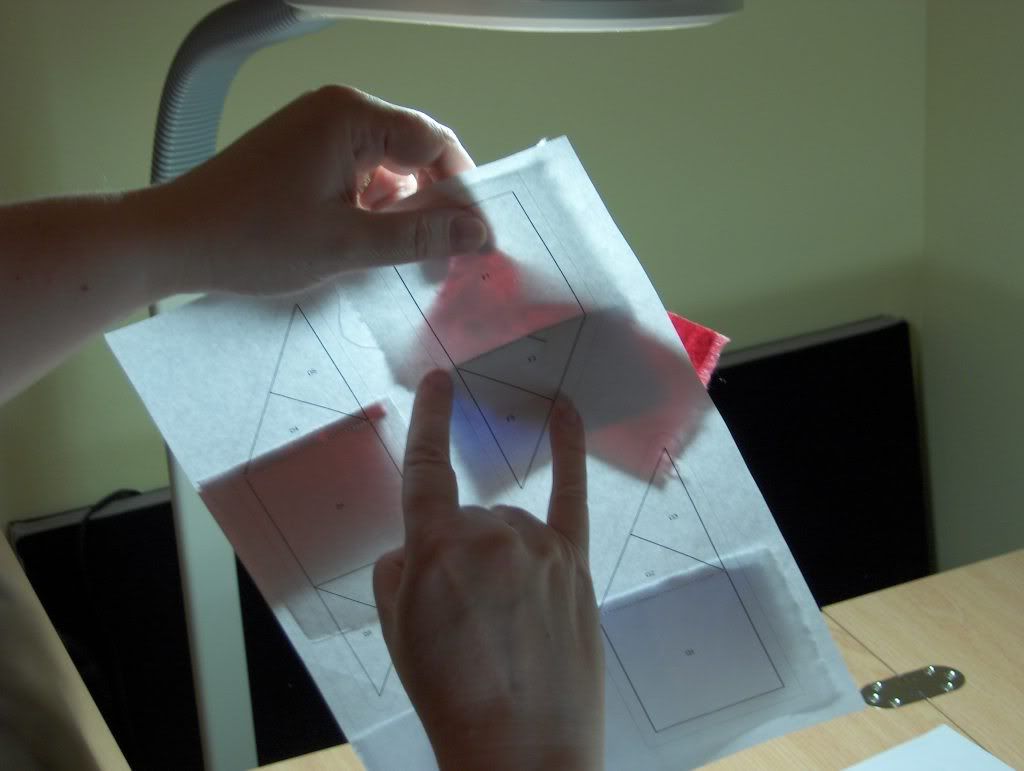
Second: For the Ohio Star, start by pinning the WHITE squares right side up to the blank side of the paper. They should be positioned so they COMPLETELY cover the #1 pattern piece in their section labeled A1, B1, C1 etc WHITE. By "Completely" I mean that when held up to the light, the fabric should extend out over both the bold inner sewing line and the lighter outer cutting line on ALL sides of the #1 pattern piece. Remember, the first piece of fabric in any given section ALWAYS gets pinned to the fabric with its RIGHT side up.

Third, note the color specified for the #2 pattern piece and place the second piece of fabric so it sits right sides together with the already pinned white fabric. Now pay attention, this is the hard part: the second piece has to be placed such that when you sew on the line between A1 and A2, it completely covers the #2 pattern section, including all the seam allowances. This picture shows all the #1 and #2 fabric pieces pinned right sides together waiting to be sewn.

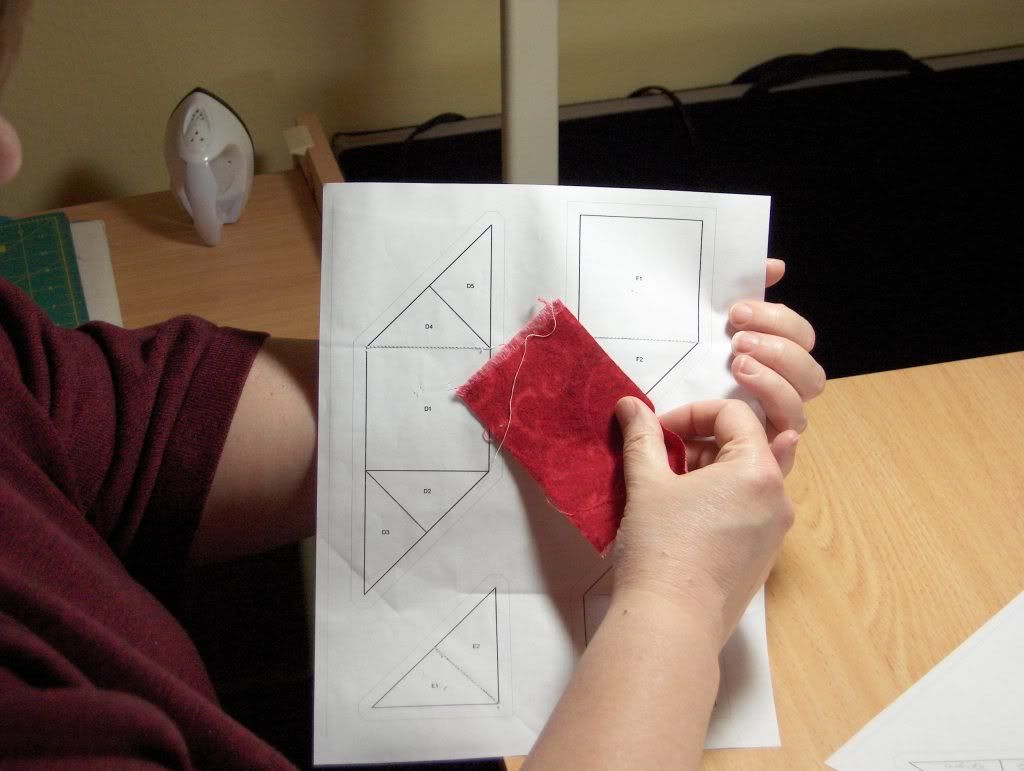
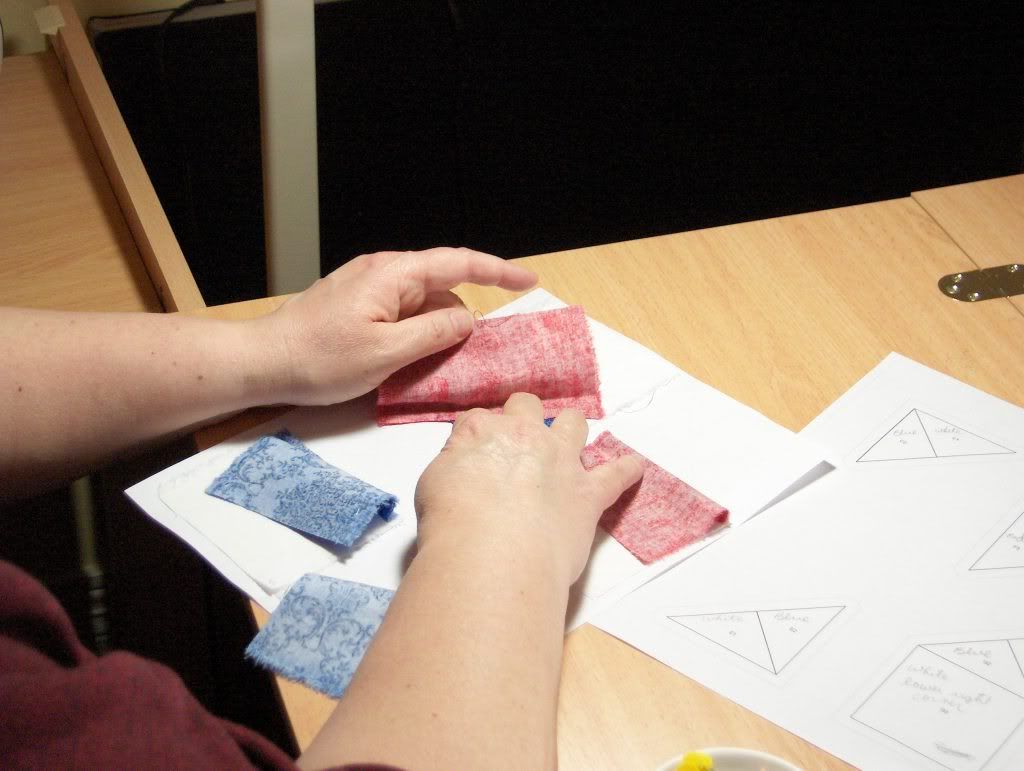
To get the placement correct, I eyeball the fabric on the pattern side with the future seam allowance folded over, to get a feel for how much leeway I'm going to have with the piece. If it's a tight squeeze, I'll have to be VERY careful when pinning down the fabric.

I switch over to the fabric side of the paper, with the future seam allowance still folded over, to determine exactly where the fabric needs to be after it is sewn in place. As it is shown, the red piece will flip over to fully cover the pattern on the other side after it is sewn into place.

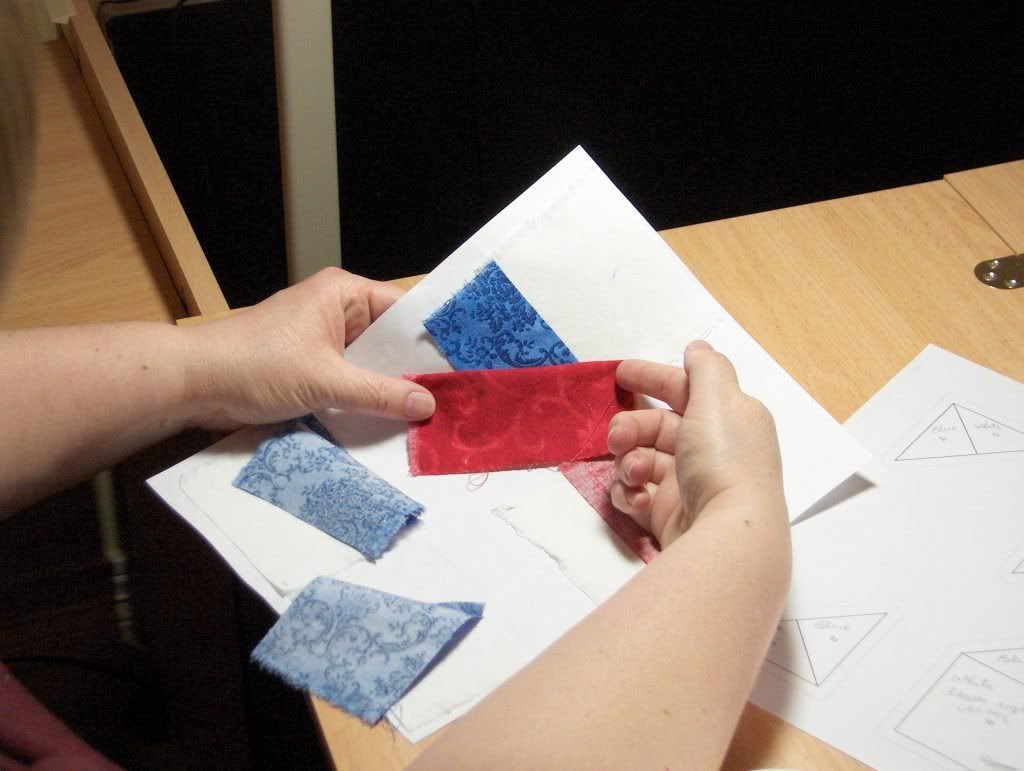
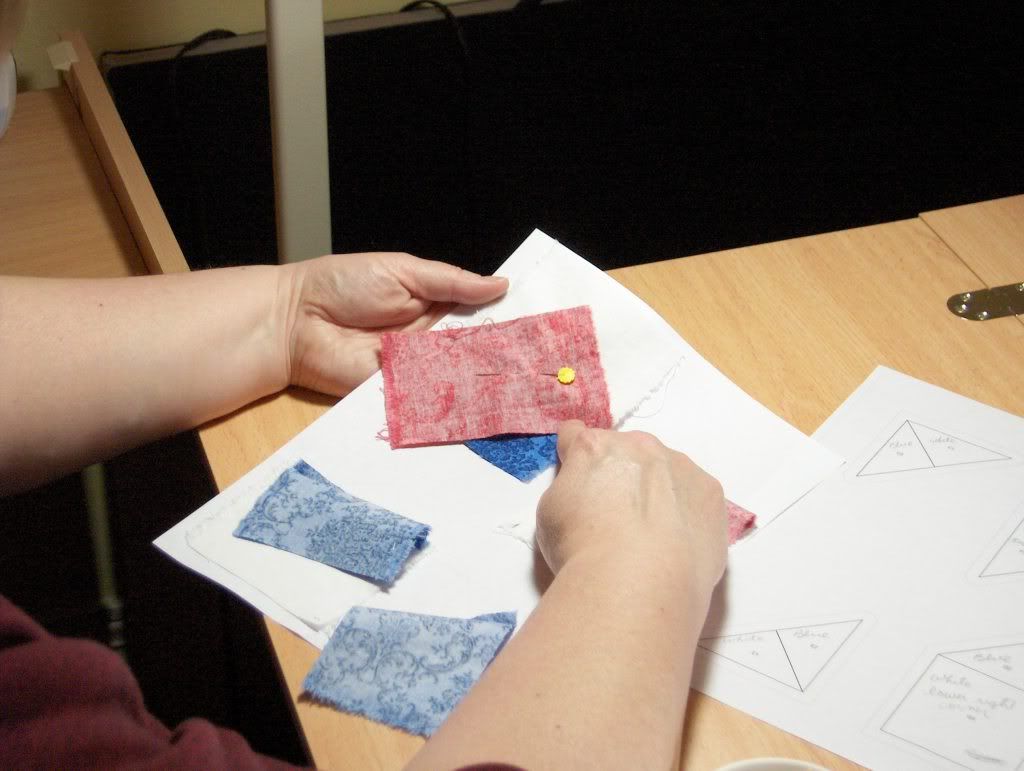
To determine exact placement, place the fold along the seam line, and, while carefully holding the seam allowance in place, allow the rest of the fabric to flip back for sewing.


Place a pin where it won't interfere with sewing the seam. At this point the two fabrics will be pinned right sides together and ready to be sewn together.

It's easier to see what it looks like after it has been sewn. Here C1 and C2 have already been sewn together. You can see that the light shadow of the White C1 fabric completely covers its triangle. I have folded over the blue C2 fabric piece over its seam line to verify that it completely covers the C2 pattern triangle including seam allowances. It does. If it didn't, I would have to rip out the seam, position the fabric better, then sew it again.

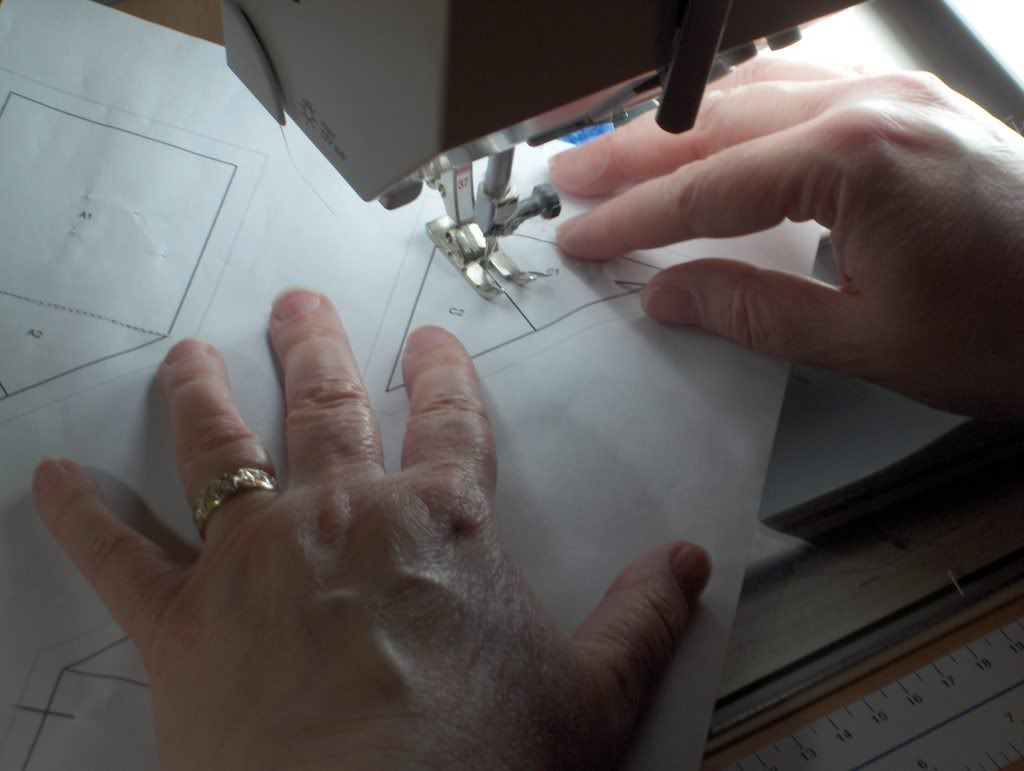
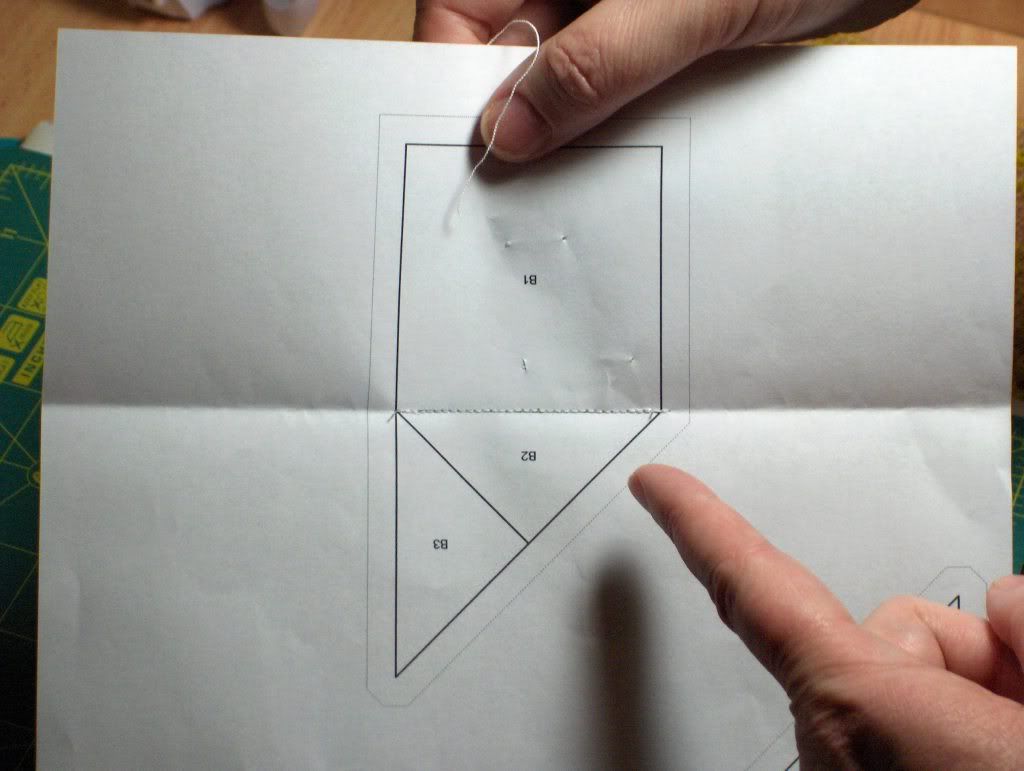
Getting back to the sewing part, you want to sew paper side up, right through the line between the #1 and #2 pattern pieces. Do NOT sew through the seam allowances. I normally position the needle right on the line, take a few stitches, then run in reverse a few stitches, then do the whole seam, ending with a few reverse stitches to hold the seam in place. Here I am sewing the first seam.
Remember, sew along the bold seam lines only, do not sew into the seam allowance.

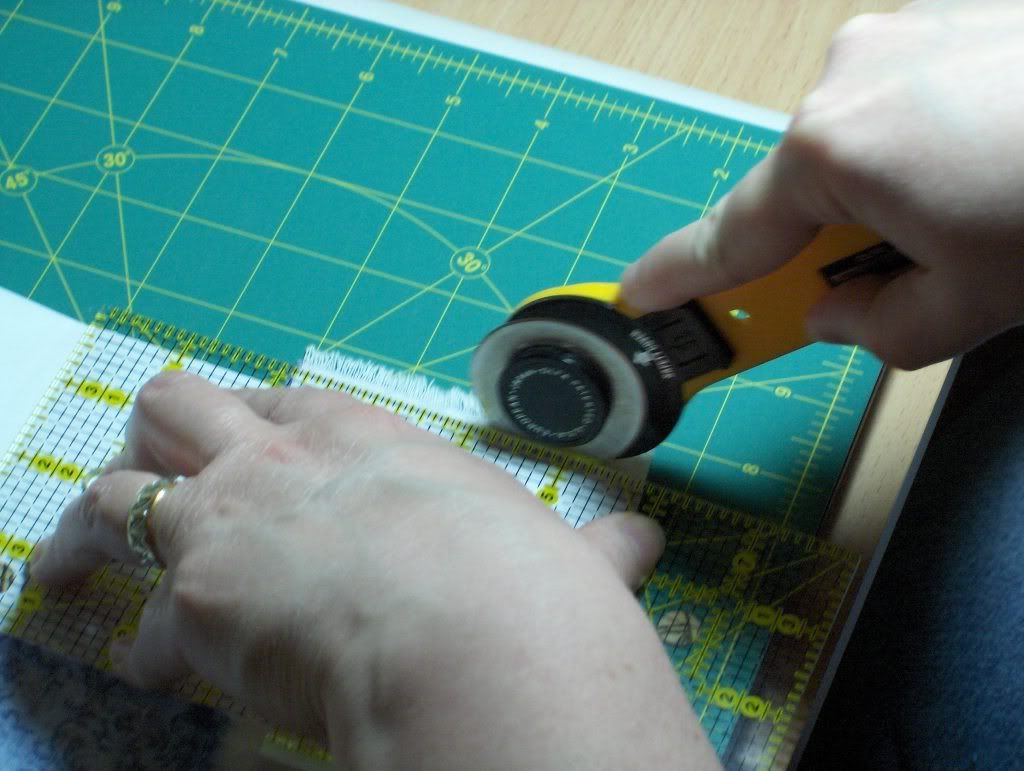
Now that you have sewn your seam, you have to trim the initial seam allowance to 1/4 inch. To do this you fold the paper back along the seam line. It folds very easily because of the seam.

Fold the paper onto itself so the seam allowance you just created is dangling free.
Using your rotary cutter and a ruler, line up the quarter inch marking on the ruler with the fold of the paper, then trim the seam allowance to 1/4 inch.

You should have a nice 1/4 inch seam allowance when you're done. Now it's time to iron.

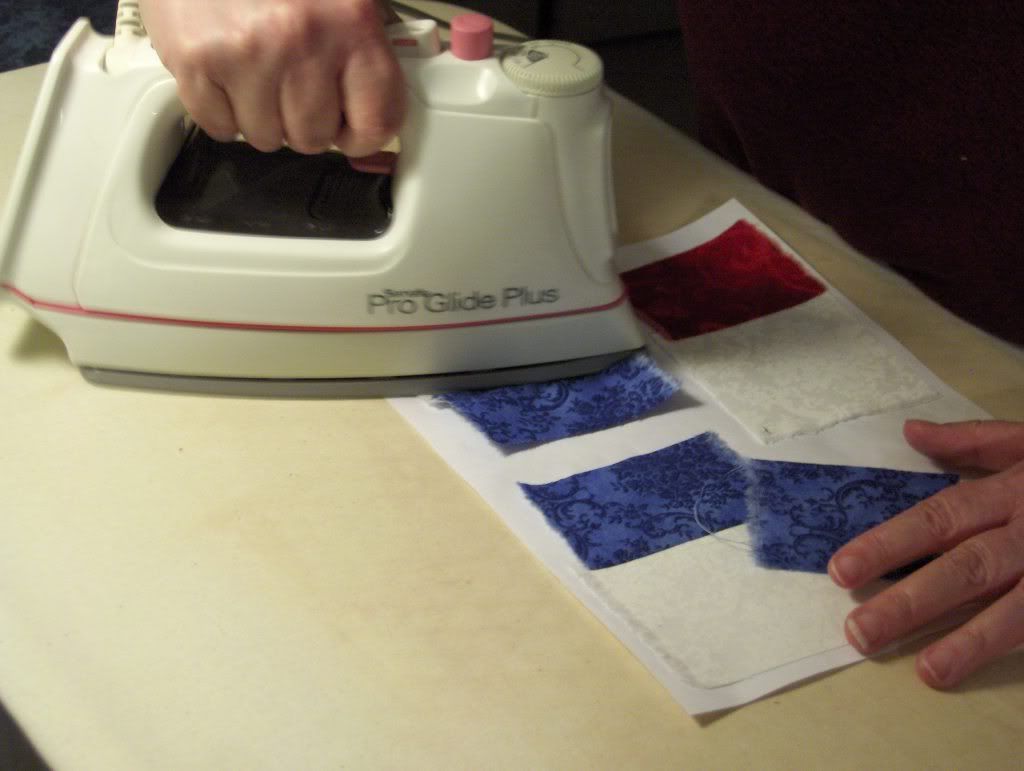
Iron the fabric nice and flat along the seam. None of the sections have been trimmed yet, you can separate the pattern sections whenever you want, but don't trim the individual sections until all fabric has been sewn, trimmed and ironed.

If the section you're doing has more than two pieces, attach the third piece to the second piece exactly as you did the first two. Leave all the paper in place, trimming only the seam allowances. Make SURE the second piece is laying perfectly flat against the paper while the third piece is being attached. If the fabric is distorted at all the design will be messed up and the pattern will not fit together correctly. Each subsequent piece that gets attached goes through the same process:
  1. Place and pin the fabric with right sides together on the blank side of the paper,
  2. Sew along the seam line on the pattern side of the paper,
  3. Fold the paper along the seam line away from the seam allowance,
  4. Trim the seam allowance to 1/4 inch,
  5. Iron the fabric flat so the right sides are facing outward.

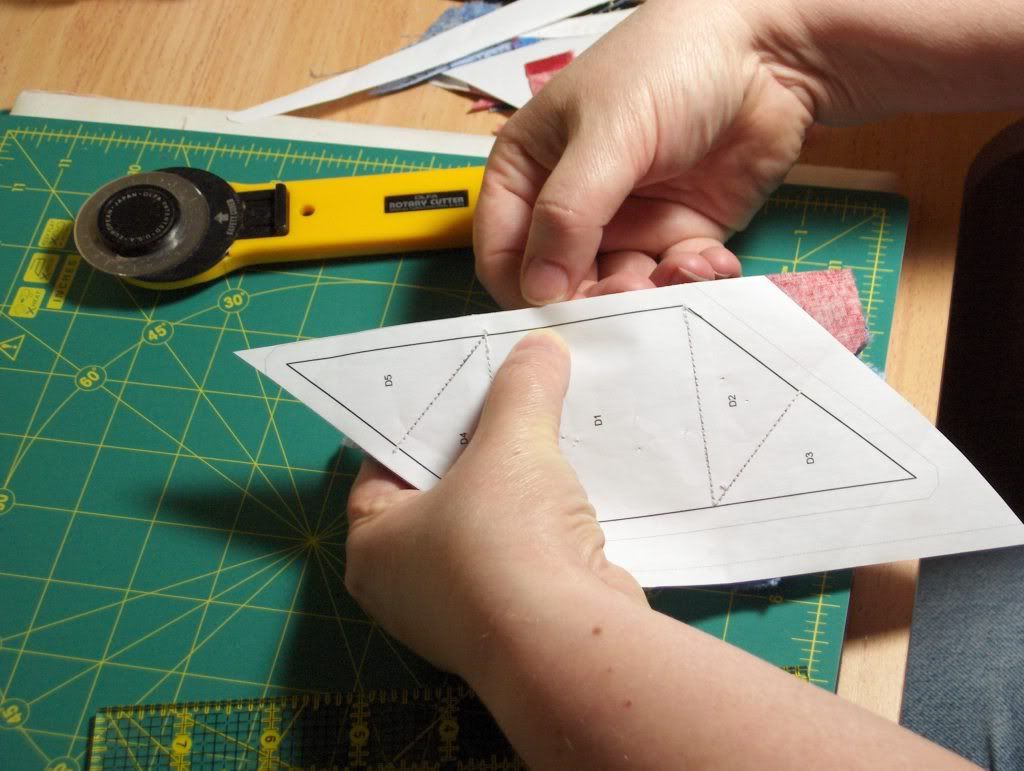
When all the pieces of a section are completed and the final piece has been trimmed and ironed, then it's time to trim up the section. Line up the ruler along the outer light cutting line (NOT the SEAM LINE!!!) and trim off the excess paper and fabric both at the same time.

Trim all sides of the section, leaving the quarter inch seam allowance between the sewing line and the cutting line intact.

This is how it should look when you're done trimming:

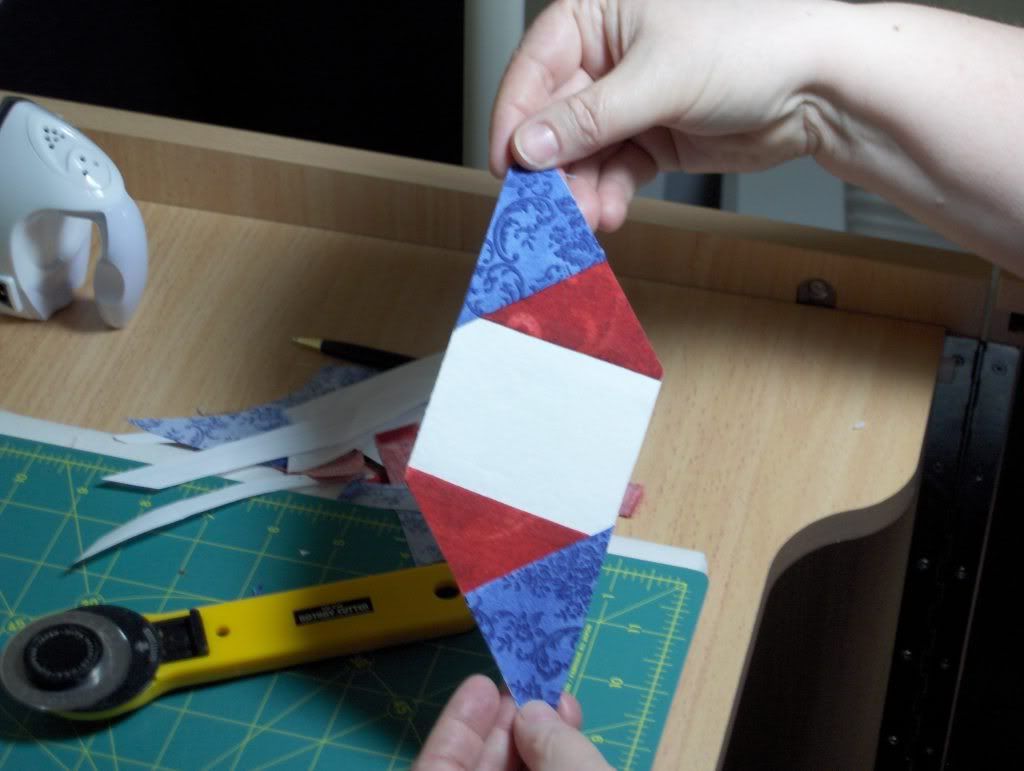
You can see the pattern growing on the fabric side.


To assemble the star I had to line up the pieces using the pattern. This kept all the pieces right side up.


I flipped them over carefully and here is my Ohio Star, all ready to be carefully pinned and sewn together. More on that later.

Thursday, March 19, 2009

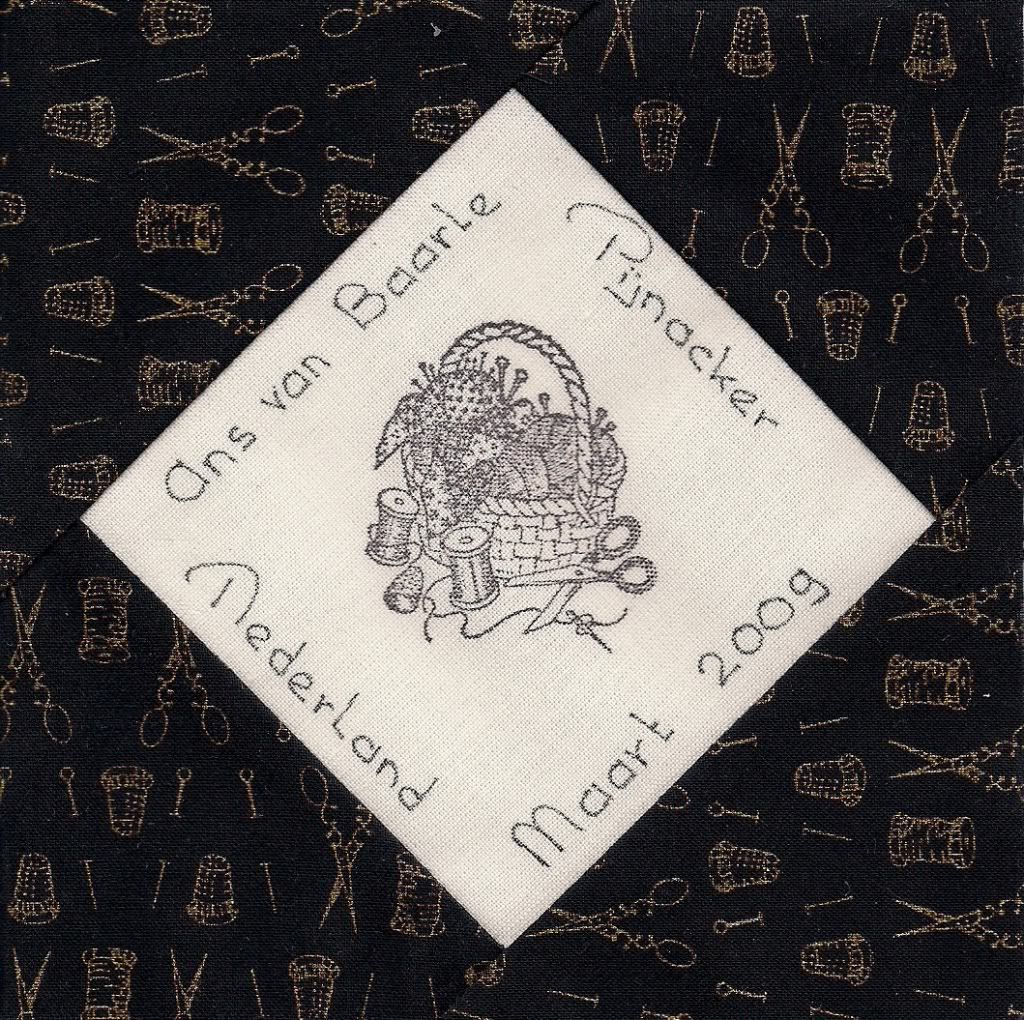
Internation Siggy Swap - Ans van Baarle

I love this siggy! From the tiny little thimbles and scissors on the fabric to the cute little sewing basket stamp, it's all about handiwork, which is just as it should be for siggies. I looked up Pijnacker in The Netherlands. It seems to be a suburb of Delft, of blue and white china fame. It's also very close to The Hague, where the world courts are, which puts it very close to the sea as well. I'm just happy to get it at all! My return siggies seem to be taking a long time to arrive, but perhaps I'm just too impatient! I love getting soft packages in the mail; they're always a treat.


Sunday, March 15, 2009

Dallas Quilt Celebration 2009 - Awesome!

We had a really good time at the quilt show. There was certainly lots to see! We took lots of pictures. Here is the slideshow. I bought all sorts of stuff. I covered three months worth of presents for my secret pal, got a "Big Board" ironing board which is very similar to the thing I've been asking Larry to make me for months now (he was thrilled to be off the hook), the latest Chiaverini and Ferris novels, some beautiful quilt cards, one of Joy's lovely hand-dyed pastel fat quarter collections, and a Flynn Mulit-Frame System for quilting large quilts on my home sewing machine.
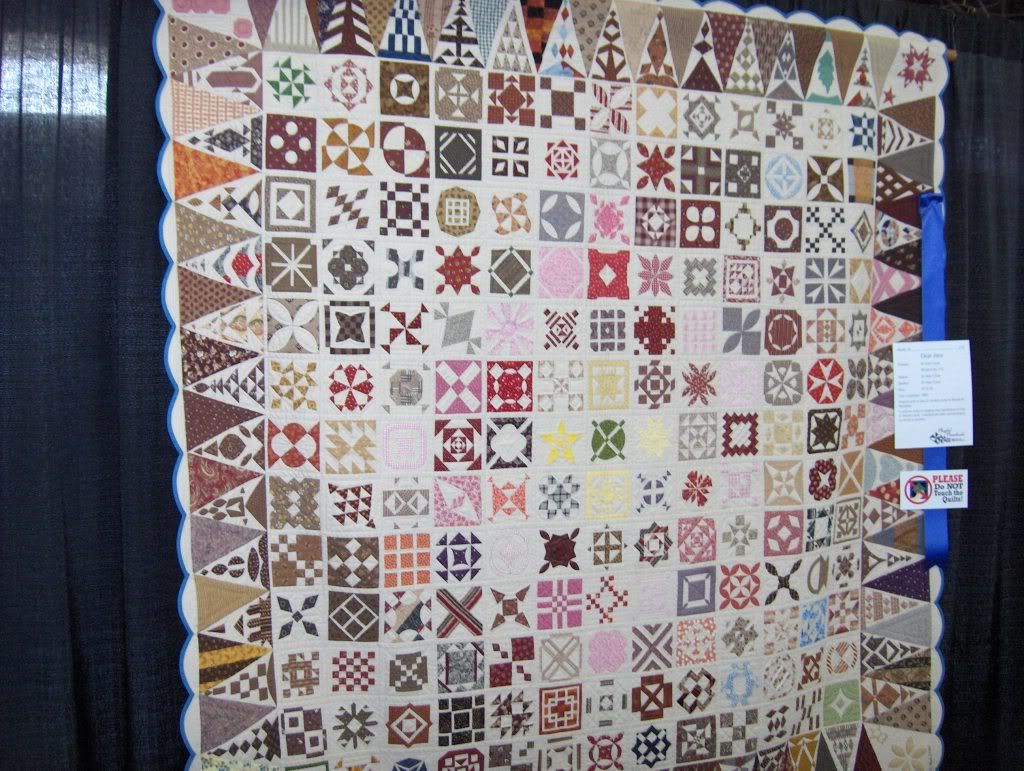
Here's an absolutely wonderful Dear Jane, a virtual replica of the original. It came up winless in this show. Are they getting tired of us, do you think?


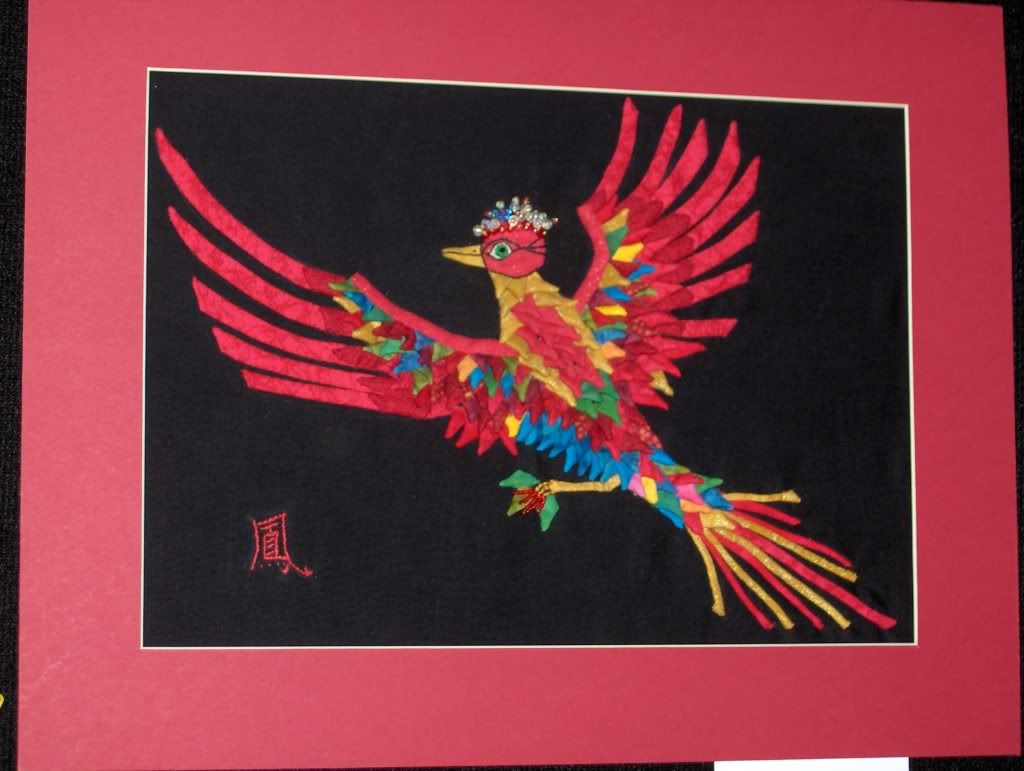
Here is one of Larry's favorites. The texture on this bird was awesome. The bird reminded us of Fawkes, the phoenix in the Harry Potter series.
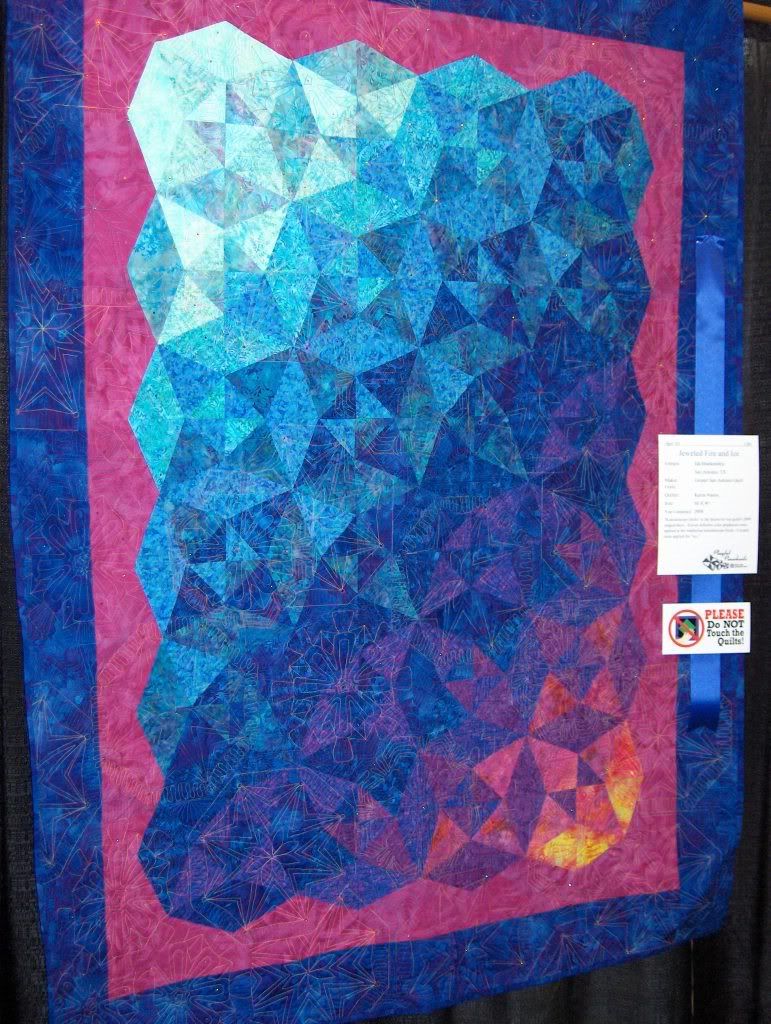
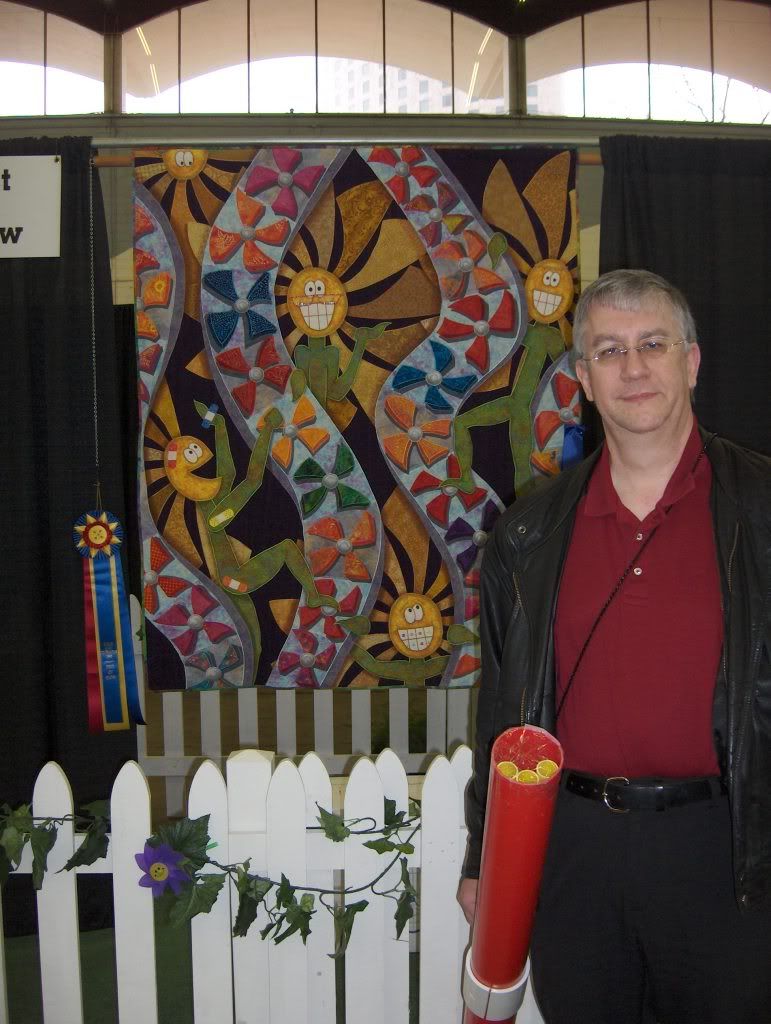


Larry really liked this one too. His favorite color (by far) is blue. I thought it was pretty amazing too!


We both really liked the best in show. I certainly thought it was an excellent choice for that award. It showed the most creativity coupled with the highest level of technical expertise of any quilt in the show. Look at how much depth it shows, and how perfectly flat it hangs! Larry wasn't as impressed as I was (not enough blue, I think). It had stiff competition, but it was definitely the cream of an excellent crop. I took multiple closeup photos of this work; they are displayed early in the slideshow.


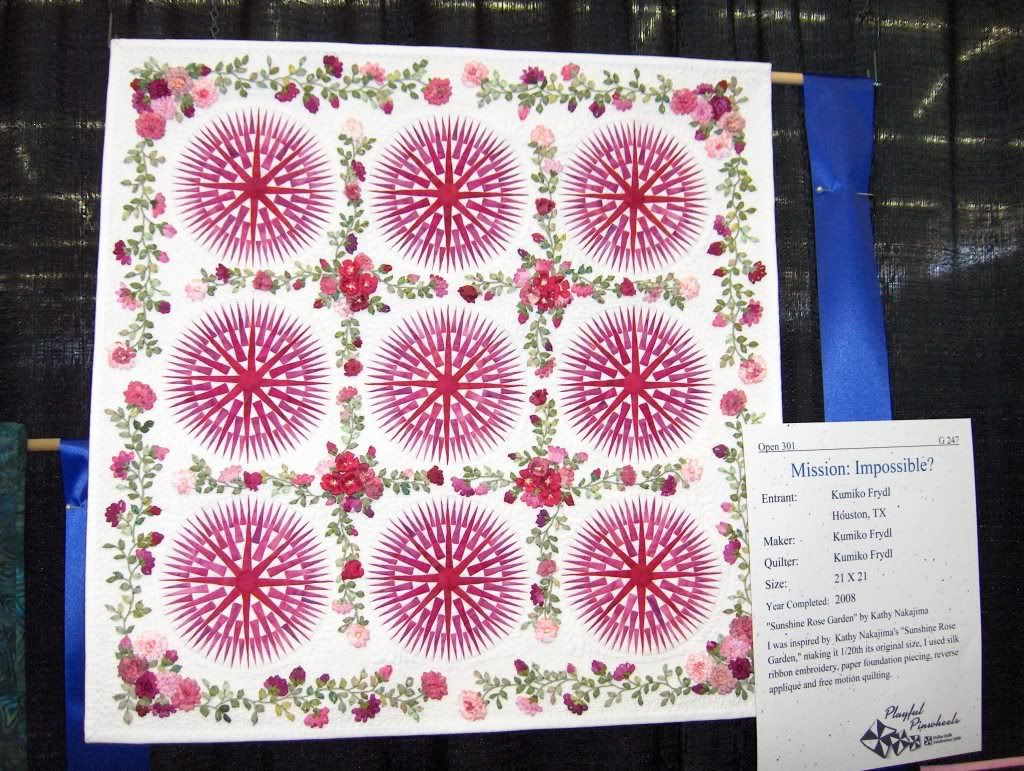
This one was wicked cool too. The pieces on this miniature are incredibly small. That piece of paper is the standard 8.5"x11" sheet that all the quilts are shown with. It very deservedly won the blue ribbon for best miniature. Oh yeah, her dimensional embroidery is phenomenal too. Mission Impossible she called it? Apparently not!


We rounded out this lovely, if tiring, afternoon with a fabulous meal at Craft, located in the W hotel in downtown Dallas. The food was amazing, as usual, and the service is unlike anything I have ever experienced anywhere else. We stayed at the W for Christmas a year ago, when Larry's job wouldn't let him go out of town over the holiday. Craft was new then, and was already quite wonderful, but it has gotten even better since then. The meltingly delicious shortribs, the perfectly sauted broccoli, the to die for lemon crepes. Sigh. It's a good thing it is 50 miles away and shockingly expensive, or I would be another 100 pounds overweight, but once a year? C'est parfait!

Saturday, March 14, 2009

Dallas Quilt Celebration 2009

My husband and I were reading the Dallas Morning News yesterday when he showed me the Dallas Quilt Celebration was on the cover of the Guide Live section. The show is at Dallas Market Hall through this weekend. I meant to mention it yesterday at the Blanketeers meeting, but after I passed out the block kits and gave the paper piecing tutorial, I forgot all about it. Oh well. Then after work, out of the blue, my husband asked me if I wanted to go to Dallas for the quilt show! I was surprised; Larry is really wonderful, but not often THAT wonderful. lol He was serious (I wasn't sure at first) and he handled all the logistics, since it's at multiple venues all over Dallas. I'm not sure how many places we'll get to, because we can't leave until noon, but I'll have a full report when I get back. I'm hoping they allow pictures, because Larry offered to be my photographer.

Two of my favorite vendors, Joy's Fabrics & Quilts and Cabbage Rose will be there. I was just at Cabbage Rose last Friday, but I never see Joy anymore, and she used to work in the same building I do. We used to run into each other in the bathroom there, in fact, that's how we met. lol Now I only see her at quilt shows. Joy's hand dyed fabric selection is unbeatable. The green in the Big Top Dear Jane block I finished last Sunday is one of hers. It remains the most beautiful green fabric I have ever seen; I'm going to try to get some more today!