Showing posts with label Larry. Show all posts

Tuesday, September 22, 2015

Tatting Tuesday - What I've been doing instead of tatting

This is what I've been doing lately instead of tatting.

Master bathroom shower floor
The floor of our shower in the master bathroom developed problems.  The "mud" or concrete under the tiles had begun to break down, making the floor uneven, cracking the grout and causing a leak. Luckily for us, the bathroom is over the garage, so it only dripped on the garage floor.

I tried to do a quick fix, which left the tiles uneven and the grout kept cracking loose. And, it only stopped the leak for a little while. 

Now I am attempting a more thorough fix, removing all the tile and the loose "mud" underneath, patching the mud, and installing new tile.  This is the patched mud, which still needs some smoothing and evening out. Then I can put down new tile, grout it, and thoroughly seal it.  Hopefully this will stop the leak for a long time.

Larry

Tuesday, September 15, 2015

Tatting Tuesday - Snow Dragon Wing Done

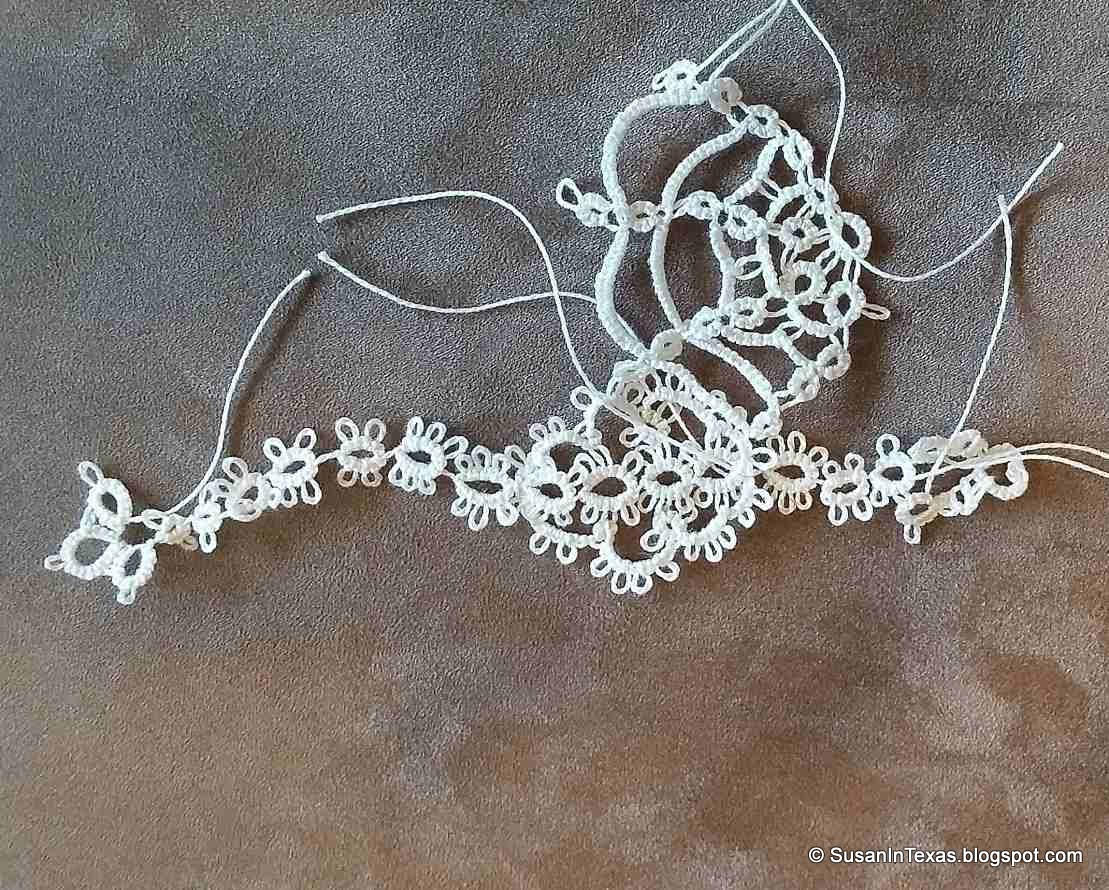
The second wing of the Norwegian Snow Dragon is finally done and attached to the body!  Yay!

Norwegian Snow Dragon - Tatting complete
Now all I have to do is work in the ends, and block and stiffen it.

This was quite a project.  Easily the most complex I've done, and not just because I had to learn new techniques (like the Single Shuttle Split Ring). Now I'm looking forward to something simpler, like helping Grandma with a few projects of hers.

Larry

Tuesday, September 8, 2015

Tatting Tuesday - Almost Ready to Fly

The second wing on the Snow Dragon is ready to be joined to the body and worked through the last row.

Snow Dragon - Second Wing ready to join
Of course, this work would go faster if I wouldn't make so many mistakes....

Larry

Sunday, September 6, 2015

Singer Restoration Sunday - Stripping off the old paint

Here is the Model 66 I'm working on, with most of the rust and old paint removed.


I removed this much with an electric drill sander, using 60-80 grit sandpaper. Next week, I will use my sandblaster to get at the harder-to-reach parts (like the inside of the throat and the underside).

Larry

Tuesday, September 1, 2015

Tatting Tuesday - Second Wing Progress

Progress on the second wing of the Snow Dragon is pretty slow.


It is quite a complicated pattern, and easy to go astray. But I think I'm getting comfortable with the pattern, if I would only stop making mistakes.

Larry

Tuesday, August 25, 2015

Tatting Tuesday - One-Winged Dragon

I finally completed the first wing of the Minor Norwegian Flying Dragon.

Minor Norwegian Flying Dragon - One Wing Complete
It was very complex, using two shuttles at once almost throughout, and switching primary shuttle back and forth on alternate rows. And joined to the body in several places on the last row.

Now I can start working on the other wing!

Larry

Tuesday, August 18, 2015

Tatting(-less) Tuesday - Strolling Through Silverton

Larry is in Oregon for a few days, but my tatting is still at home. I forgot to pack it! Oh, well, I will just have to catch up for next week.

In the meantime, I have been walking about lovely downtown Silverton, and checking out the shops.  In several of the antique stores, I found vintage sewing machines.  The first one was a bentwood case model, an Old Homestead II:

Old Homestead II model sewing machine and case - Top View
 It is apparently an electric motor version, although the motor is not currently installed, and I didn't see a belt for it anywhere

Old Homestead II model sewing machine and case - Front View
 I believe that is the foot controller, to the left of the motor.  If you look closely, you can just make out the worn lettering of the end of the name, inside the decal on the arm.

Old Homestead II model sewing machine and case - Storage Compartment
Included in the case was this storage compartment, to the right of the machine, with a few additional attachments and spare needles. A wooden top slides into grooves around the edges to close up the compartment.

Next I spotted a treadle table and machine in the corner of another store:

Treadle Machine - Front View

Treadle Table - Front View
 This appears to be a Singer machine, given the Singer Manufacturing Company badge on the front of the throat.  Also found there is a label from a company (based in Los Angeles) that apparently worked on it some time in the past.

Singer Badge and Repair Shop Label
 Here you can better see some of the detail of the artwork still decorating the arm and throat.

Front View

Rear View
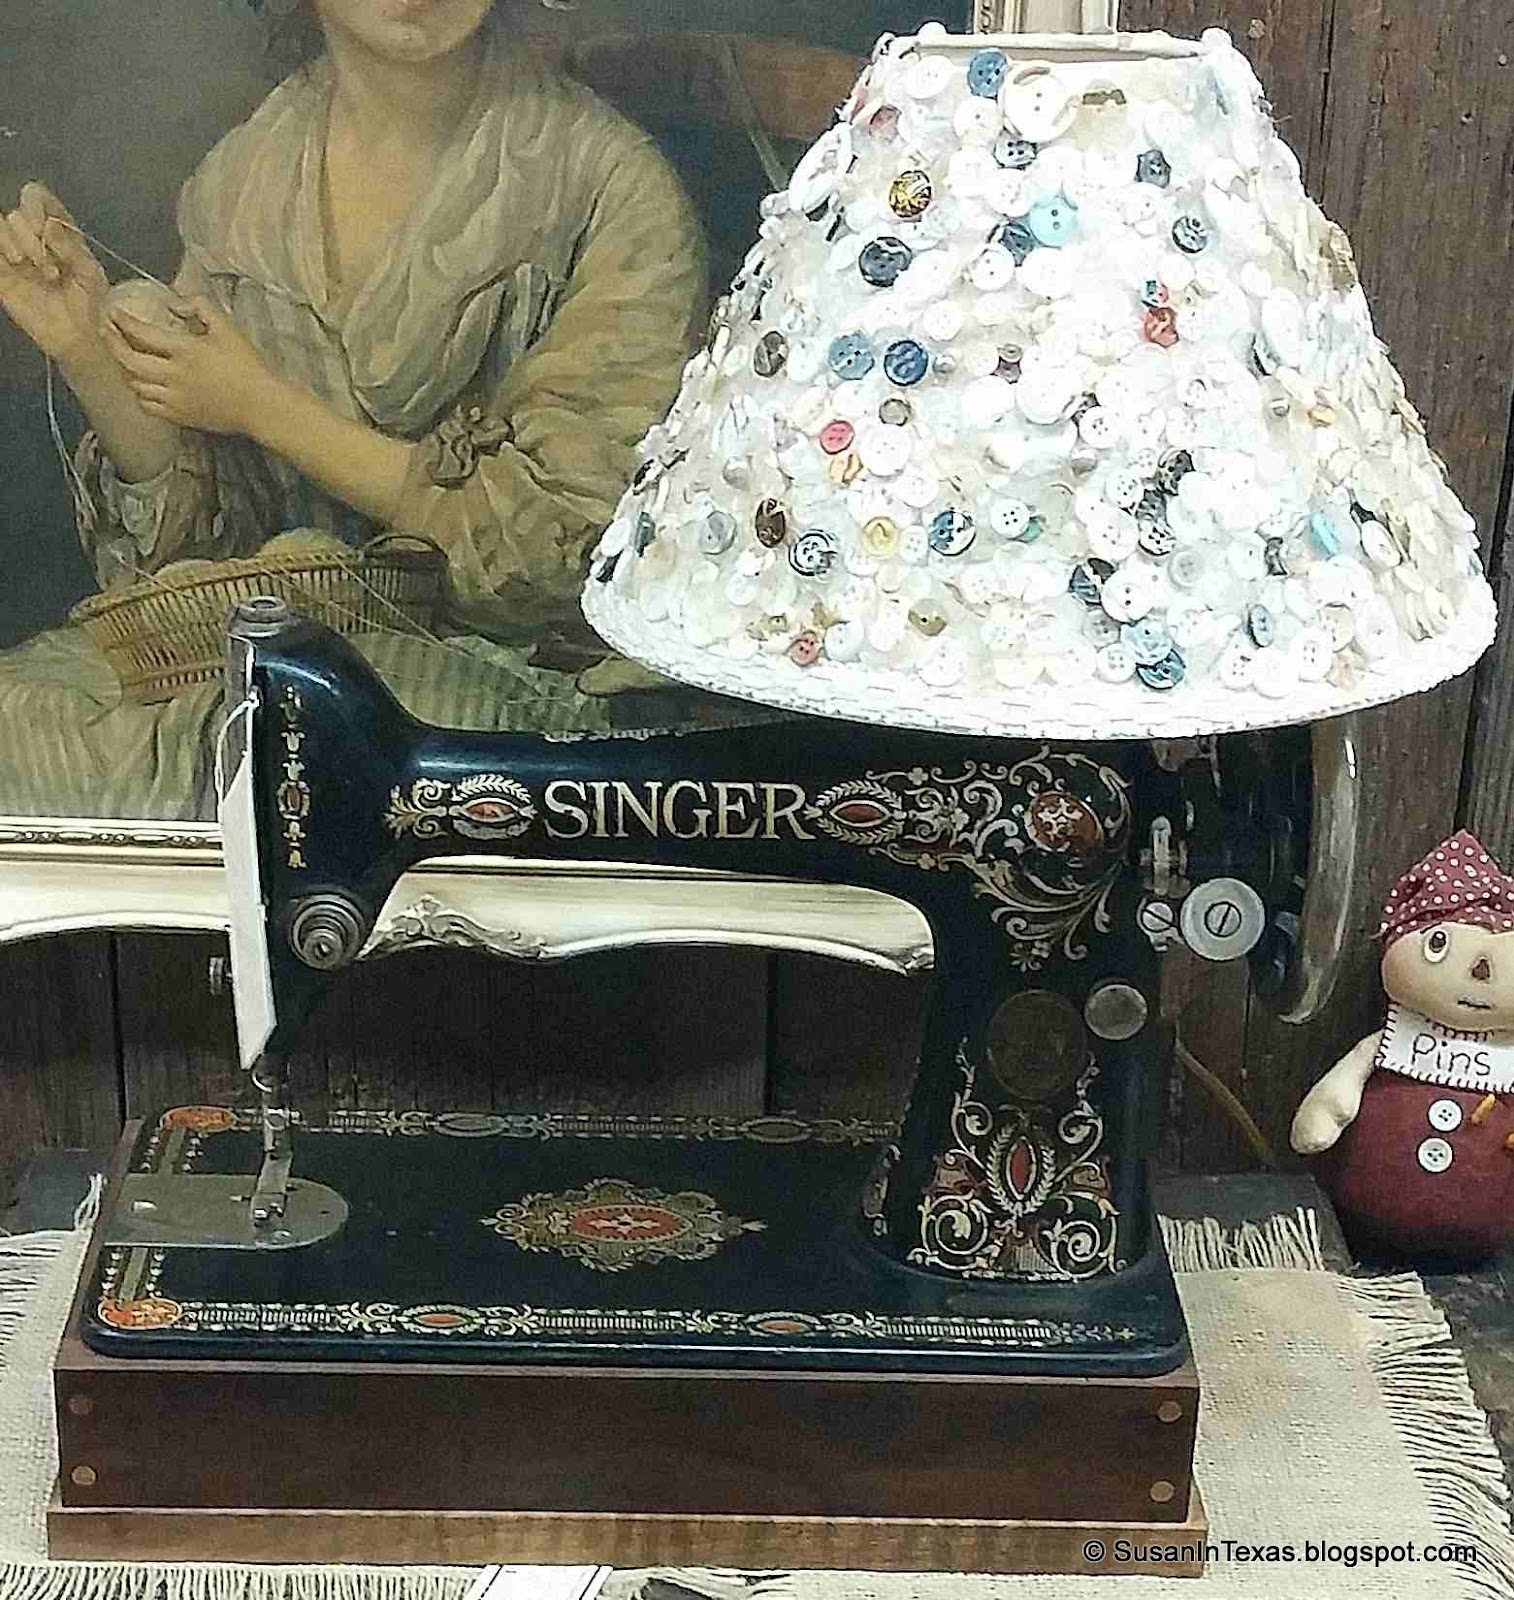
Finally, at yet another shop, there was a machine (already sold!) that had been made into a lamp.

Singer Sewing Machine Lamp
I don't think this is the approved way to add a light onto your sewing machine!  The lamp works, of course, and the machine can still be turned, although I am unsure that it would actually sew. And I don't know if they had to drill bigger holes in the machine to thread the wires through, or if the original holes were big enough.

Larry


Saturday, August 15, 2015

Singer Restoration Saturday - Singer Emblem Removal

The brass Singer Manufacturing Company badge, all shiny and new again.

Shiny again
Removing the badge on the front of the throat is tricky.  It is held in place by two brass pins, which are pushed through the holes in the badge and the throat, and then are bent over inside. It isn't easy to reach these pins, straighten them out, and push them back out again.

What is not as hard is to break the pins at the bend when trying to straighten them, and then gently pry them loose. With this badge, I was able to get one of the pins out intact, but I broke the other one.


The shinier areas on the badge are where dirt flaked off while working the pins loose.

What you are left with is a clean spot on the machine, and a number worked into the metal of the body.

Relatively Clean Spot

Sometimes I think the expected way to remove the badge is to clip off the pins, pull off the badge, and replace them with all new pieces.  And sometimes I think you're not supposed to remove the badge at all!

Larry

Tuesday, August 11, 2015

Tatting Tuesday - Dragon Wing Progress

I took the pattern for the Flying Minor Norwegian Dragons, which I had found to be very complex and confusing, and broke it down further into instructions for each shuttle used on each feature. Maybe I'm just too new to tatting, but I could not keep straight which shuttle was supposed to do what once I got past the first couple of rings.

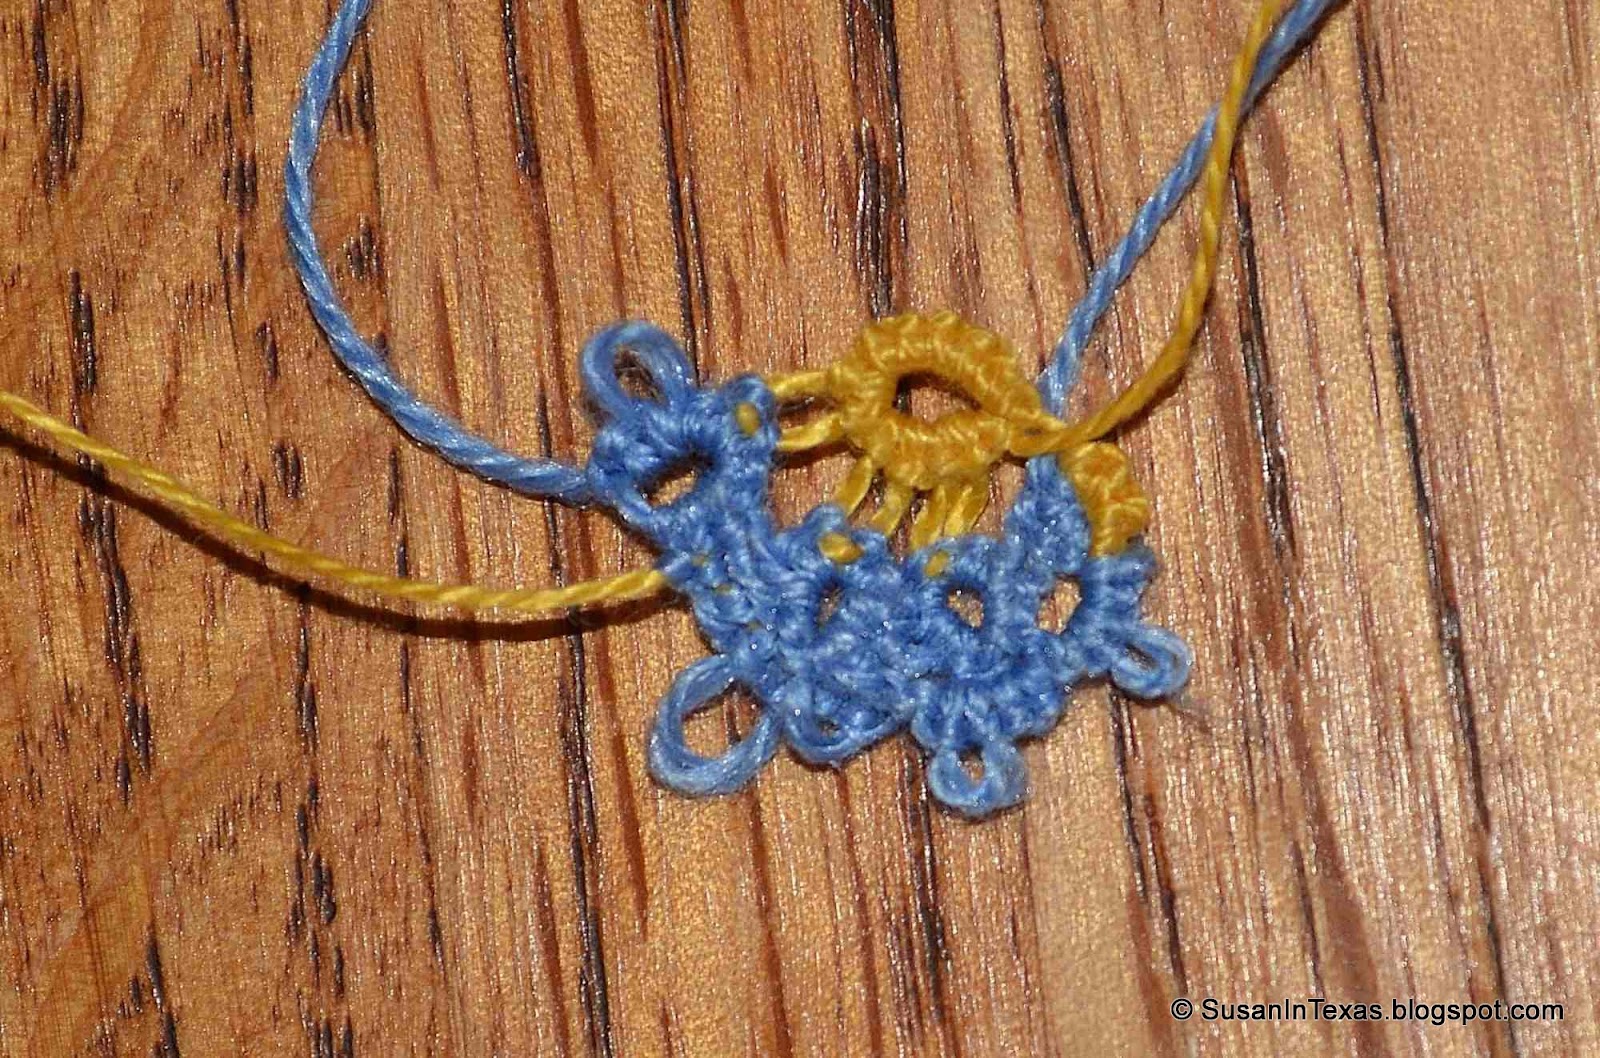
With the augmented pattern, and working in two colors for clarity, I was able to produce:

Dragon Wing two-color test using Augmented Pattern
This is what the wing is supposed to look like, up to the point I ran out of gold thread on the shuttle. The fourth (and last) row on the wing is very similar to the third row, except for joining to the body in several places.  It should not be too bad.

With the tested new pattern in hand, I have begun an all-white wing.

Snow Dragon Wing using Augmented Pattern
I can see I've already made one mistake: the second ring on the left side should not have a picot on it. Oh, well, it should not disrupt the structure of the remaining work, and maybe the wing will look good with one more "claw" on the leading edge.  As long as I remember to make a matching mistake on the other wing, I think it will be okay.

Larry

Saturday, August 8, 2015

Singer Restoration Saturday - Cleaning up the rusty parts

To remove the rust from the parts removed from the sewing machine (especially the visible ones), I soak them in a vinegar bath for a couple of days.  This converts the insoluble red iron oxide (rust) into (more) soluble black iron acetate, which can then be scrubbed off more easily.

I start with the parts in a plastic bin:


Parts ready to be de-rusted
I then pour in enough vinegar to cover the parts.  If you do this a lot, you may want to start buying the gallon jugs of vinegar.

After soaking a couple of days, the parts are ready to be scrubbed down.


After soaking
Some of the color in the vinegar is because I used some cider vinegar to top off the bin, but most of it is from the converted rust and grime from the parts.

Next I take an old toothbrush and scrub off the remaining black stuff from the parts.  A sink with running water is the best place for this.


The cleaned up parts
You can see some of the parts, like the long feed dog rod, still has a rusty look to it.  As an internal part, the look is not so important, but you might want to give it a wipe with a bit of oil to keep the rust away.

The balance wheel's rust has been removed, but the areas that were rusty have still lost their paint.  I suspect the whole wheel will need to be stripped and repainted (and the pitted places on the rim smoothed out).

The most improvement comes in the chromed external parts.


Before
After


This is a now a faceplate that would dress up a sewing machine.

Larry


Tuesday, August 4, 2015

Tatting Tuesday - Snow Dragon Progress

Last week I had finished the body of the Snow Dragon from the Flying Minor Norwegian Dragon patterns, and I was looking forward to completing the wings and putting it together. Unfortunately, I haven't gotten very far on the wings.


Snow Dragon Wing (started)
I found out that these dragon wings are very complex, working with two shuttles and making rings, chains, and split rings with both. It is especially hard to keep straight when worked in the same color thread. I have started working a test piece in different colors so that I can see better how the different threads work together.


Dragon Wing Test
From the pattern, this is how the wing is to start, with the upper ring and the outside half of the split ring (on the right) in one thread (that is, from one shuttle), and the rest of the row worked from the other thread (from the second shuttle).  Then it gets really complicated.  

I think I am going to have to work out how to break the pattern down even more, so that it tells me not only what stitches to do, but also which shuttle to do them with.

Larry


Saturday, August 1, 2015

Singer Restoration Saturday - Preparing Stencils and Cleaning Parts

Last week, I was only needing to get a few more pieces of the Model 66 I'm working on, and I could start stripping the head.  I wound up having to get a new screwdriver, one with a narrow enough head to fit through an access hole in the back of the faceplate area, and short enough not to bump into the arm with the handle.

My other screwdrivers were too wide or too long
Now I just need to get the brass Singer badge off the side of the arm, and I am ready to strip off the paint.  I will have to reach in and straighten these pins so that I can pull them out and release the badge.

Not as badly bent as in a Model 127
And, of course, there is the cleaning of the parts I took off.  A little scrubbing with soap and water and a toothbrush really makes a difference.

These two parts used to look the same
And finally, I am trying to work with stencils, rather than decals.  I have captured a photo of the Singer logo on the arm, and will try to 
use it as a stencil when repainting it.


That's all for now!
Larry

Tuesday, July 28, 2015

Tatting Tuesday - Snow Dragon Progress

My new tatting project is a Flying Minor Norwegian Dragon, from a free pattern posted on the internet by Anne Bruvold.  I stumbled across it while I was looking around for animal patterns, and I thought it looked mighty cool.


Flying Minor Norwegian Dragon - Head, Body, and Tail
This is a Snow Dragon, since it is all in white.  The linked pattern also identifies several other color variations, and suggests there might be others not yet classified.

The basic shape of the dragon is very easy to see, from the tip of the snout, down the neck to the rounded body, to the barb at the tip of the tail.  The threads where the neck joins the body are not part of the wings, although they are suggestive of where the wings will be eventually.

Part of the challenge of mastering these dragons is the use of a new (to me, at least) technique, the Single Shuttle Split Ring (SSSR). All the rings of the dragon's backbone are SSSRs. The pattern does not explicitly teach you how to do the SSSR, but does provide a link you can follow to find instructions on how to do it.

I am just starting on the wings, which are started separately and each is joined to the body as you work it.

Soon I should have a Snow Dragon to bring me cool thoughts during these hot summer months!

Larry

Saturday, July 25, 2015

Singer Restoration Saturday - Return to Model 66

With the restoration of Dollie's case completed, it's time to return to the Model 66 (no nickname at present). I had started to disassemble it for cleanup and refurbishment (as the one in the next worst condition) when I switched to work on the other Model 127 ("Pearl").

Model 66 Case
The paint had definitely suffered from its previous use and storage, and almost all the decals have been worn off the bed.  After removing a few more parts (like the brass Singer logo plate, and the rest of the needle rod), the body will be ready to be stripped for repainting.

Model 66 and parts removed
And, as you might expect, there are a lot of parts that need to be cleaned and de-rusted. 

I re-wired the electric motor, control box, and light, since the original wiring was falling apart.

Model 66 re-wired electric motor and light
This machine also came with a cabinet (as opposed to a treadle table). As you might expect, it is in poor shape also.

Model 66 cabinet - front view

The veneers are all peeling off, and the exposed wood is weathered and warped. The lid seems to have been closed and provided some protection, but the rest looks like it was exposed to the elements for quite a while! You can also see the knee lever for the motor controller (hanging down under the drawer). The controller would be mounted on the right side inside the cabinet.

Model 66 cabinet - rear view - closed
The two pieces of wood resting on the top are the back pieces of the lid and top, which have come loose.  You can see the lid support arm, which swings out when the lid is opened to help hold up the weight of the lid.

It looks like a pretty big job, especially the cabinet! I will get to try out some new techniques with it!

Larry

Tuesday, July 21, 2015

Tatting Tuesday - Multicolored Bookmark completed, Handkerchief Edging Progress

The completed Beginner's Bookmark, with minor modifications:
Multicolored Beginner's Bookmark

The multicolored thread really makes this a fun item.  We tried a number of ribbons from Grandma's extensive collection, but the white worked best, making all the colors pop out brightly.
On the hankie edging front, I stopped when I thought I was a few rings short of having enough to finish.  I expected to have Susan stitch the edging to the handkerchief until she got close to the starting point, and then I could see exactly how many more rings to make.  But when I checked with Susan, she was afraid I had made too much!  

Grandma's (and my) Handkerchief Edging
Susan says when she stitches the edging down, she will try to space the rings the same as Grandma's, so we will see how much the edging stretches around the hankie.

Larry

Saturday, July 18, 2015

Singer Restoration Saturday - Dollie Complete

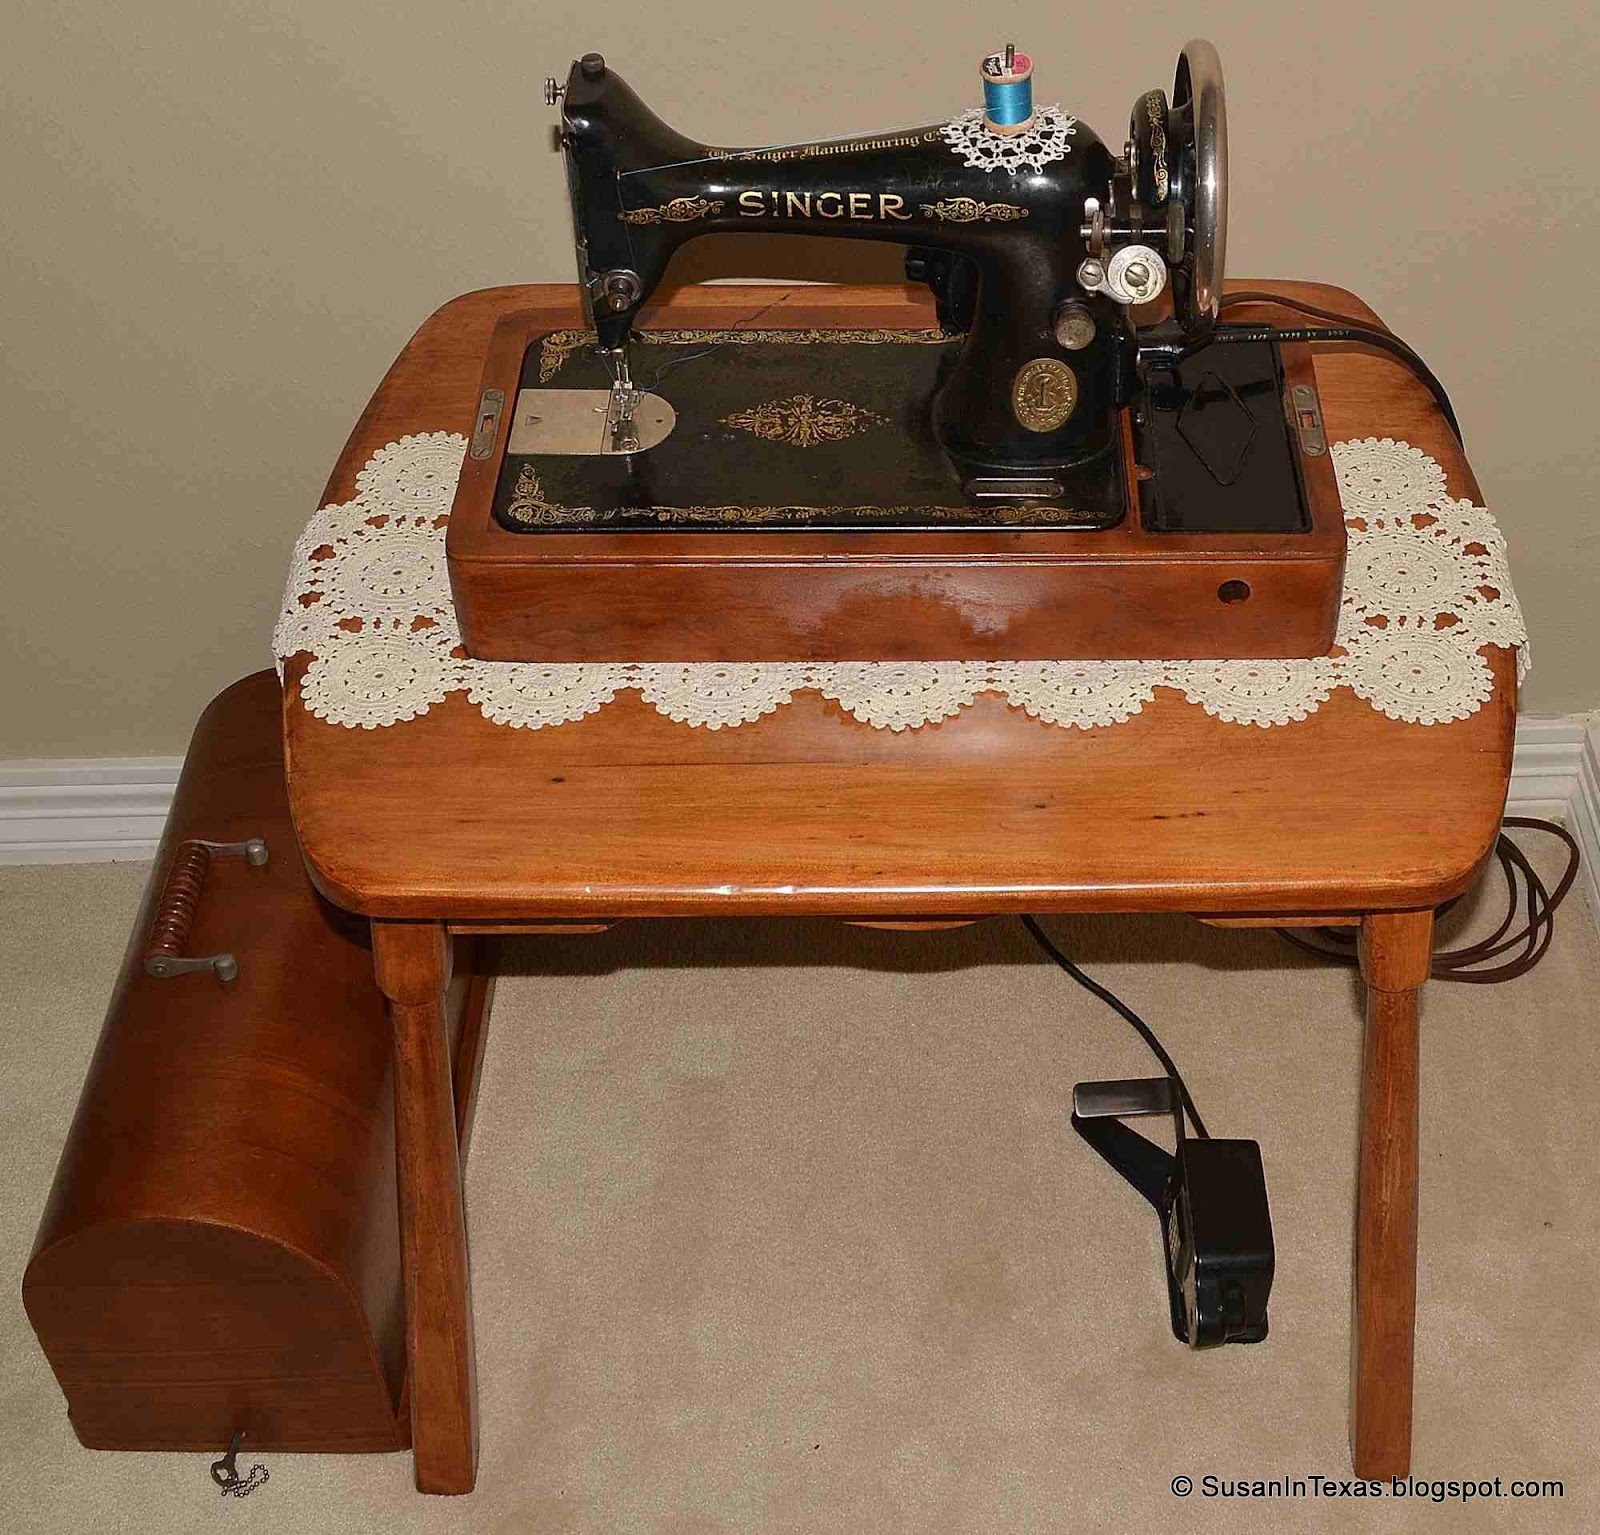
After all the excitement of the trip to Green Bay, I finally finished the restoration of my great-grandmother's Model 99K and case (nicknamed "Dollie" after her), and a little table to display it on.


Dollie ready to go
The crocheted runner that Dollie is resting on was made by my grandmother (Dollie's daughter). It makes a nice touch, in addition to protecting the finish on the table.


Closed up for storage
Everything packs up neatly for storage or transport. The wires for power and the foot control coil up nicely and stow in the space below the arm.


Top removed

Power Cord and Foot Control unpacked
The two wires run from the motor (on the back of the throat, just peeking out from behind) to the right and down to plug into the wall and set up where the user's foot would be.


Plugged in and Foot Control in place 
On to the next project!

Larry

Tuesday, July 14, 2015

Tatting Tuesday - Multicolored Bookmark Progress and Next Project

This is a pretty simple bookmark pattern (it's even called "Beginner's Choice") from the book Tatted Bookmarks - Needle & Shuttle.  I thought it would be fun to do in a multicolored thread, instead of boring old white :).


Multicolored Bookmark
I made a couple of changes to the design, mostly because I didn't have the pattern handy when I came to the end of the row.  There are fewer picots in the arcs on the ends, and I joined all three picots on the end rings to the ones next to them.  But, it doesn't look like an issue to me.  Now I just need to work in the ends for my start and finish (at the upper left) and from fixing my mistakes (on the right end).

For my next project, I will be helping Grandma finish a tatted edging for a handkerchief. She said she was finished, but it looks like the handkerchief was a bit bigger than she expected.

Grandma's Tatting for Handkerchief - a little short
The pattern is not very complex, but I will be trying to imitate Grandma's stitching that is already sewn onto the handkerchief, so I will have to be careful.

Larry

Tuesday, June 23, 2015

Tatting Tuesday - Edging Test Completed

I completed the test piece for the tatted edging I wanted to try.

Edging Test Completed
Susan suggested that I try ironing the piece when finished, steaming out the twists and crumples that tatting had worked into it. I followed her suggestion, and I think it really improved the look of the finished work.

Larry


Tuesday, June 16, 2015

Tatting Tuesday - Edgings

This week I am switching back to tatting.  I am not giving up on crochet; I still have a lot to learn, and I'm sure that it's one of those things that only gets better with lots of practice.  

But I don't want to forget all about tatting either.  So I am working on a short piece of Edging #2 from Elegant Tatting Patterns (Janet Carroll)


Edging #2 - Just a couple of repeats

This is a pattern where you work one direction until you have the length you want, and then stop and work back to where you started. The final result looks like this.


So far, I have done the first row and just started on the second. This is done with weight 30 thread, and it seems like it will turn out a bit heavy for a handkerchief.  Does anybody know what would get an edging like this? Are there general guidelines for thread weight and pattern width for different uses?

Larry

Saturday, June 13, 2015

Singer Restoration Saturday - Dollie Progress and a Mystery Unearthed

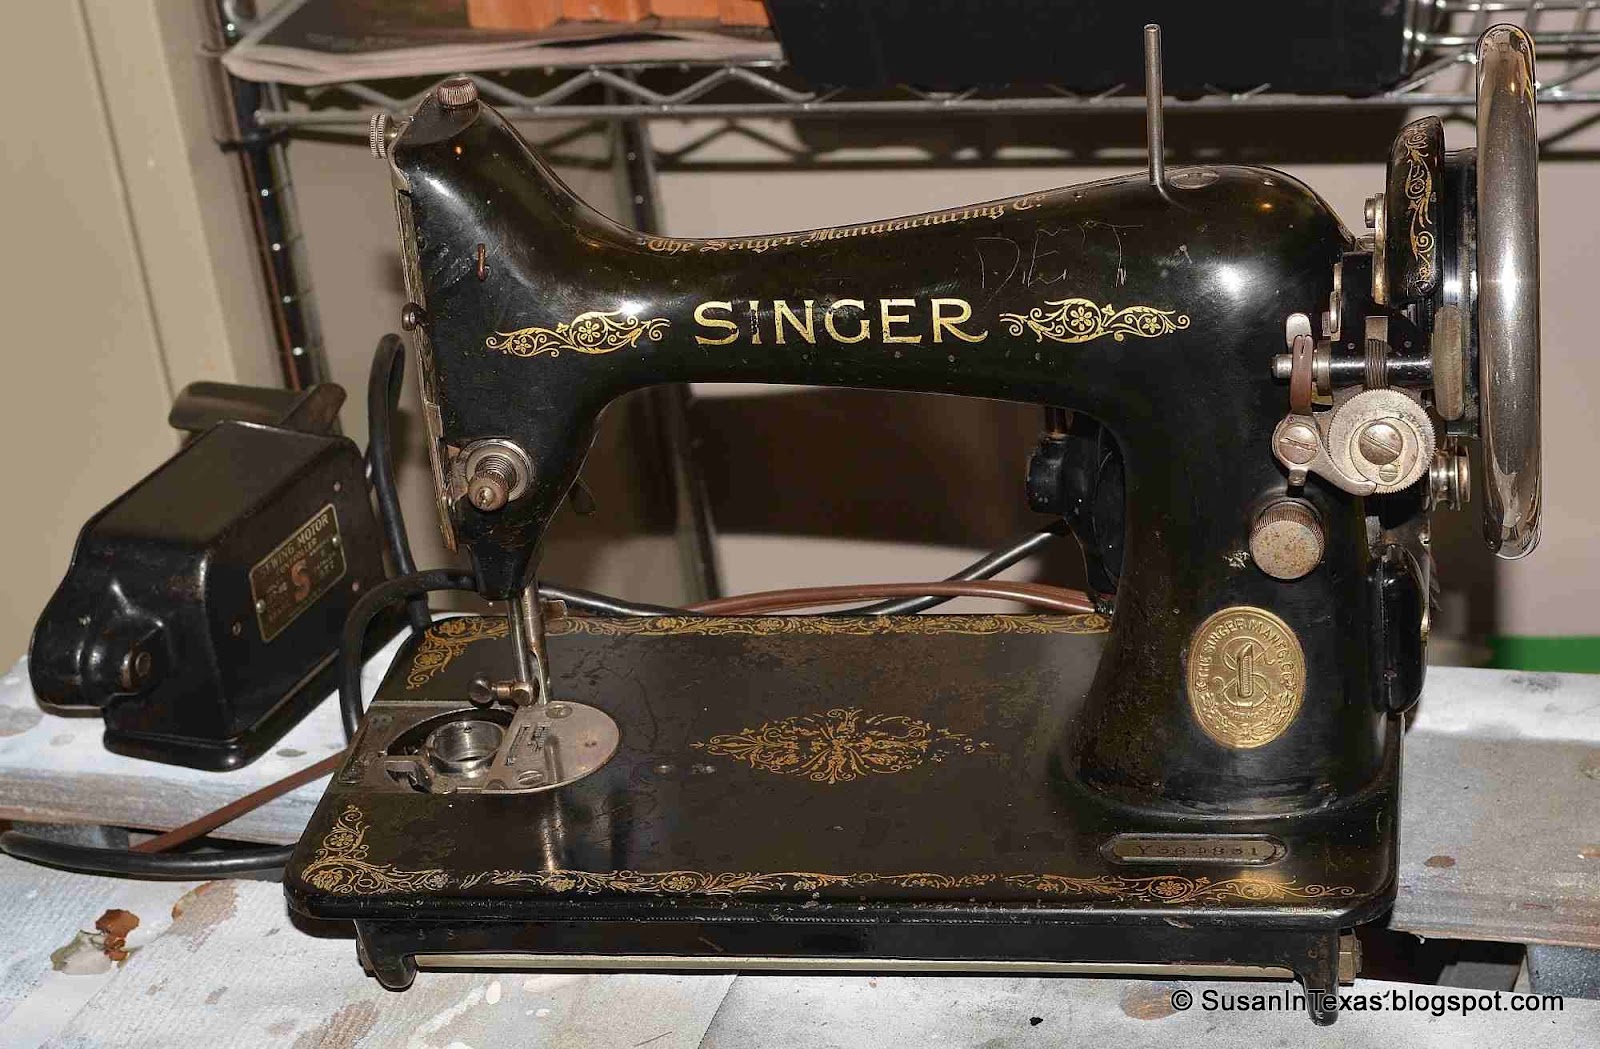
Have not made a lot of progress with Dollie the past week -- distracted by the new car lol.  I have applied a couple of coats of paste wax on her to get her ready for her closeup.  If you enlarge the image you can see the initials "D.E.T." scratched into the surface.  I would blame that on my sister, Denise, but her middle initial is 'A'.  And Dollie, was Dolly Franklyn Dunn Henderson, so that's not it.  I believe we have a new family mystery!

Dollie - freshly shined up
The finish is even worse than I remembered.  Maybe someday I will want to completely redo it; but for now, I will concentrate on finishing the display table.  It needs to be flipped over so a coat of polyurethane can be put on the legs on the legs.

Display table
I will focus next week on getting it all together!

Larry