Thursday, July 30, 2015

Dear Jane C-7, Megan's Mountain Laurel - a good beginning

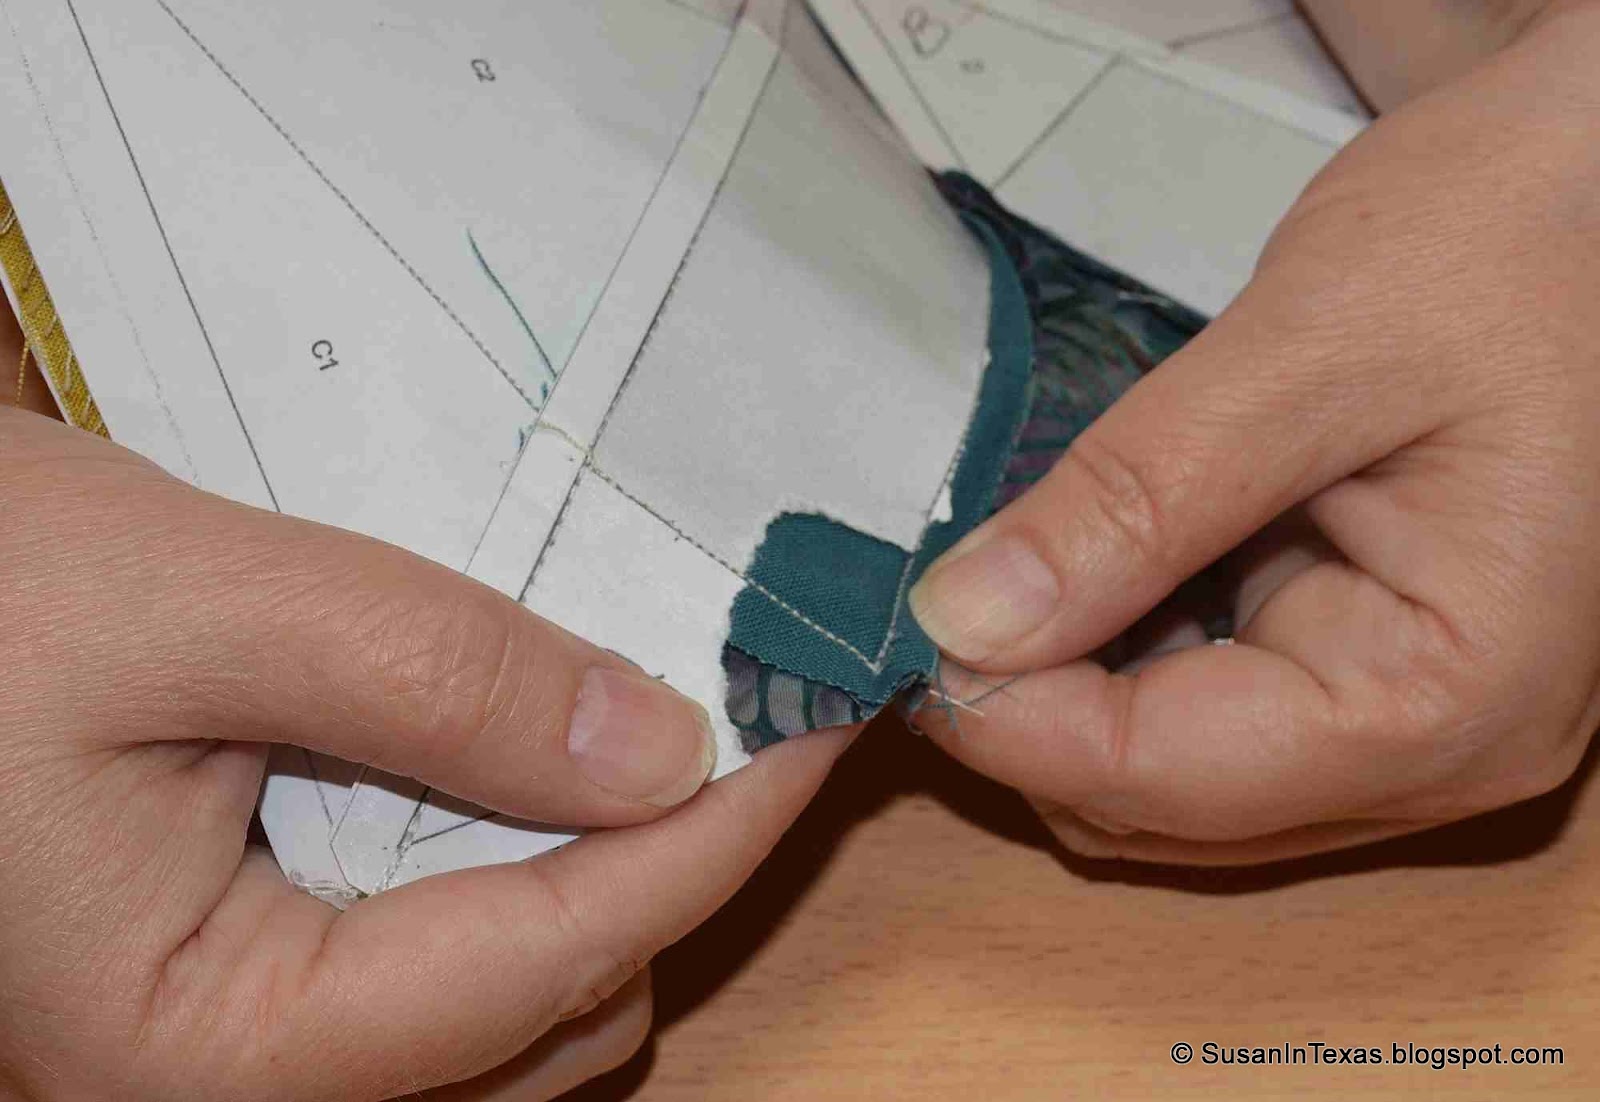
You know it is going to be a fiddly block when getting this much done feels like a big accomplishment.  There are 45 tiny little pieces in Megan's Mountain Laurel, including four tiny little appliqued diamonds.  Megan is going to take awhile!  


I do love the "kite tail" stage. This took so long that my Clover iron got really hot waiting for me.  I had to use a press cloth to avoid scorching the muslin, but on the bright side, these tiny little pieces now lay perfectly flat. :O


And, of course, I just love the batik.  I believe the blue was a recent acquisition last Christmas in Green Bay.  So pretty!

Happy quilting!
Susan

Wednesday, July 29, 2015

Wordy Wednesday: Harlequin Johnny - Conquering Inset Seams, a Tutorial

I am so happy!  I got all 100 inset seams completed on the Harlequin blocks.  All the seams lay nice and flat, with no puckers, and only a few garbled seams on the underside to vex me.

First I removed the paper from the large center square on the block. The inset seams are much easier to align after the center paper is gone, because the blocks move much more freely without it.  I also ripped out paper around the inner point on both the top and bottom of the block to get a clear field of vision.


I swept my finger between the two pieces of fabric to get all the inner seam allowances out the way of the next seam.  I did not do this at first and my previous seam allowances got sewn to the front of the block.  Yuck!  

I then stuck a guide pin straight through the point, just underneath where the two seams came together, making sure to check the back to verify the pin was coming out in the correct location too.


I looked between the fabrics to verify the guide pin did not catch on anything it was not supposed to, and to verify that all the previous seam allowances are well from the next seam.


I placed a pin at the point, right underneath the guide pin, making sure it evenly bisected the angle.  I will start sewing at this pin, so it needs to be as close as possible to the guide pin.  After this pin is in place, the guide pin is removed.


I placed another guide pin at the outer edge of the block and pinned there just as you would for matching any two paper pieced sections. I also placed a guide pin through the seam line at the center of the seam, to make sure my paper pieces are properly aligned, then I place a pin there.  It is really important that the entire seam is properly aligned, and all this pinning really helps to insure that.  


It is finally time to sew the seam.  Place the point directly under the needle.  Sometimes my two previous seams did not quite meet. When that happened, I aligned the needle just behind the pin to avoid having a tiny hole at the point.  When laying the block beneath the needle, take the time to sweep back the seam allowances so they lay flat on the underside.  I skipped this step a few times and some of those underside seam allowances got sewn in all wonky.


With some of the paper gone, use the quarter inch foot to get the correct seam allowance, and aim for the line on the paper.  Always use a leader and ender for this type of sewing, you do not want a thread nest at the point! 


With 100 inset seams on 25 blocks, I got lots of practice in this technique.  It was not as bad as I had feared, and I got very good results when I followed all the above steps.


Now I just have to remove the rest of the paper, iron the blocks and trim them down.  I gave the blocks an extra quarter inch to allow for paper-piecing "shrinkage".  I do not believe I would do that again.  These larger blocks do not seem to experience shrinkage to nearly the degree that that tiny Dear Jane blocks do, and now I have to trim them all down, but that is a task for another day.


Tuesday, July 28, 2015

Tatting Tuesday - Snow Dragon Progress

My new tatting project is a Flying Minor Norwegian Dragon, from a free pattern posted on the internet by Anne Bruvold.  I stumbled across it while I was looking around for animal patterns, and I thought it looked mighty cool.


Flying Minor Norwegian Dragon - Head, Body, and Tail
This is a Snow Dragon, since it is all in white.  The linked pattern also identifies several other color variations, and suggests there might be others not yet classified.

The basic shape of the dragon is very easy to see, from the tip of the snout, down the neck to the rounded body, to the barb at the tip of the tail.  The threads where the neck joins the body are not part of the wings, although they are suggestive of where the wings will be eventually.

Part of the challenge of mastering these dragons is the use of a new (to me, at least) technique, the Single Shuttle Split Ring (SSSR). All the rings of the dragon's backbone are SSSRs. The pattern does not explicitly teach you how to do the SSSR, but does provide a link you can follow to find instructions on how to do it.

I am just starting on the wings, which are started separately and each is joined to the body as you work it.

Soon I should have a Snow Dragon to bring me cool thoughts during these hot summer months!

Larry

Monday, July 27, 2015

Grand Illusion - the Block Building continues

Back to Grand Illusion agan:  I have been broken up the construction of the Grand Illusion blocks into manageable sections.  In the last GI post, I put together the center strip.  This time I did the top of the blocks.  Of course, the tops and bottoms of the GI blocks are identical, so I was able to make up ten blocks and five half blocks on the design wall.  The rest of the strips are just grouped in a jumble below the blocks.


I will spend another session putting together the lower strips of the block, and then another session assembling the blocks.  Only then will I finally get to play with the green sashings.  It is hard to believe that yet another color gets thrown into this mix.  I wonder if a thread color exists that would help to tone this wild child down - maybe grey?

Sunday, July 26, 2015

Six on Sunday - Week 11

While cleaning out our coat closet, among other things I found a collection of dog collars and leashes.  Since we no longer have any pets, we really don't need this many collars and leashes, so we decided to let most of them go.
  
Twelve dog collars and leashes - 4 pounds
I think I will take them down to the local animal shelter, although I fear they will try to get me to take a pet home with me!

Larry 

PS  What Larry doesn't say is that we used to have three dogs, including a Saint Bernard.  His collar was the large red one in the upper left corner.  He was the reason for the extra sturdy red leash! I still miss him, but he has been gone for over 18 years now, so it is probably time we cleared out his stuff.

Saturday, July 25, 2015

Singer Restoration Saturday - Return to Model 66

With the restoration of Dollie's case completed, it's time to return to the Model 66 (no nickname at present). I had started to disassemble it for cleanup and refurbishment (as the one in the next worst condition) when I switched to work on the other Model 127 ("Pearl").

Model 66 Case
The paint had definitely suffered from its previous use and storage, and almost all the decals have been worn off the bed.  After removing a few more parts (like the brass Singer logo plate, and the rest of the needle rod), the body will be ready to be stripped for repainting.

Model 66 and parts removed
And, as you might expect, there are a lot of parts that need to be cleaned and de-rusted. 

I re-wired the electric motor, control box, and light, since the original wiring was falling apart.

Model 66 re-wired electric motor and light
This machine also came with a cabinet (as opposed to a treadle table). As you might expect, it is in poor shape also.

Model 66 cabinet - front view

The veneers are all peeling off, and the exposed wood is weathered and warped. The lid seems to have been closed and provided some protection, but the rest looks like it was exposed to the elements for quite a while! You can also see the knee lever for the motor controller (hanging down under the drawer). The controller would be mounted on the right side inside the cabinet.

Model 66 cabinet - rear view - closed
The two pieces of wood resting on the top are the back pieces of the lid and top, which have come loose.  You can see the lid support arm, which swings out when the lid is opened to help hold up the weight of the lid.

It looks like a pretty big job, especially the cabinet! I will get to try out some new techniques with it!

Larry

Friday, July 24, 2015

Dear Jane C-6 Ashley's Aura Progress to Completion

Ashley's Aura seemed like it would be simple enough to applique. So, instead of dealing with all those curved seams, so I did it that way. Except for getting the melons sized correctly and placing them just right, this was not a difficult block.


I basted the pattern down to assist with placement, just like I did for Eye of the Cyclone.  It only takes a very few minutes to baste down the paper, and you make up the time later because everything comes together so smoothly.  I had very little excess of this batik, so I had to be careful with placement; basting helps with that too.


After basting down the pattern, I basted down the melons.  This was where I learned that some (most) of my prepared melons were a bit too large due to poor ironing at the points.  I corrected the points as well as I could, then basted the melons in place.  The actual applique was a breeze after all this preparation.


This is by far the most intensely colored Dear Jane block I have made.  It really stands out in its place on the design wall.  Some of the other fabrics in my batik stash are almost this bright; I will have to make sure to use plenty of them so Ashley's Aura does not become known as Ashley's Angry Aura!

Thursday, July 23, 2015

Harlequin Johnny - All Done except for the Inset Seams

All twenty-five Harlequin blocks are done, except for the very hardest task - those pesky inset seams! Some people recommend that all the paper be removed prior to attempting the inset seams.  I can see where they are coming from; however, I still have to trim the blocks down, and I would like the paper on for that.  Maybe I should just remove the center paper now since that is the part that inhibits folding to complete the inset seams.


I think I'll do the sensible thing, take out the center paper, and then try sewing the inset seams a few different ways until I hit on the one that gives the best results. I wonder how long that will take?  I have done six of them so far, and they seemed to take forever - only 94 to go.

Wednesday, July 22, 2015

Tuesday, July 21, 2015

Tatting Tuesday - Multicolored Bookmark completed, Handkerchief Edging Progress

The completed Beginner's Bookmark, with minor modifications:
Multicolored Beginner's Bookmark

The multicolored thread really makes this a fun item.  We tried a number of ribbons from Grandma's extensive collection, but the white worked best, making all the colors pop out brightly.
On the hankie edging front, I stopped when I thought I was a few rings short of having enough to finish.  I expected to have Susan stitch the edging to the handkerchief until she got close to the starting point, and then I could see exactly how many more rings to make.  But when I checked with Susan, she was afraid I had made too much!  

Grandma's (and my) Handkerchief Edging
Susan says when she stitches the edging down, she will try to space the rings the same as Grandma's, so we will see how much the edging stretches around the hankie.

Larry