Sunday, August 9, 2015

Six on Sunday - Week 13

We have made it to Week 13! A whole quarter of a year, pulling out a few items a week that we don't need to keep, and getting them out of the house.  So far our closets have been the main beneficiaries, but other rooms are beginning to benefit as well.

Susan continues to work through the clothes in her closet, looking in a box of older things tucked away. She has now managed to consolidate two boxes of clothes down to one, so that's one less box taking up room in her closet.


Six tops and shorts - 3 pounds
Some of these things were old favorites, and been worn until they were almost worn out.  And one had never been worn, never even had the tags removed! I guess this is one time I bought something for Susan, and she didn't really like it, but it never got returned for a refund.

Larry is cleaning out the cabinets in the master bathroom, and moving on to find things in other rooms as well.


Bag of expired meds, two free totes, old exercise program, old CD player, old pair of socks - 5 pounds
The medications in the bag were all expired, or boxes that were emptied and consolidated with another (who needs a box for 2 band-aids?). The free totes were sent unsolicited by various charities in their requests for donations. We tried the exercise program, but found it to be too vigorous, too hard on our joints. And I rarely wear brown socks; they just don't go with the pants I usually wear - black slacks, or jeans, or shorts.  In fact, the brown loafers that I've had for many years (because I wear them so infrequently they never wore out) have become my painting shoes, just so I can get some use out of them!

Larry


Saturday, August 8, 2015

Singer Restoration Saturday - Cleaning up the rusty parts

To remove the rust from the parts removed from the sewing machine (especially the visible ones), I soak them in a vinegar bath for a couple of days.  This converts the insoluble red iron oxide (rust) into (more) soluble black iron acetate, which can then be scrubbed off more easily.

I start with the parts in a plastic bin:


Parts ready to be de-rusted
I then pour in enough vinegar to cover the parts.  If you do this a lot, you may want to start buying the gallon jugs of vinegar.

After soaking a couple of days, the parts are ready to be scrubbed down.


After soaking
Some of the color in the vinegar is because I used some cider vinegar to top off the bin, but most of it is from the converted rust and grime from the parts.

Next I take an old toothbrush and scrub off the remaining black stuff from the parts.  A sink with running water is the best place for this.


The cleaned up parts
You can see some of the parts, like the long feed dog rod, still has a rusty look to it.  As an internal part, the look is not so important, but you might want to give it a wipe with a bit of oil to keep the rust away.

The balance wheel's rust has been removed, but the areas that were rusty have still lost their paint.  I suspect the whole wheel will need to be stripped and repainted (and the pitted places on the rim smoothed out).

The most improvement comes in the chromed external parts.


Before
After


This is a now a faceplate that would dress up a sewing machine.

Larry


Friday, August 7, 2015

I Dream of Baltimore Beauties

One of my dream quilts to make is a Baltimore Beauty.  Who can resist their gorgeous designs and luscious applique?  Not me! There are wonderful resources available, Elly Sienkiewicz comes immediately to mind.  I have several of her books and they never fail to get my creative juices flowing.  Then reality takes over, and I remember all the quilts I have started that take up all my limited free time.  That doesn't stop me from planning ahead though.


See, there is this gorgeous place in Green Bay that would make a terrific subject for a quilt in the Baltimore Beauty style.  So much so, that I wonder if anyone has ever done it before.  It is called Heritage Hill.  It is a lovely historical park, with dozens of antique structures, most of them restored originals from the early days of Green Bay.


Larry and I had a lovely day there in September of 2013.  It was raining on and off, and only about 51F, so we had the place almost all to ourselves.  We walked and walked, getting a little wet, but taking dozens of pictures.  I spent the whole time imagining the quilt I would make in my head.  


So much architectural detail to choose from.  Including the Cotton House, the Belgian Farm House and the Moravian Church in the quilt are no-brainers, but what about the Bark Chapel?  Where does one draw the line?  It would certainly be a puzzling inclusion to anyone unfamiliar with Heritage Hill!


Anyway, all I have so far are pictures and a dream.  I cannot even decide how I want to place the blocks.  And I still have not decided about the Bark Chapel.

Thursday, August 6, 2015

Leaders and Enders - Lots and Lots of Half Square Triangles

This is the first time I have revisited my leaders and enders project in quite a while on the blog, and has the stack ever grown.  I have 946 half square triangles made up already.  I need (at least) 1024, so I am closing in on my goal.  I start with two 3" squares, which make two 2-5/8" HSTs unfinished, which end up as two 2-1/8" finished squares after they are sewn together.


Interest in leaders and enders is surging over in Bonnie Hunter's Quiltville, where there is a tumbler challenge just beginning.  If you are not doing leaders and enders, you should consider joining that.  Leaders and enders are a terrific way of 1.) getting lots and lots of units done with very little effort, 2.) a great way to save thread since there is always something under your needle, 3.) a wonderful way of using up small scraps of fabric. 


Each of my HSTs start with one square of black toned fabric and one of something very bright for contrast.  According to Larry, who did the big "counting" last night for me, I now have:

      • 63 pink and black HSTs
      • 150 red and black HSTs
      • 96 orange and black HSTs
      • 95 yellow and black HSTs
      • 158 green and black HSTs
      • 210 blue and black HSTs
      • 74 purple and black HSTs
      • 100 multi-colored and black HSTs

I will have to be careful from now on or I will overshoot my goal of 1024 units.  After I have 1024 HSTs, I will be sewing them into four patch units.  It won't be long now!

Wednesday, August 5, 2015

Grand Illusion - Nearly Wordless Wednesday

Only fifty more seams and all twenty-five blocks will be fully constructed.  It might take me more time to decide what goes where, than to actually sew the seams.


I think I am starting to like it.  It is so vibrant!

Tuesday, August 4, 2015

Tatting Tuesday - Snow Dragon Progress

Last week I had finished the body of the Snow Dragon from the Flying Minor Norwegian Dragon patterns, and I was looking forward to completing the wings and putting it together. Unfortunately, I haven't gotten very far on the wings.


Snow Dragon Wing (started)
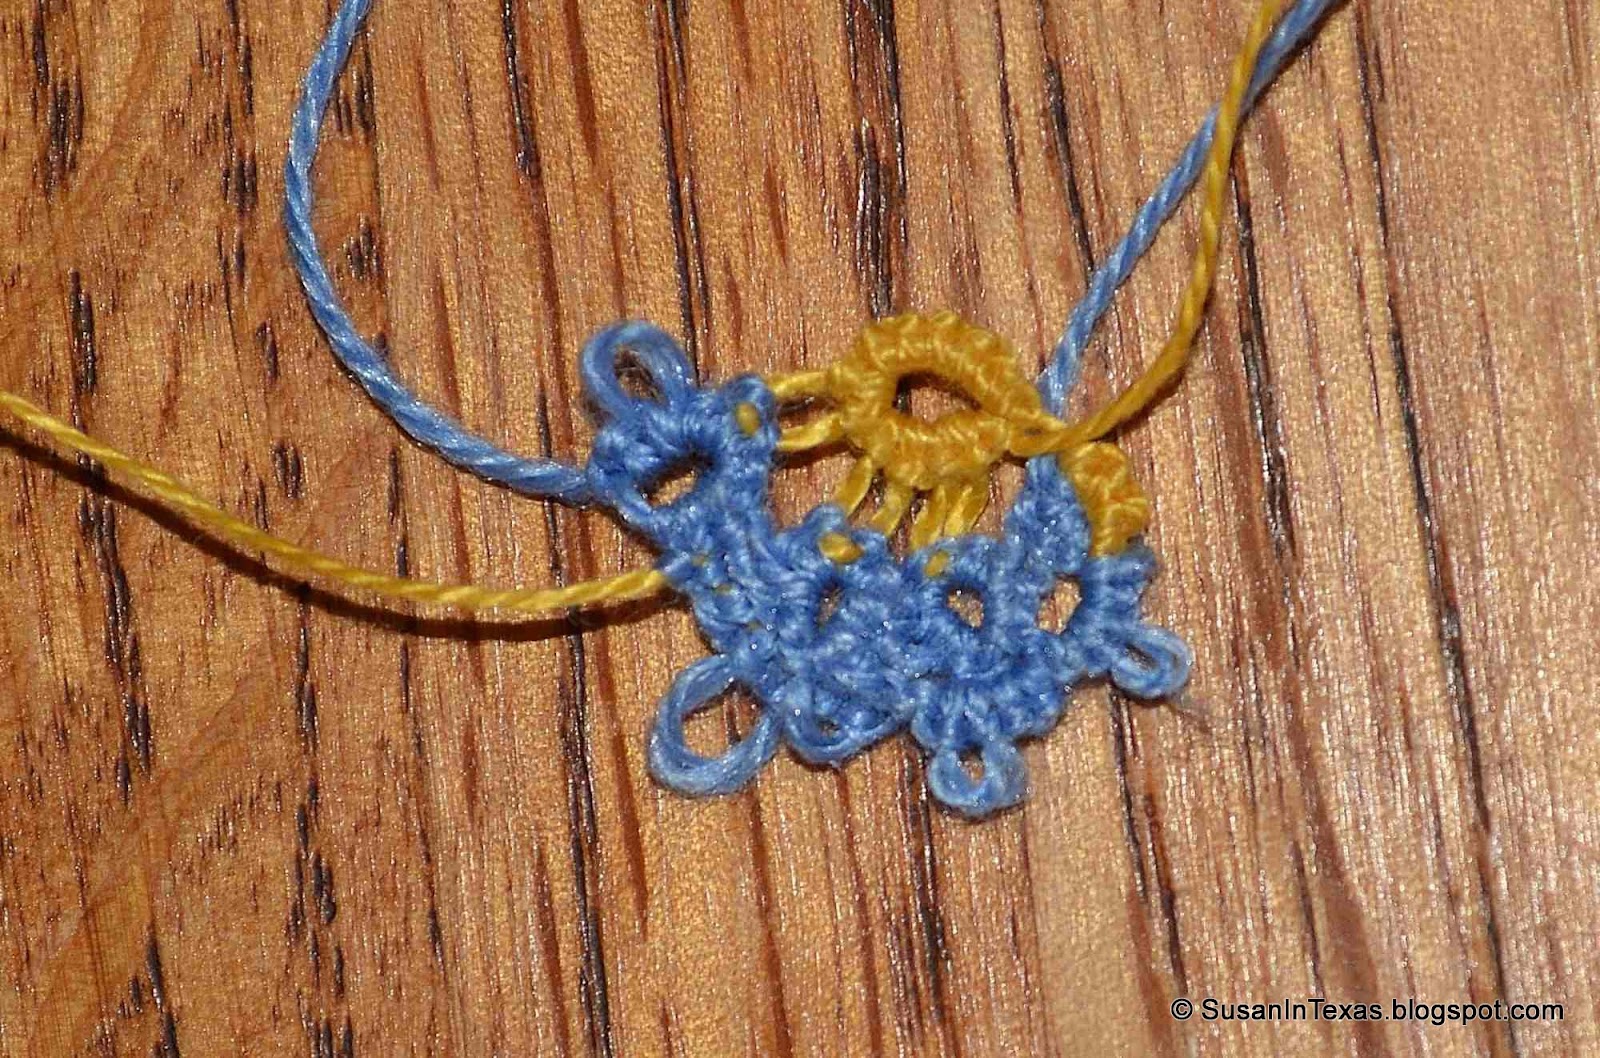
I found out that these dragon wings are very complex, working with two shuttles and making rings, chains, and split rings with both. It is especially hard to keep straight when worked in the same color thread. I have started working a test piece in different colors so that I can see better how the different threads work together.


Dragon Wing Test
From the pattern, this is how the wing is to start, with the upper ring and the outside half of the split ring (on the right) in one thread (that is, from one shuttle), and the rest of the row worked from the other thread (from the second shuttle).  Then it gets really complicated.  

I think I am going to have to work out how to break the pattern down even more, so that it tells me not only what stitches to do, but also which shuttle to do them with.

Larry


Monday, August 3, 2015

Dear Jane C-7, Megan's Mountain Laurel Completed

I finished Megan's Mountain Laurel.  I love how the paper-piecing came out, but the applique is only OK - those extra sharp points are a bear to get perfect.  Clocking in at 45 pieces, this block took some serious time to complete.  I finished the paper-piecing on Friday, prepared the applique on Saturday, then started working on it Sunday at the Blanketeer Bee.  With those sharp points, I should probably have attempted reverse applique, but all my previous attempts at reverse applique have turned out just awful! 


The next few blocks in Row C are much simpler than "Megan." What a relief!  Looking at it objectively, the case could be made that Row C is one of the most difficult rows in the entire Dear Jane quilt.  Sure, it does not contain "Papa's Star", but Row C is full of blocks with pointy appliques, and lots of complex paper-piecing - sometimes on the same block.  It makes me look forward to D-13, everyone's favorite siggy block.  

Six on Sunday - Week 12

This week we are finishing up with the pet equipment from the coat closet, plus some clothing from a storage box in Susan's closet.


Tops and sweaters, an old electric toothbrush, a dog sweater and dog collar,
set of eyeglass cases - 8.5 pounds


Saturday, August 1, 2015

Singer Restoration Saturday - Preparing Stencils and Cleaning Parts

Last week, I was only needing to get a few more pieces of the Model 66 I'm working on, and I could start stripping the head.  I wound up having to get a new screwdriver, one with a narrow enough head to fit through an access hole in the back of the faceplate area, and short enough not to bump into the arm with the handle.

My other screwdrivers were too wide or too long
Now I just need to get the brass Singer badge off the side of the arm, and I am ready to strip off the paint.  I will have to reach in and straighten these pins so that I can pull them out and release the badge.

Not as badly bent as in a Model 127
And, of course, there is the cleaning of the parts I took off.  A little scrubbing with soap and water and a toothbrush really makes a difference.

These two parts used to look the same
And finally, I am trying to work with stencils, rather than decals.  I have captured a photo of the Singer logo on the arm, and will try to 
use it as a stencil when repainting it.


That's all for now!
Larry

Friday, July 31, 2015

Friday round-up: Crocheting, Tatting and Knitting

Grandma has been on baby jacket kick again, so I have brought her latest creation home to complete the fancy edging.  She does not like to do that part anymore!  I don't mind; this is the yarn we gave her at Christmas, and it is very soft and lovely to work with.


Larry has completed the tatting for this handkerchief that Grandma started.  His tatting has gotten so good!  The only difference I can tell between his tatting and Grandma's is that his rounds are a bit further apart from one another.  I will have to mind my stitching to keep the rounds the same distance apart on the hankie. Constant vigilance!  lol


I finally finished the scarf I have been working on at Grandma's place.  The skein seemed to be endless.  There was a large, poorly handled knot towards the very end of the skein.  I decided that was a sign, and ended the scarf before I had to deal with the knot.  It is certainly plenty long.


We are having a bee this Sunday.  Perhaps I can finish edging the baby jacket and the hankie there, then I won't have to schlep my sewing machine along with me.

Happy stitching,
Susan in Texas