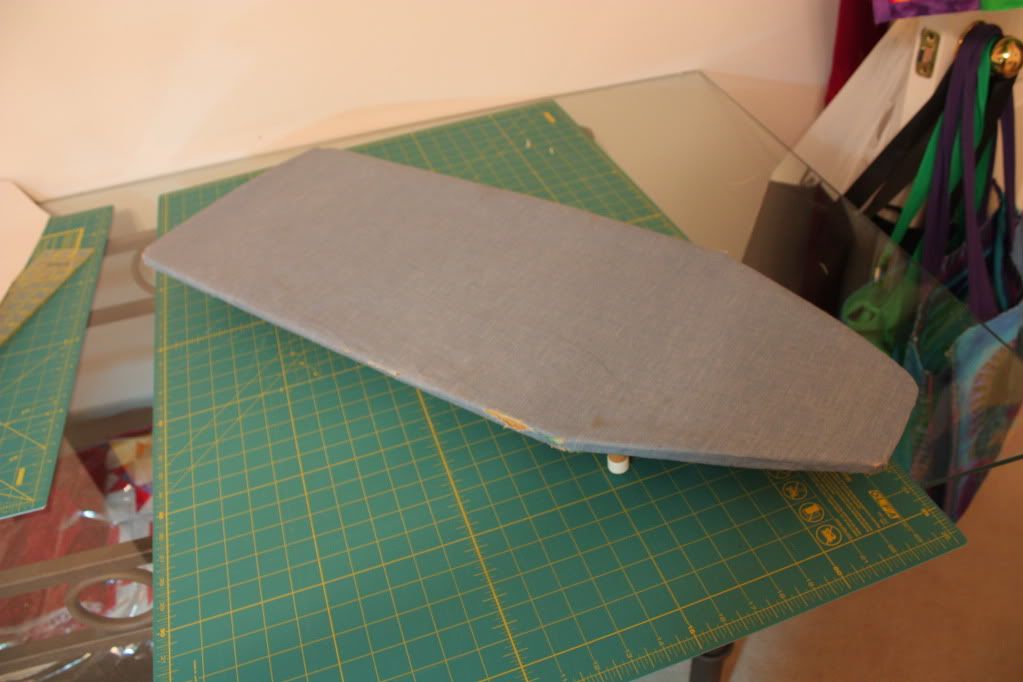
 It was dirty and in sad shape, but I thought I could easily fix it.
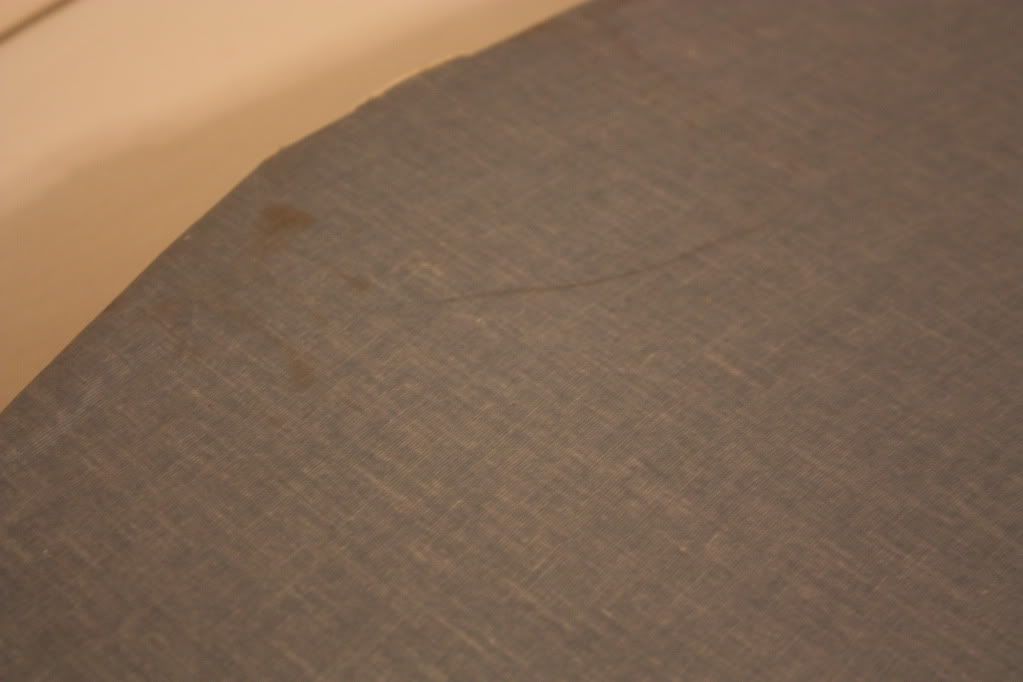 So a mere 13 years later, I got right on it! Larry & I consulted our handy Feng Shui guide, so that a "bad element" wouldn't accidentally be introduced into the "creativity corner" of the sewing room. 8) We decided that a pretty yellow and blue floral couldn't possibly have any "bad vibes".
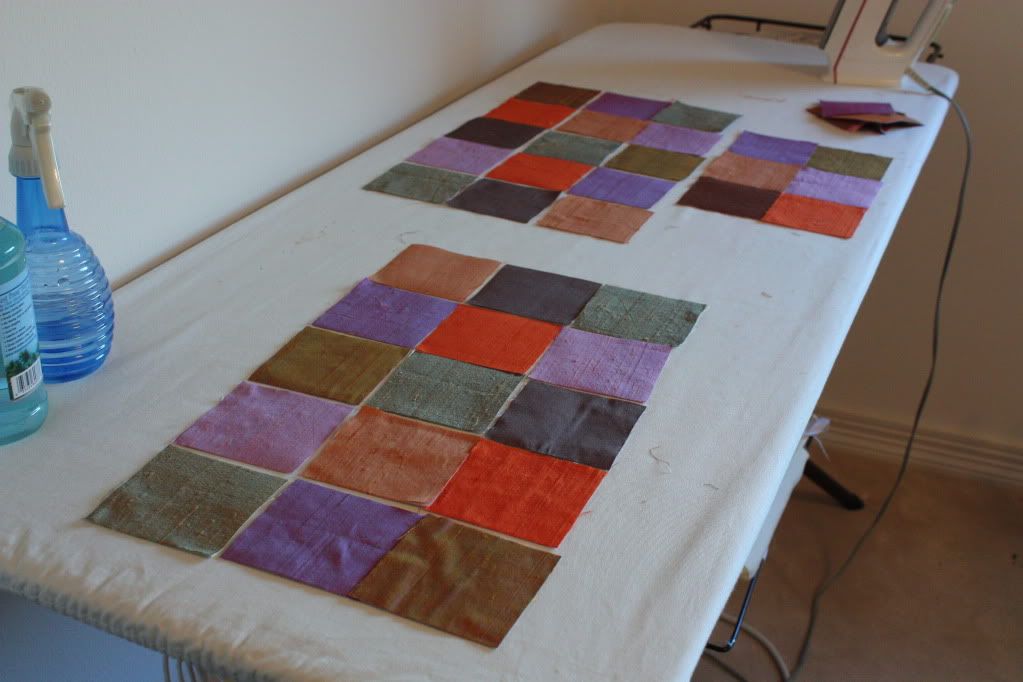
 I made a paper pattern about 3" bigger than the top of the board. I pinned the pattern to the back of the floral cotton and rotary cut it out. I used a bit of cotton batting and pinned all 3 layers together, then rotary cut that out too. I added some old muslin for the bottom layer so I now had a quilt sandwich. I then removed the paper pattern and serged all three layers together. OK, this was NOT the genius idea I thought it would be. Despite ample pinning, my "sandwich" slipped all over the place. I had to stop after serging one side, smooth it back down again, then serge the other half. Despite my best efforts, the muslin bulged. Most annoying! I decided to just smoosh the excess under the cord channel and carry on. So I did.
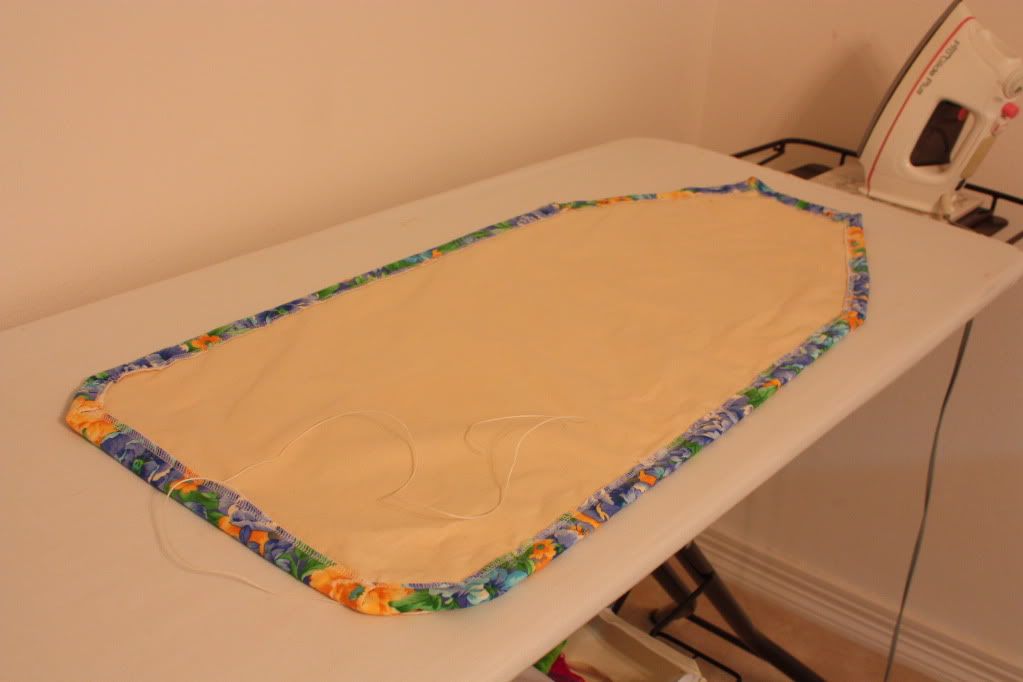 Using my walking foot, I sewed over the serged line, leaving a 1" channel for the cord, with a 3" hole to start and finish. You better believe I back stitched like fury to reinforce the edges of that hole! I knew I was going to have to pull like the dickens to get this thick wonky cover to lay flat on the board.
 I threaded some kitchen twine on a big plastic needle and pushed it all around the thick channel. Very tiring for the hands that! I pulled and I tugged, then I pulled some more, and finally made a knot. Now it lays nice and flat. I left plenty of extra cord so if I ever need to wash it, the cord won't get lost in the channel.
 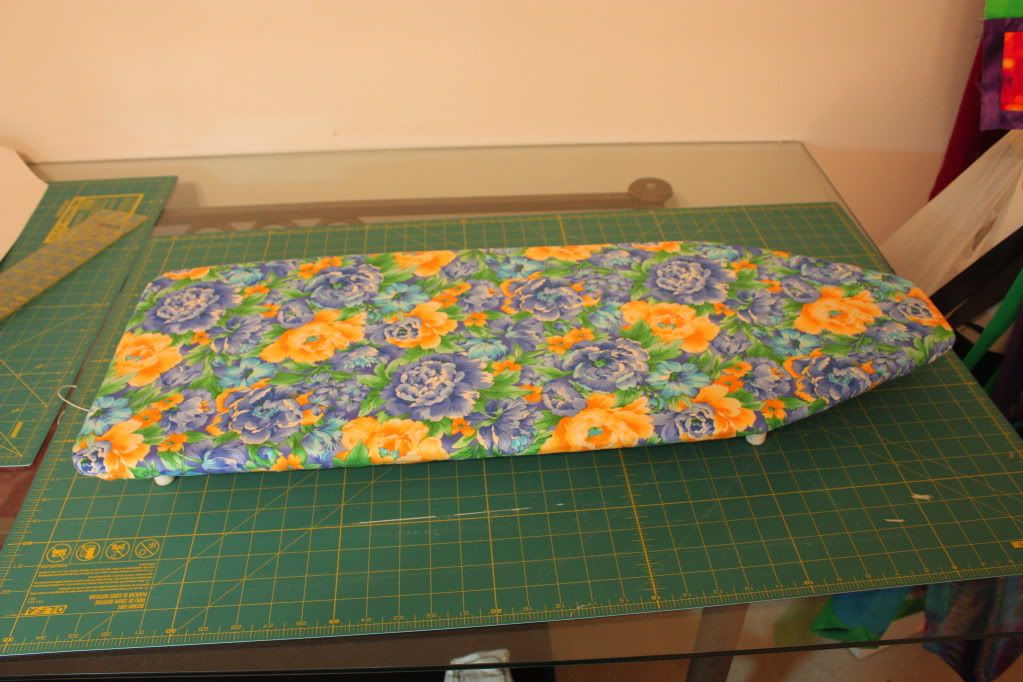 It looks lovely against the wall, which is where it will be 90% of the time (or more). It sure is more attractive now than with the dirty old cover. And it only took me 13 years. 8)