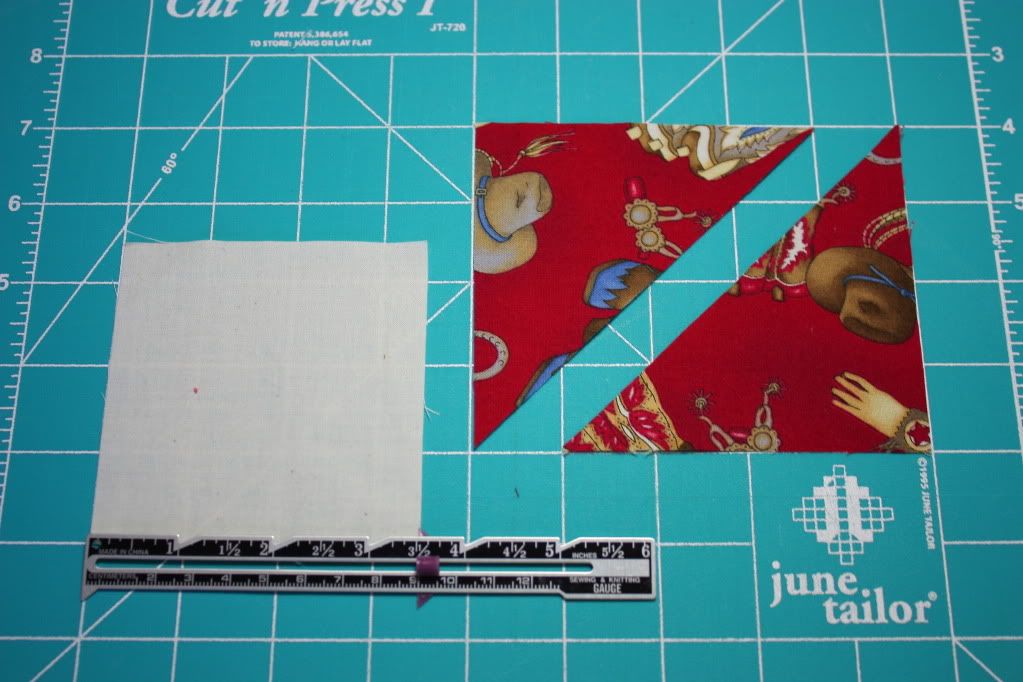
 Decide how many siggies you want to make and cut out that same number of 3.5" squares of muslin fabric. You can get about 110 centers from one yard of muslin.
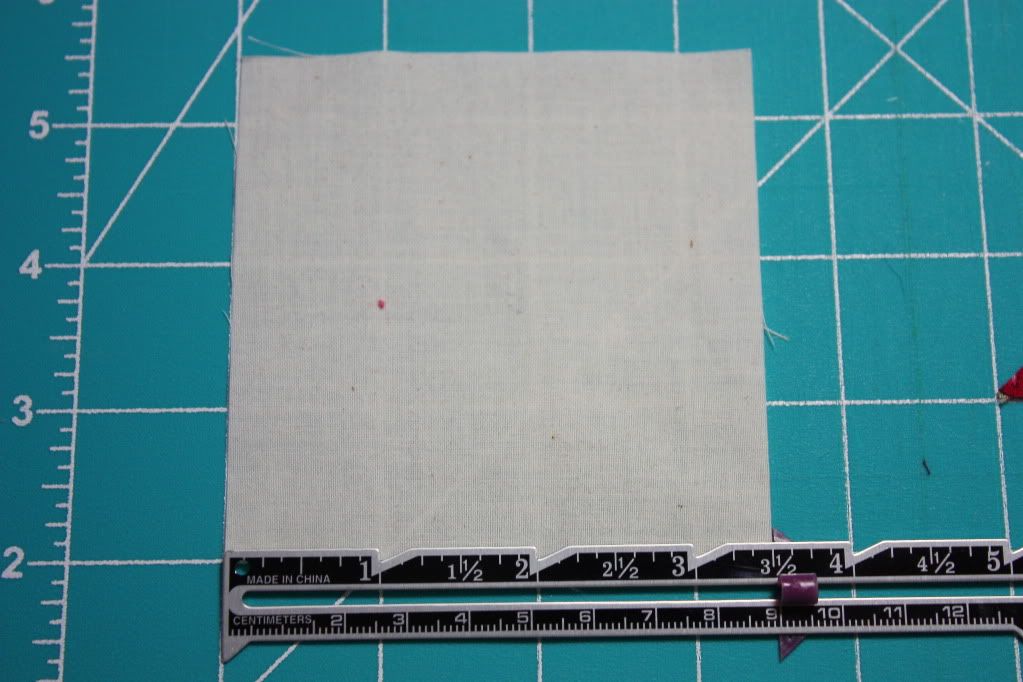 Cut twice as many 4" squares of patterned fabric and cut them in half once diagonally. You can get about 90 squares from one yard of fabric, which is enough for 45 blocks.
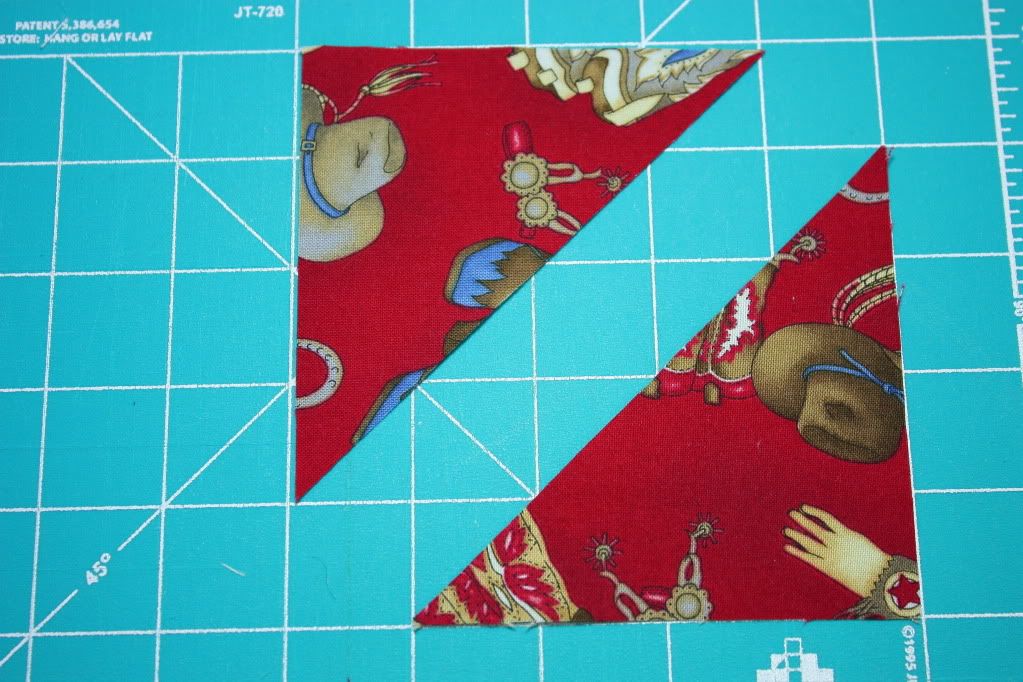
To make the template, use your quilting ruler to draw the two outer vertical parallel lines 3.5" apart. The length of the lines isn't critical, mine are about 3" long. Connect the two lines with a horizontal line about 1" away from the edge of the plastic. Mark two dots in line with the connector, about 1-1/16" to either side of the vertical lines. Draw a center line parallel to the vertical lines dividing the space exactly in two, 1-3/4" from either line. Make this center line about 4" long. Place a mark on this line a bit more than 2-3/4" down from the connector. Finally, mark 2 lines 1/4" in from each of the vertical lines, from the connecting line to the edge of the plastic.
 I drew the positioning lines directly on the plastic template, then taped a piece of paper to the back so the lines would show up better. You could also draw the lines on paper; the plastic is just more durable.
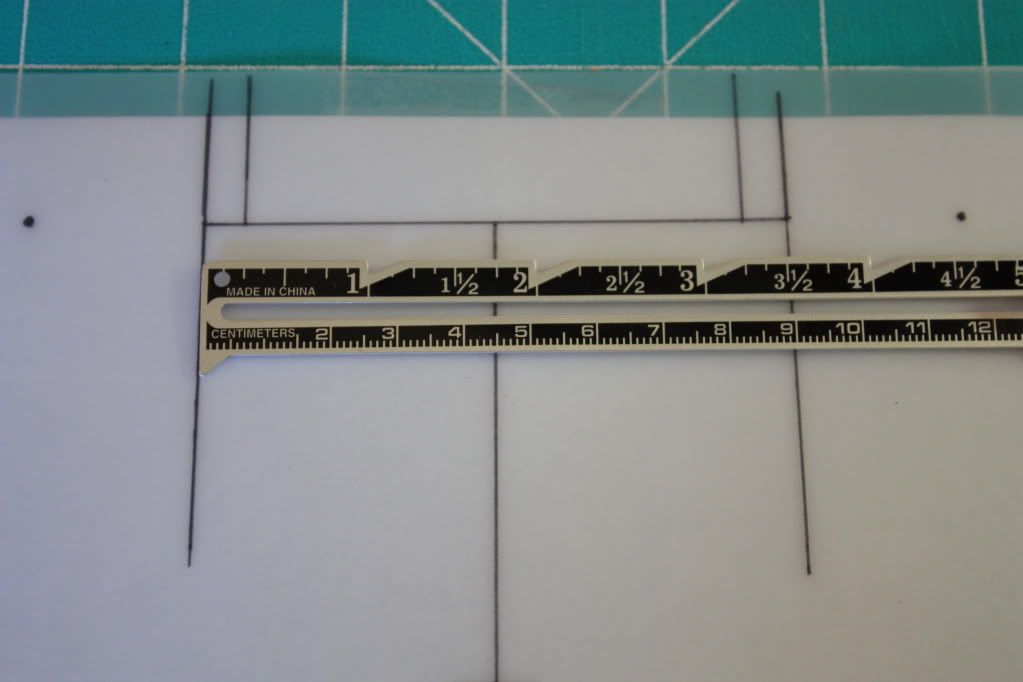 This is how to use the positioning template: Place a triangle right side up on the template along the connecting line, with a point on either dot. Make sure the tip of the triangle lines up along the center line. Here you can see the mark you made on the center line; it should be pretty close to the tip of the triangle.
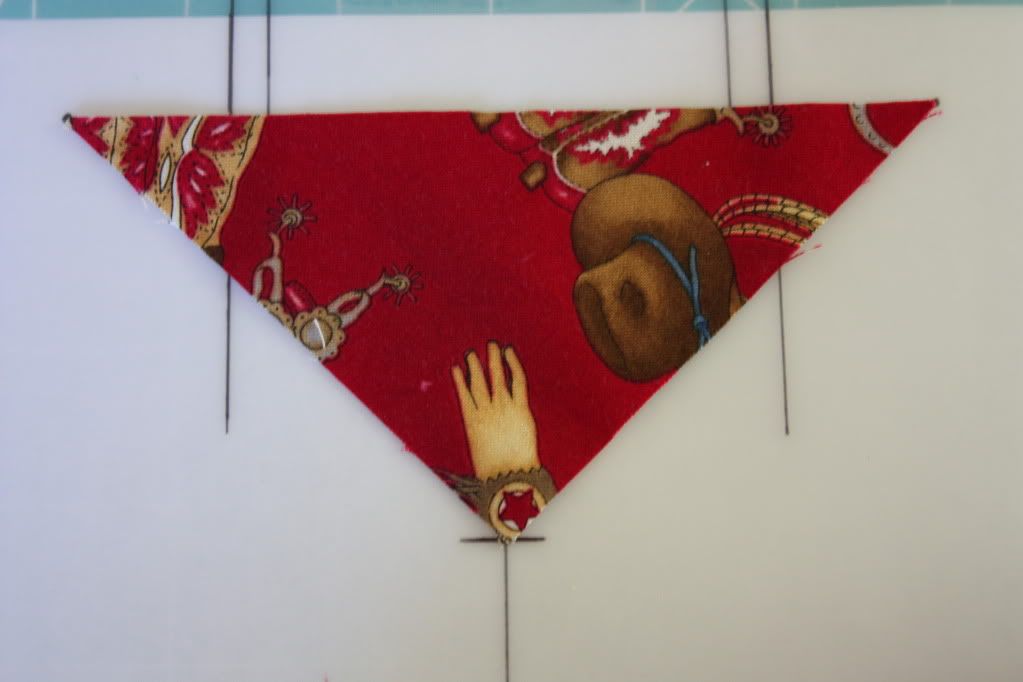 Hold the triangle in place with your baby finger and forefinger while you place the muslin center on the triangle.
 Carefully align the muslin between the outer two vertical lines. The edges of the two fabrics should meet along the connecting line. Ignore the inner vertical lines for now.
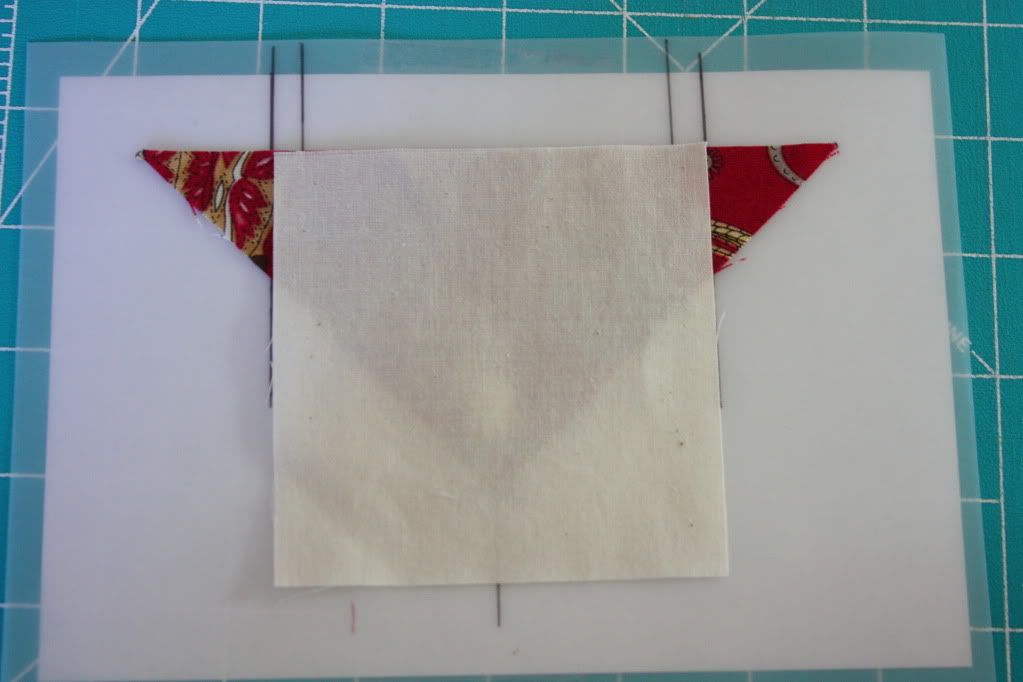 Rub the two fabrics together a little to get them to meld with each other. Pile them gently to the side near your sewing machine. They stay together pretty well, especially if you are gentle and don't flip them over.
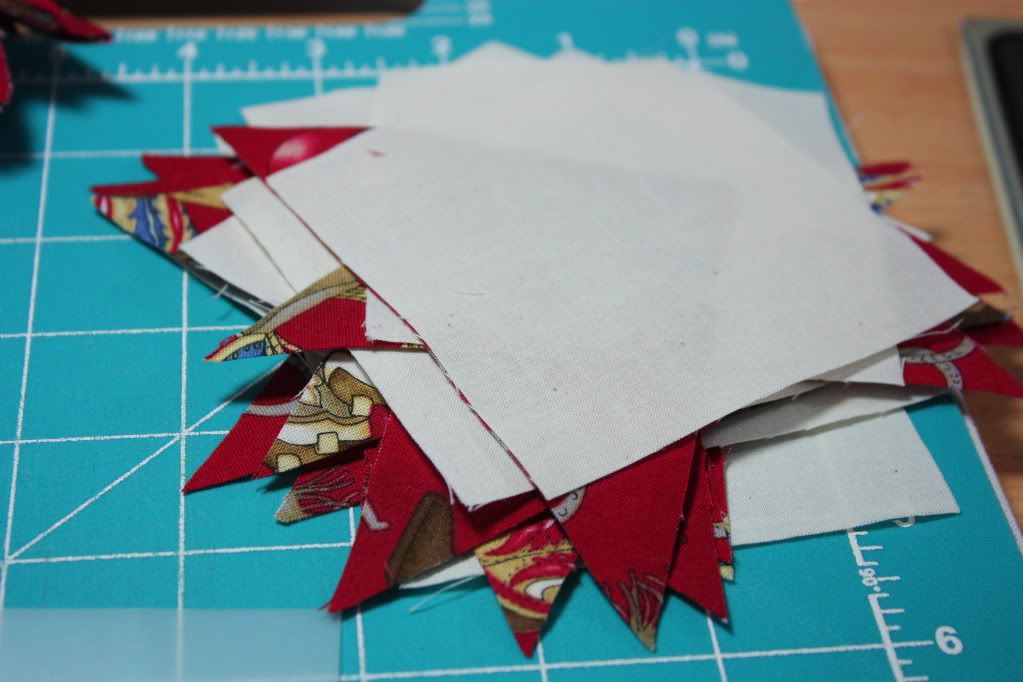 Inspect the edges of each pair to make sure they are closely aligned, then chain sew the pairs together. I always start and end sewing on a bit of waste fabric. This avoids thread nests on the siggies and keeps all the long thread tails on the waste fabric. Raise and lower the presser foot between each pair to keep the seam a nice 1/4". Don't rush! Slow and steady wins the race.
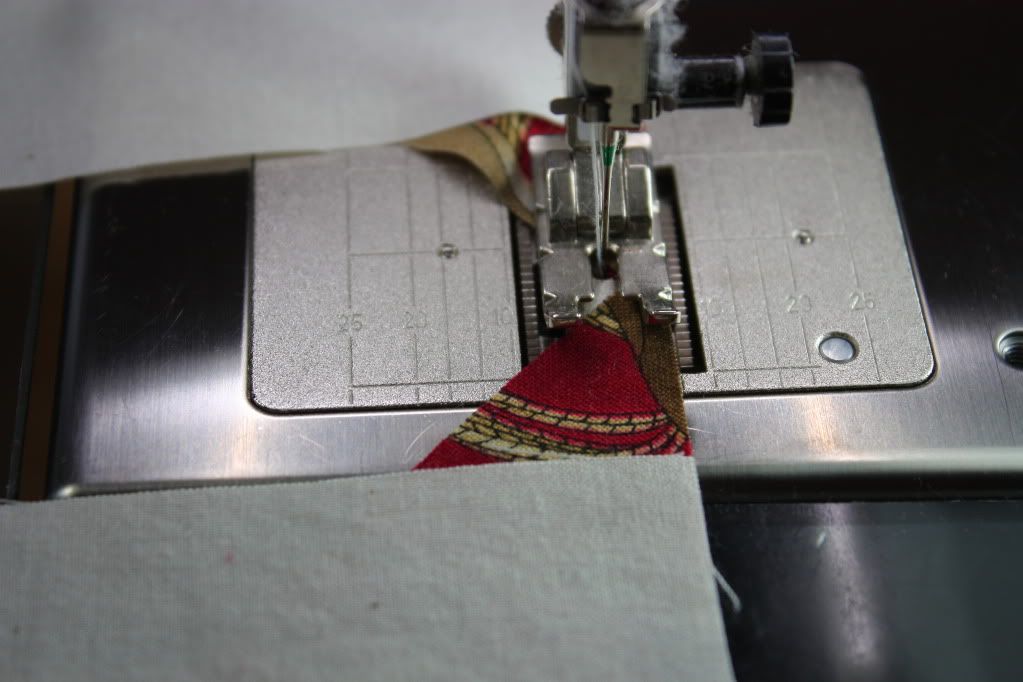 When all your pairs have been sewn, finish sewing with the waste fabric, then snip the pairs apart. Line the pairs up on the ironing board triangle side up. This way the seams will be ironed towards the darker fabric. Iron with right sides together first to meld the seams. I always use a dry iron, no steam.
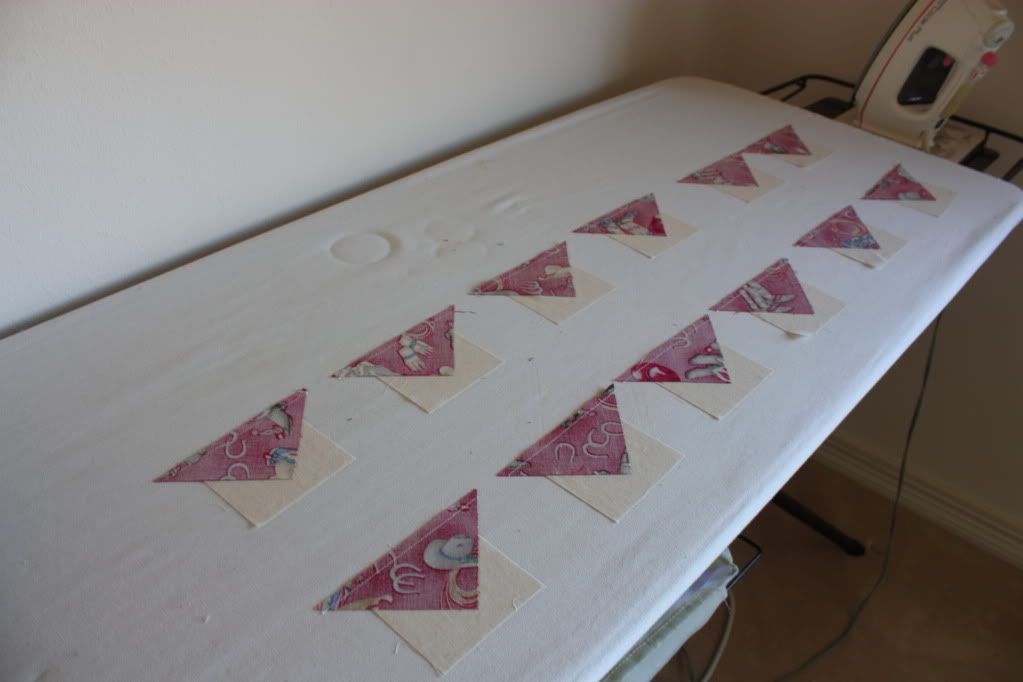 Finger press a seam, then iron it, making sure to get a clean seam. Normally I let the iron sit on the previous pair while I finger press the next pair. I don't worry too much about ironing the ends perfectly, but I am careful to get a nice clean open seam. I hate it when the patterned fabric gets sewn in with a tiny fold next to the seam. Yuck!
 To sew the second corner on, place a triangle on the template exactly the same way as before, with the tips on the dots along the connecting line and the point on the center line at the mark.
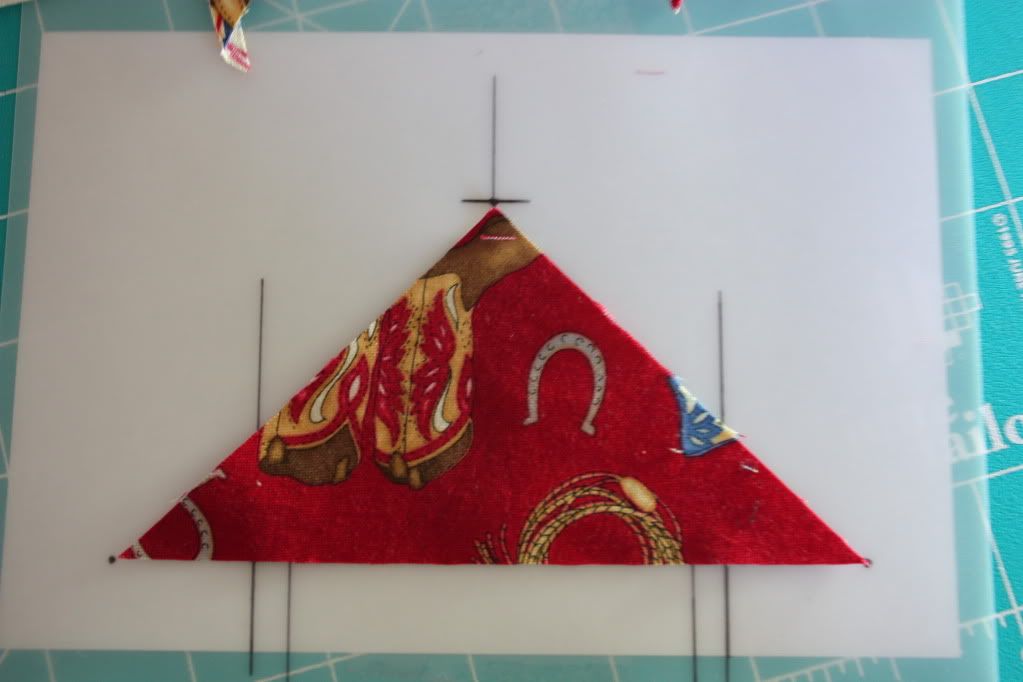 Attach the opposite corner by placing the sewn pair on the triangle face down. The unsewn edge of the muslin should line up between the outer two vertical lines and along the connecting line just as it did for the first corner. Continue to ignore the inner two vertical lines.
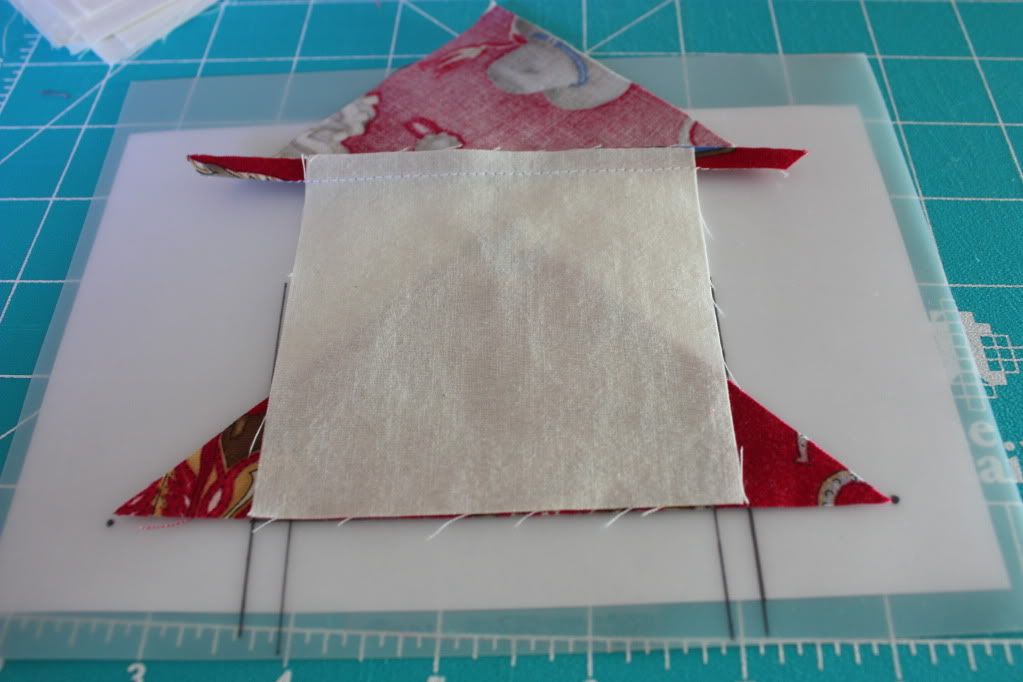 Chain sew the opposite corners to the sewn pairs using waste fabric to start and end your seam. Snip the sections apart and line them up for ironing with the original corner face up and near you. Meld the seams, then finger press and iron each seam.
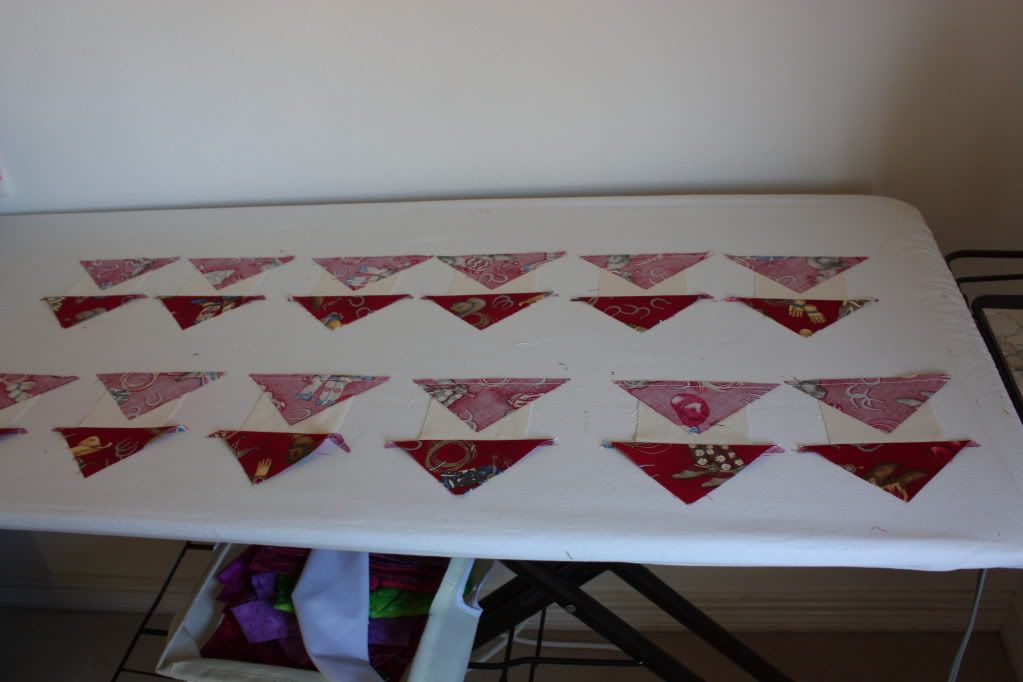 The sections should look like this when they are all ironed:
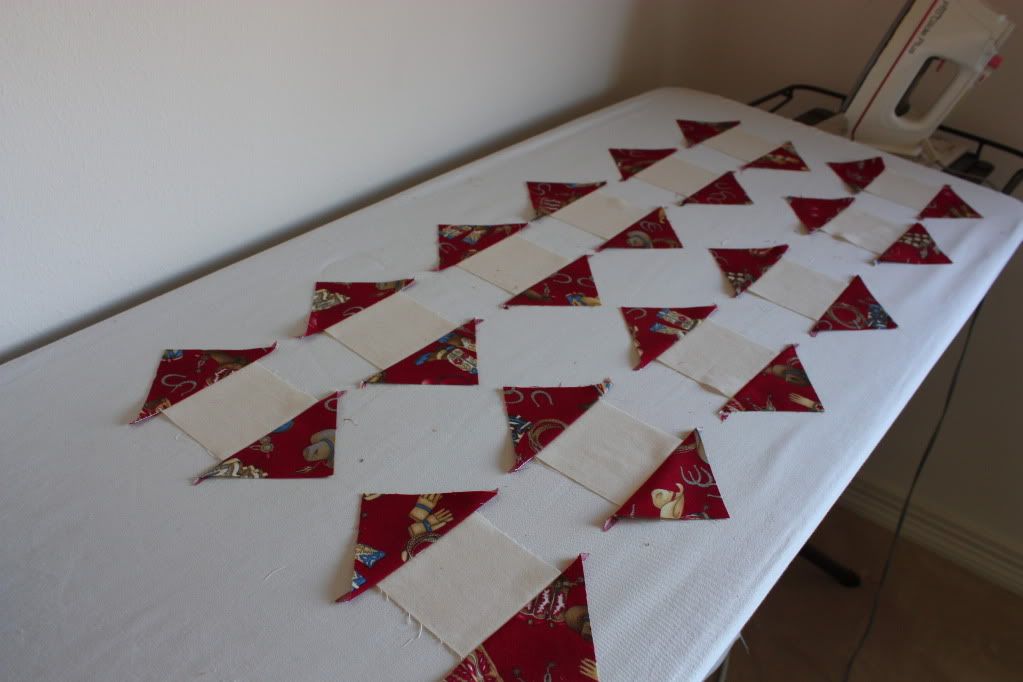 Begin to attach the third corner by placing a triangle on the template exactly as you did for the other two corners, tips to dots along the connecting line, with the point on the center line at the mark.Now it's time to use those inner vertical lines that we have been ignoring until now. Align the seams with the inner vertical lines, while still matching the edges along the connecting line. Here is my husband carefully holding up the tips of the existing corners so you can see how they line up with the inner vertical lines.
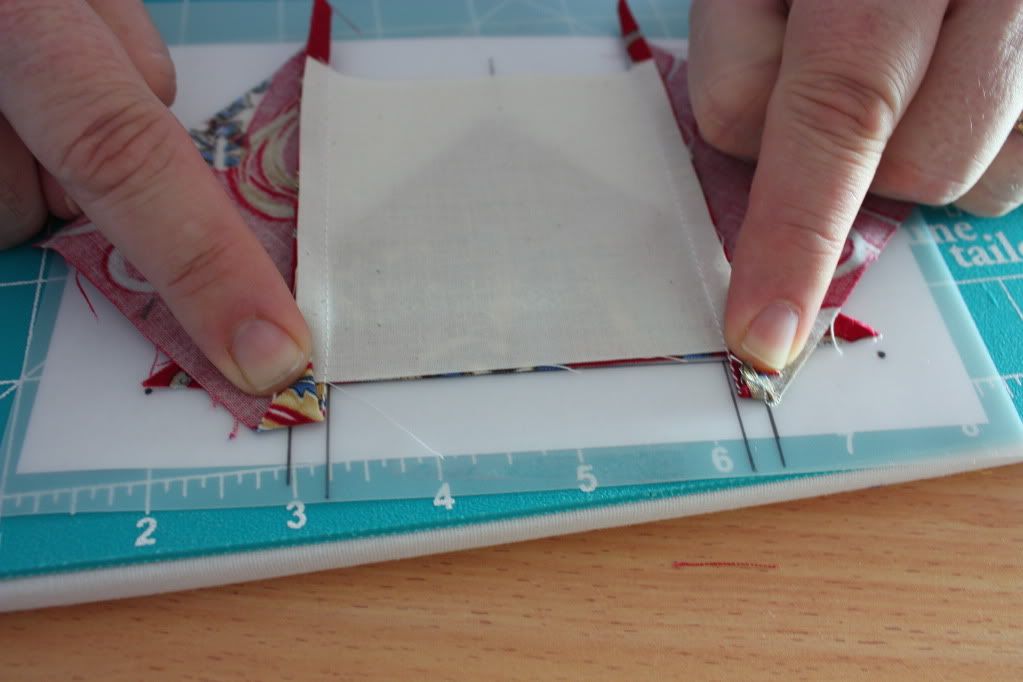 This set is perfectly positioned and is all ready to be gently lifted up and set aside.
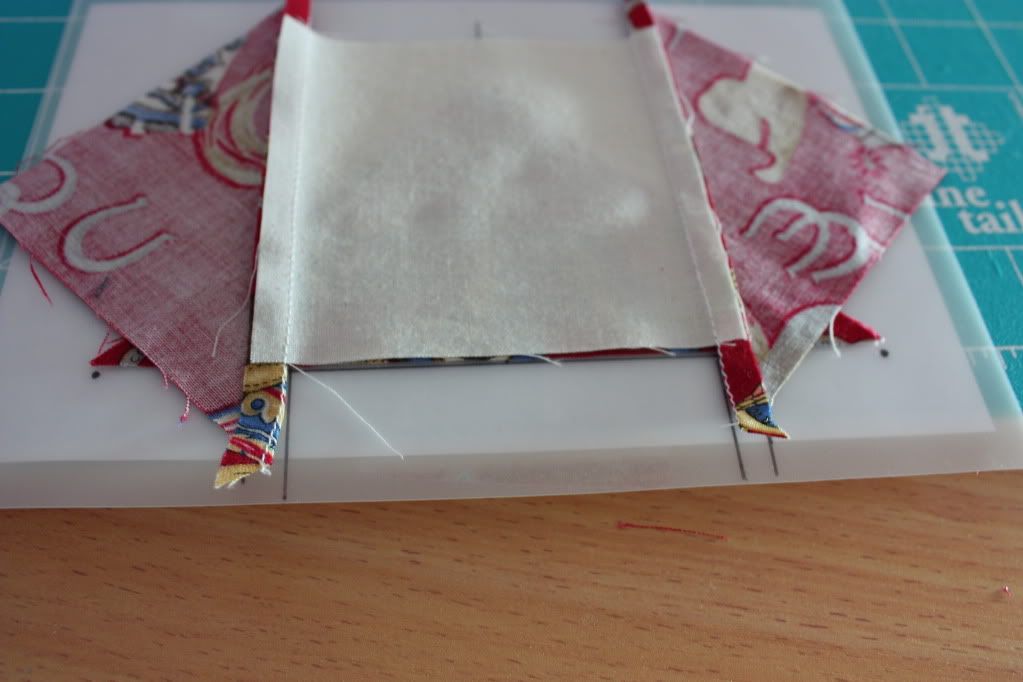 Here you can finally see the waste fabric I mentioned. Chain sew all the sections with the seams facing upwards so you can be sure they lay properly while being sewn.
 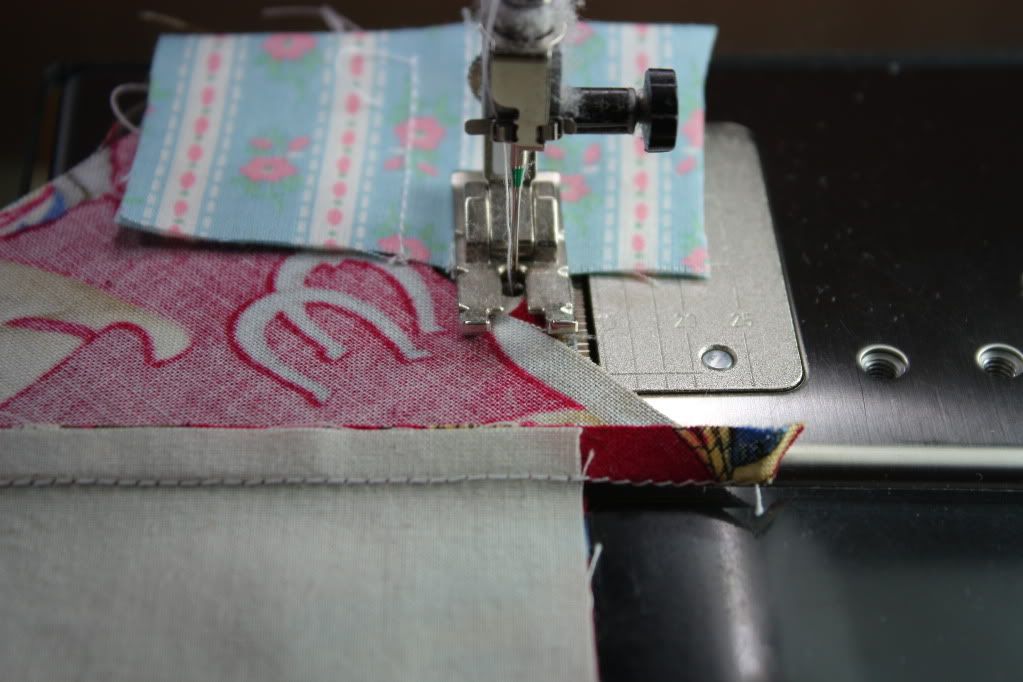 Snip the sections apart and line them up for ironing with the new corner face down and away from you. Meld the seams, then finger press and iron each seam. Here is a section with three corners sewn on. When properly positioned and sewn, the outer edges of the corners should be very smooth. This one is turning out pretty good.
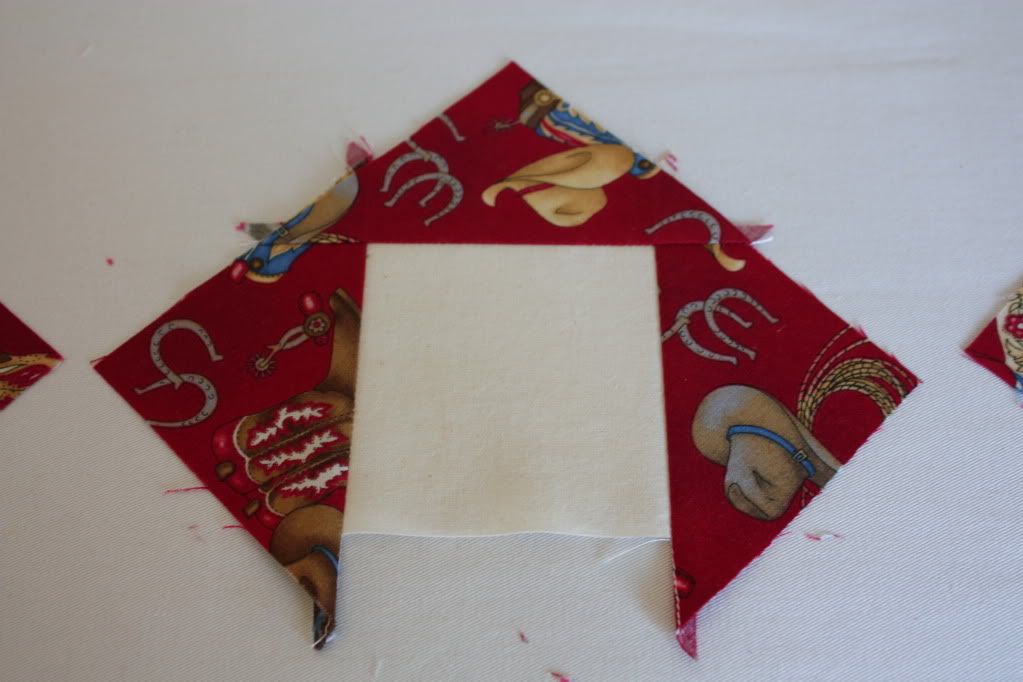 This one isn't quite so good. See how the right edge is a little bit off. It's not perfect, but it is plenty good enough since the edges will all be trimmed before they are made into a quilt.
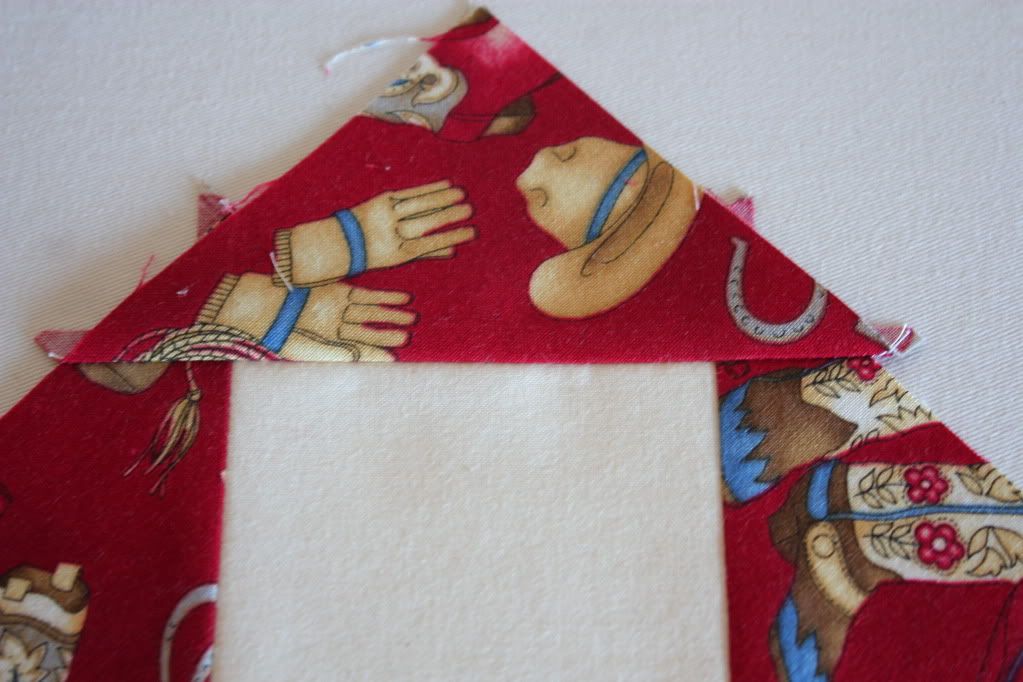 For the final corner, begin the exact same way, with the triangle positioned as shown. Lay the section on top of the triangle, using the inner vertical lines as a guide for the seams as before. Match the edges along the connecting line.
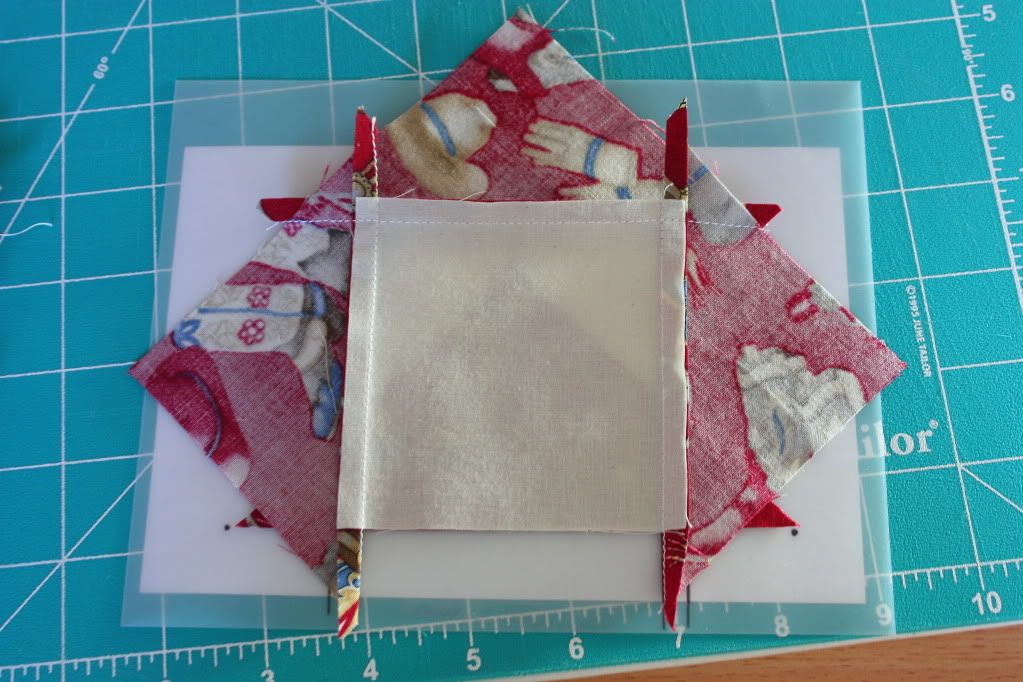 Chain sew all the sections with the seams facing upwards so you can be sure they lay properly while being sewn. Keep using that waste fabric and remember to raise your presser foot so you can slide the next section up close to the needle; taking these little pains really makes a difference in your final product.
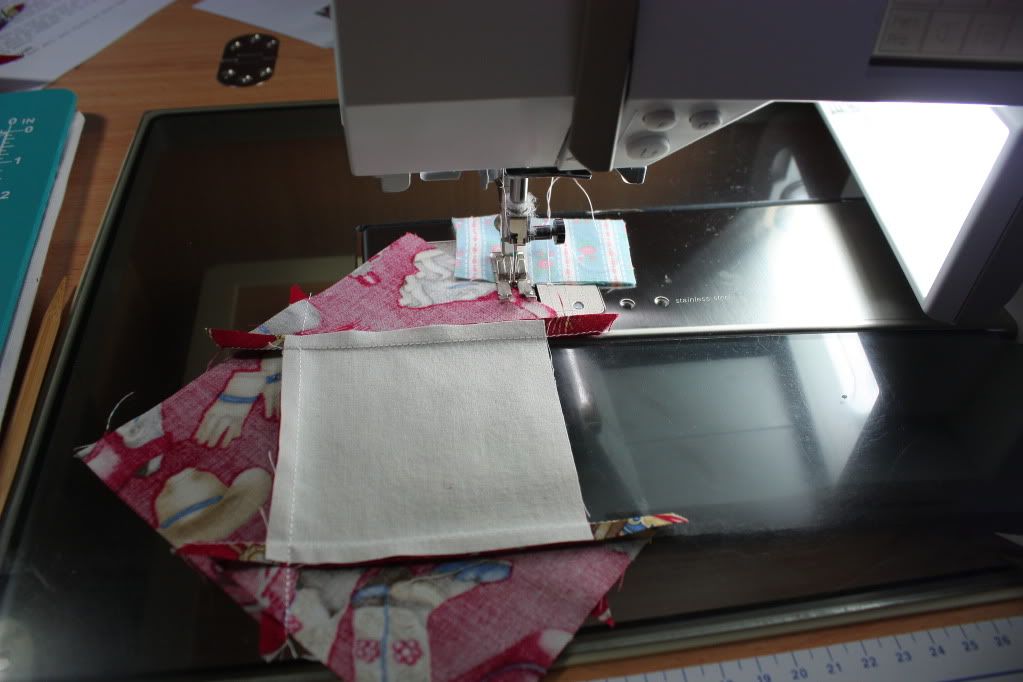 Snip the sections apart one last time, then line them up for ironing with the new corner face down and away from you. Meld the seams, then finger press and iron each seam.
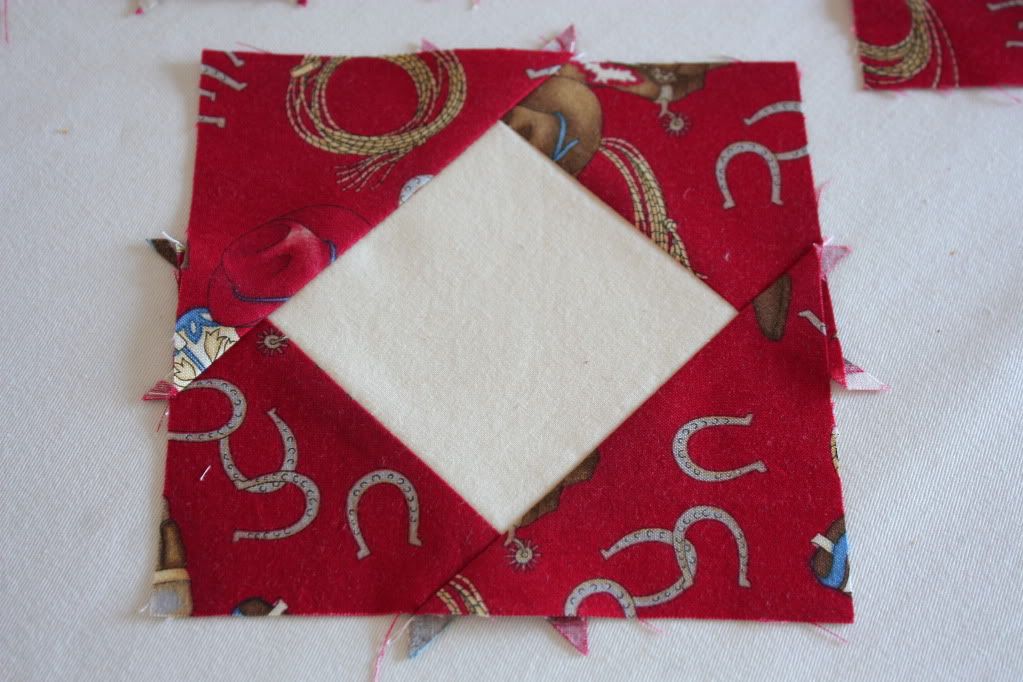
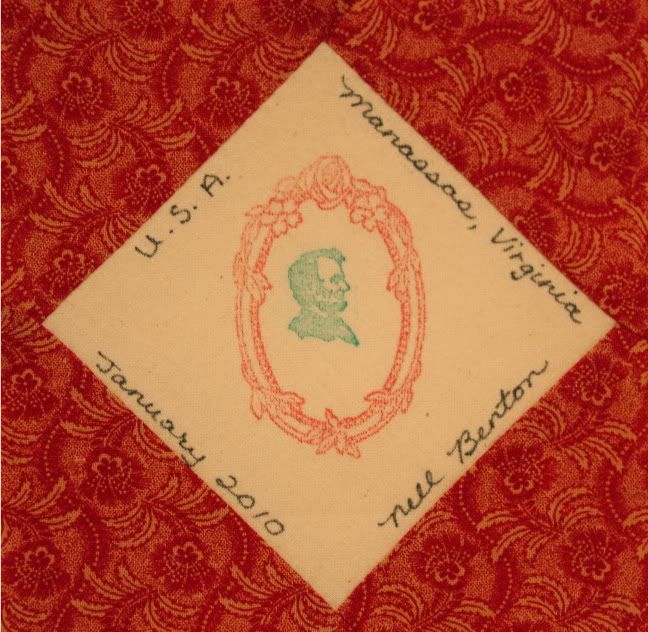
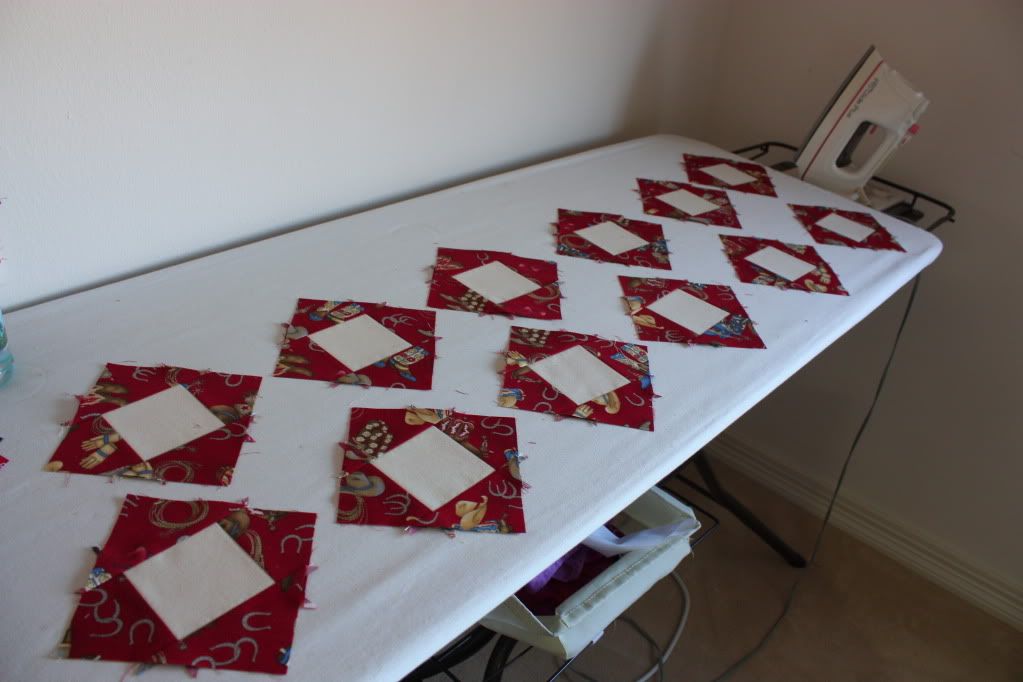 The final product, all ready to be stamped and signed.